
A prepper pantry is a supply of shelf-stable food, water, and essentials for emergencies and disruptions. Beginners should start with at least three days of non-perishable food and water per person, then build toward two weeks or more using long-lasting foods, organized storage, and regular rotation.
Key Takeaways
- Start with a 3-day food supply and 1 gallon of water per person per day.
- Expand your supply to 2 weeks, then target 1 month of shelf-stable food.
- Plan for 2,000 calories per adult daily; stock rice, beans, canned proteins, and pasta.
- Store water in food-grade BPA-free containers and rotate it regularly every few months.
- Label all items with purchase and best-by dates; rotate stock first-in, first-out monthly.
Prepper Pantry: How to Stock an Emergency Food Supply (Beginner’s Guide)
A prepper pantry stores food, water, and basic supplies so you can manage power outages, severe weather, or supply interruptions. Start with a 3-day kit and expand to 2 weeks or a month as space and budget allow. Focus on familiar, shelf-stable, nutrient-dense foods, safe water, simple cooking options, and a rotation system.
Quick overview
- A prepper pantry is an organized household reserve of shelf-stable food, water, and basic supplies for short- to long-term disruptions.
- Begin with FEMA’s baseline: 3 days of food and 1 gallon of water per person per day. Grow the supply to 2 weeks, 1 month, or more.
- Prioritize foods with long shelf life, clear nutrition per serving, items your household will actually eat, water storage and purification, and a first-in, first-out rotation.
What is a prepper pantry?
An intentionally assembled reserve of food, water, and supplies stored and rotated for emergencies. The goal is simple: reduce stress, avoid panic buying, and give you time and options when normal supplies fail.
Why a prepper pantry matters
- Keeps household members fed and hydrated when stores are closed or inaccessible.
- Reduces stress and helps you make better decisions during disruptions.
- Buys time to arrange help or alternate supplies during extended outages.
What to stock: essentials and practical rules
Choose foods that store for months, supply calories and protein, can be used in several recipes, and your family will eat.
Grains and starches
- White rice, pasta, rolled or instant oats
Legumes and protein
- Dried beans and lentils, canned tuna, chicken, or salmon, jerky, nut butters, protein bars
Baking and cooking basics
- Flour, sugar, salt, baking powder or baking soda, cooking oil
Canned and jarred goods
- Vegetables, tomatoes, soups, sauces
Long-term emergency options
- Freeze-dried meals, MREs, powdered milk
Comfort and morale items
- Coffee, tea, chocolate, crackers, favorite snacks
Shelf-life notes (approximate; verify labels)
| Item category | Typical shelf life |
|---|---|
| White rice (properly stored) | 2 or more years |
| Canned goods | 2 to 5 years |
| Freeze-dried meals | 10 to 25+ years |
| MREs | about 3 to 10 years |
| Dried beans and legumes | 2 to 5 years |
Storage tip: Use Mylar bags with oxygen absorbers or vacuum-sealed food-grade buckets for bulk grains and legumes. This lowers oxygen and pest risk.
Water: the top priority
FEMA recommends 1 gallon per person per day for drinking and basic sanitation. Start with a 3-day supply. Aim for 2 weeks if practical.
Store water in food-grade, BPA-free containers and rotate regularly. Purify with boiling, quality filters such as Sawyer or LifeStraw, or chemical treatments like unscented household bleach or tablets. Commercially sealed bottles and closed-system jugs work well for long-term stashes.
Adjust water needs for hot weather, illness, children, or breastfeeding.
Non-food essentials
- Manual can opener and basic cookware
- Portable camp stove and fuel. Store fuel safely.
- Flashlights, headlamps, extra batteries, matches or lighter
- Cleaning supplies, trash bags, disposable plates and utensils
- First-aid kit, essential medications, baby formula, pet food
- Electrolyte packets, water purification tablets, unscented household bleach
Start small. Build this list over time.
How much to store
Begin with FEMA’s minimum: 3 days of food plus 1 gallon per person per day.
Useful benchmarks:
- 2 weeks: good for common short disruptions
- 1 month: robust household readiness
- 3 months or more: deeper planning, needs dedicated storage
Calorie planning: use about 2,000 calories per adult per day as a starting point. Adjust up or down for children, seniors, pregnancy, and activity level.
Example 2-week starter for 2 adults
- Rice: 10 to 20 lb
- Beans: 10 to 14 cans or equivalent dried
- Canned vegetables: 10 to 14 cans
- Canned proteins: 10 to 14 cans
- Pasta and sauce: 4 to 6 boxes and jars
- Oats, peanut butter, snacks, basic spices
- Water: 28 or more gallons total (14 gallons per person)
Plan meals, not just items. Map breakfasts, lunches, dinners, and snacks you can prepare with limited fuel and water.
Organize your prepper pantry
Practical steps:
- Create zones: grains, proteins, canned produce, baking supplies, snacks, water, tools
- Label items with purchase and best-by dates
- Use first-in, first-out: place new items behind older stock
- Store food in cool, dry, dark, pest-free locations
- Keep an inventory on paper, in a spreadsheet, or with an app
Quick checklist:
- Zone pantry
- Label items with dates
- Implement FIFO
- Create or update an inventory list
- Rotate stock monthly or quarterly
Equipment and storage upgrades
- Mylar bags and oxygen absorbers; vacuum sealers
- Food-grade buckets with gamma lids
- Freeze-dried meals and MREs for long-term options
- Water filters: Sawyer, LifeStraw, Berkey. Know which are for everyday use and which are for emergencies.
- Purification tablets and unscented household bleach
Common mistakes to avoid
- Buying foods your family will not eat
- Ignoring allergies, special diets, baby or pet needs
- Overbuying perishables that require refrigeration
- Forgetting water and a way to heat or cook food
- Failing to rotate stock
- Trying to do everything at once; build steadily within your budget
Comfort and morale
Bring items that lift spirits. Small treats make a big difference.
- Favorite coffee or tea
- Candy, chocolate, or cookie mix
- Spices to change flavors
- Kid-friendly treats
Frequently asked questions
Q: What is a prepper pantry?
A: A household reserve of shelf-stable food, water, and supplies to handle emergencies.
Q: How much should I store?
A: Start with 3 days of food and 1 gallon of water per person per day. Expand to 2 weeks or a month.
Q: What foods work best?
A: Shelf-stable, nutrient-dense, versatile items your household will eat: rice, pasta, oats, beans, canned proteins, nut butters, and freeze-dried meals.
Q: How long will food last?
A: Shelf life depends on product, packaging, and storage temperature. Check manufacturer guidance and package dates.
Simple build plan
- Put together a 3-day kit for each household member with food, water, and basic supplies.
- Add water storage and a reliable purification method.
- Expand to 2 weeks or 1 month with versatile staples and comfort items. Rotate as you use.
- Organize, label, and maintain a simple inventory.
Preparedness is practical. A well-maintained prepper pantry gives you time, options, and peace of mind.
[Becoming a Prepper: The Beginner’s Guide to Survival Readiness] [Water, Water Everywhere: How to Store H2O Without Losing Your Sanity] [Canned Goods and Other Edibles: Your First Steps to Stockpiling Food] [How to Build a Bug Out Bag: Essentials for a Quick Getaway] [Batten Down the Hatches: Home Fortification Tips for Beginners]
The Complete
Prepper's Reference.
149 articles synthesized into one comprehensive PDF — twelve chapters covering water, food, shelter, first aid, comms, and scenario-specific preparedness. Free with your email.
Unsubscribe anytime · We never share your email
You're in. Check your inbox.
Keep Reading
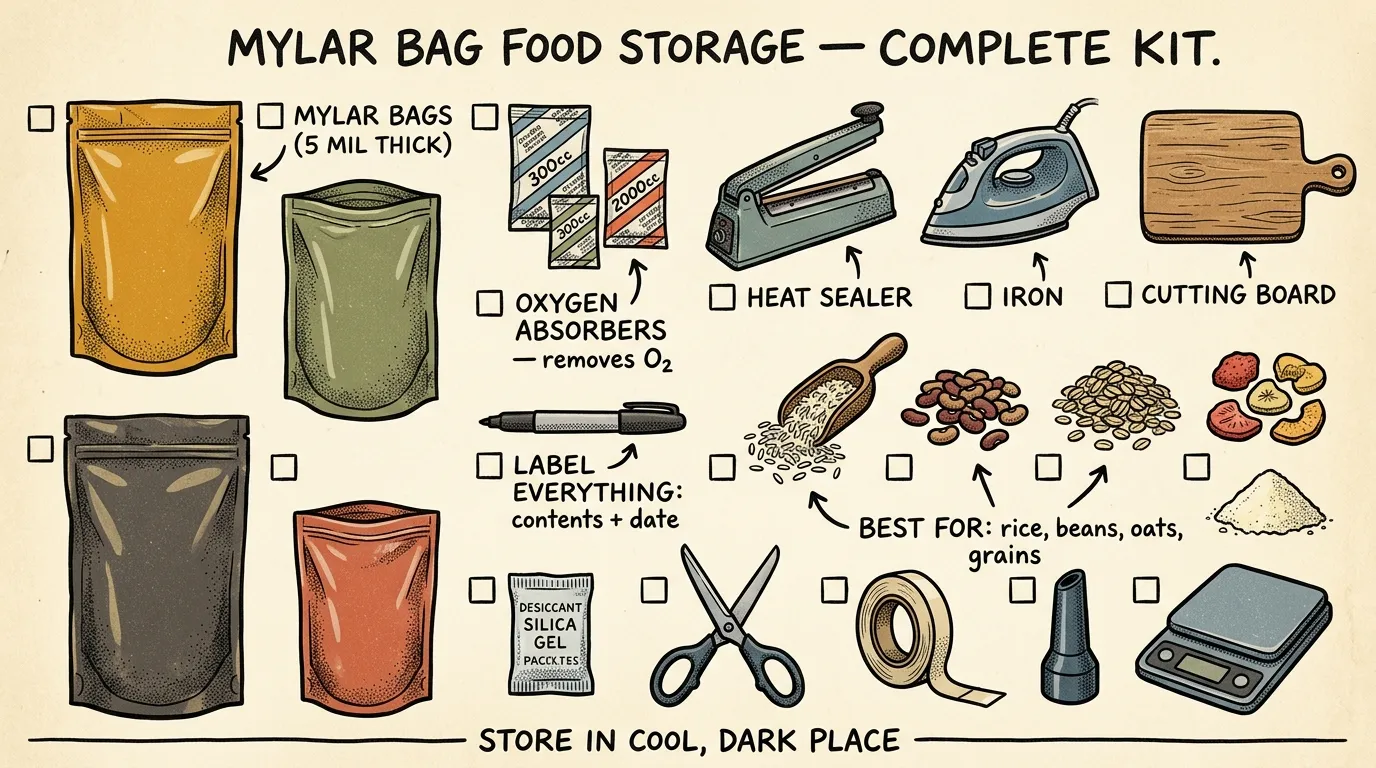
Mylar Bags for Food Storage: Complete Guide (2026)
Learn how to use mylar bags for food storage to preserve dry goods 25+ years. Expert guide covers thickness, sealing, oxygen absorbers & mistakes to avoid.
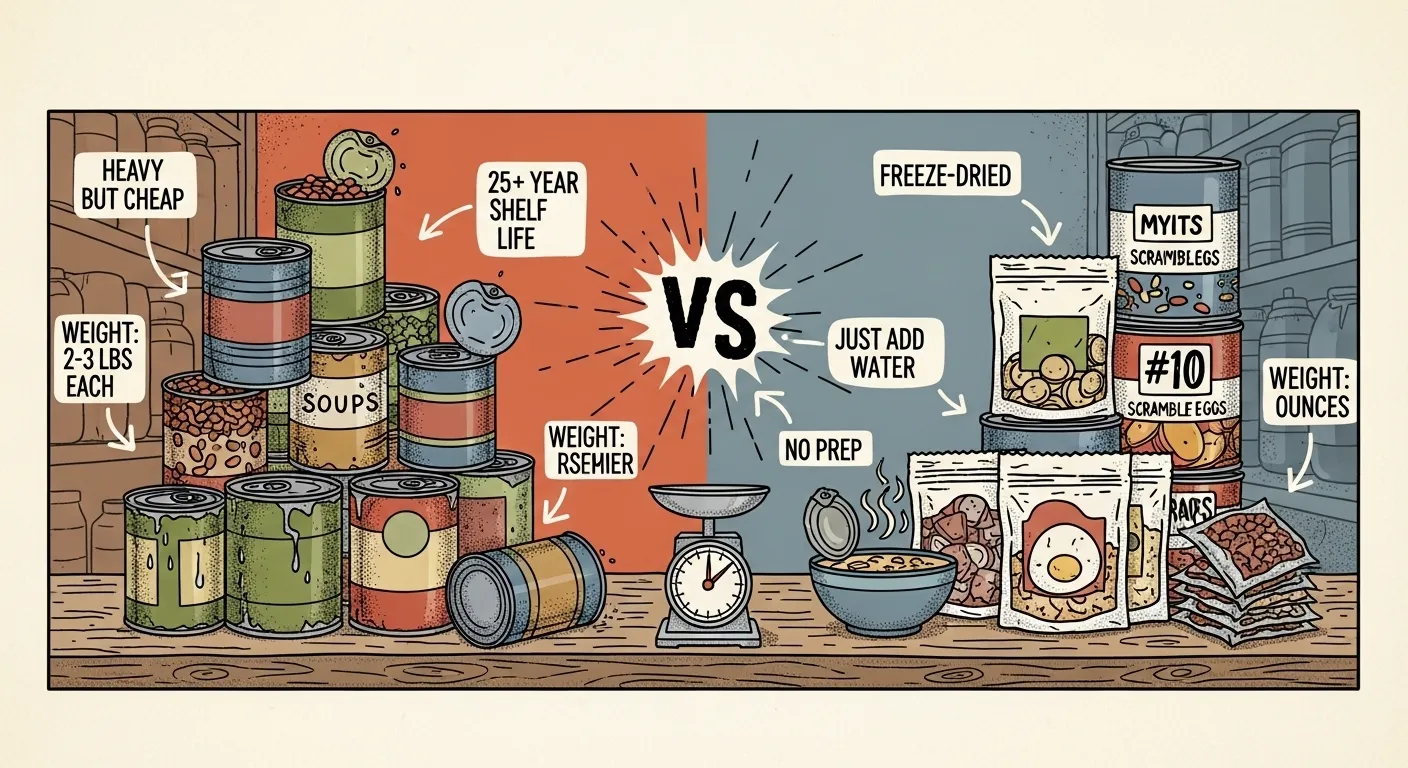
Canned vs. Freeze-Dried: The Ultimate Prepper Showdown
Canned vs. freeze-dried food: compare shelf life, cost, nutrition, storage, and convenience so beginner preppers can build smarter emergency supplies.
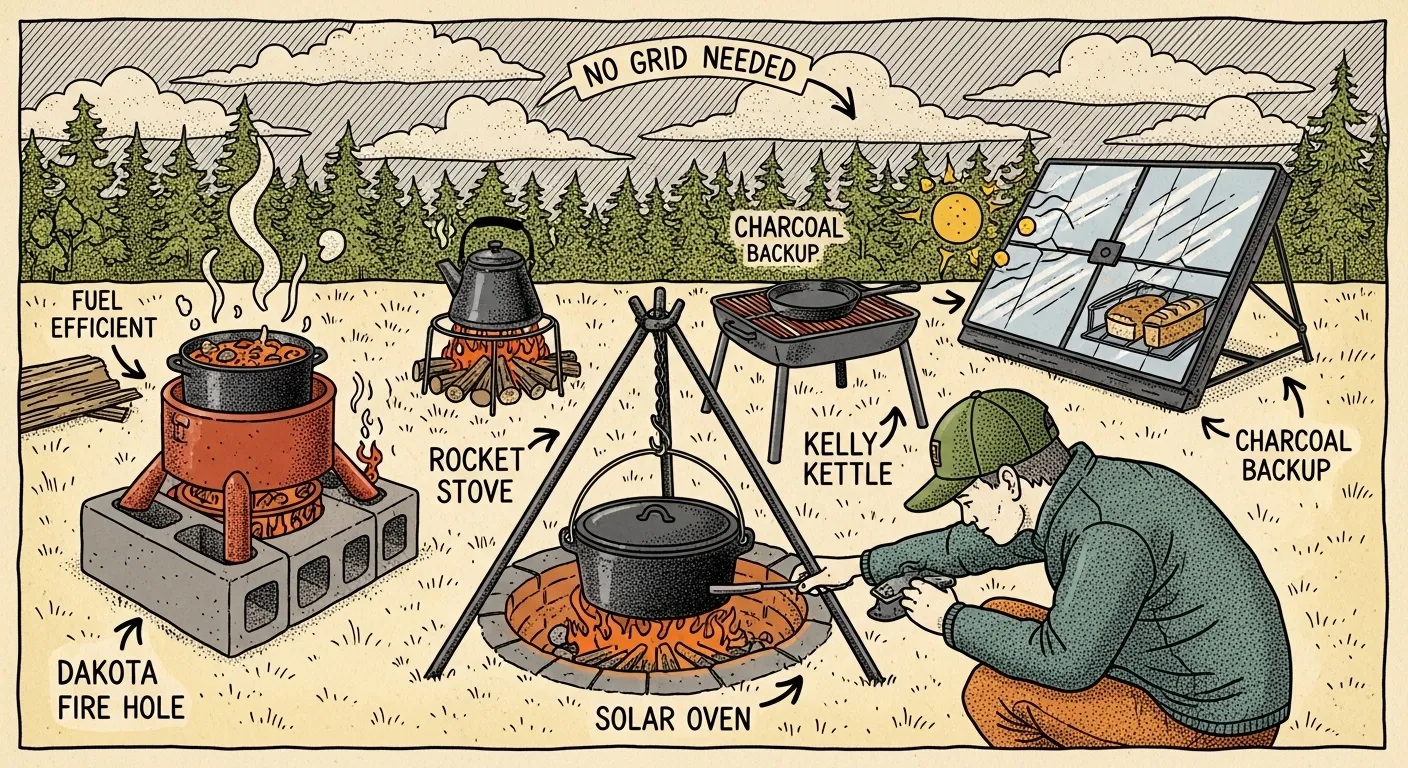
Alternative Cooking Methods for Preppers
Learn practical off-grid cooking methods for beginners, including solar ovens, rocket stoves, Dutch ovens, campfires, and alcohol stoves.