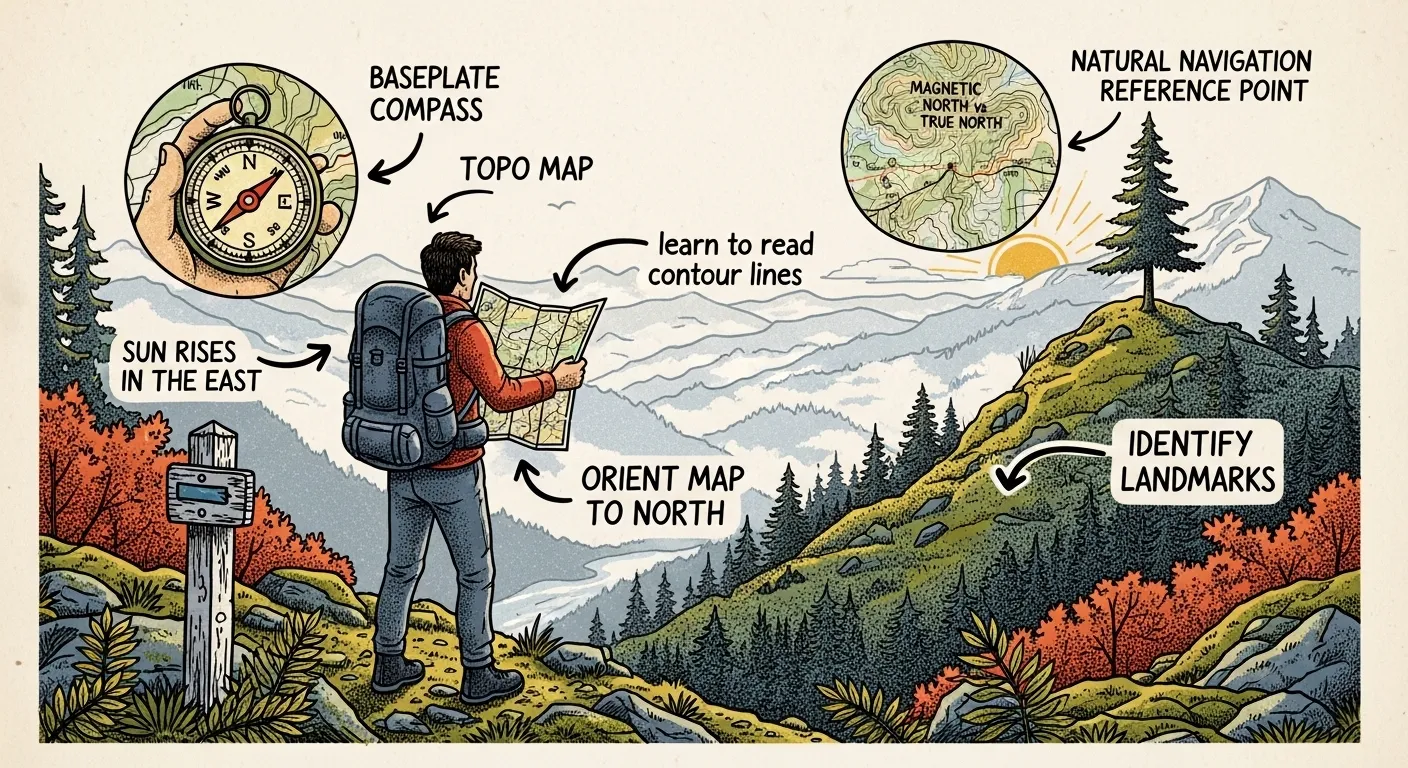
Basic orienteering for new preppers means learning to navigate with a topographic map, compass, terrain features, and natural cues instead of relying only on GPS. Start by reading contour lines and map symbols, practice taking and following compass bearings, and use landmarks, the sun, and stars as backup navigation methods.
Basic Orienteering for Beginners: A Prepper’s Guide to Map and Compass Navigation
Your phone dies. The trail forks. The GPS app you downloaded last summer wants a signal it’s never going to get out here. Now what?
Basic orienteering for beginners comes down to four skills: reading a topographic map, using a baseplate compass, taking and following bearings, and confirming your position against the terrain around you. None of it requires batteries. All of it requires practice before you need it. I’ve spent 12 years doing wilderness response work in the Pacific Northwest, and I can tell you the people who panic when technology fails are almost always the same people who never once practiced with a paper map in calm conditions.
This isn’t a survivalist fantasy skill. It’s the same navigation method search-and-rescue teams, backcountry rangers, and military land nav courses have relied on for a century, because it works when nothing else does.
Quick Summary
- Orienteering means navigating with a map, compass, and terrain awareness — no GPS, no signal, no batteries required.
- Start with the basics: contour lines, map scale, the legend, and finding true north versus magnetic north.
- Magnetic declination matters more than most beginners realize — look up your local value and apply it every time.
- Practice short bearings (50–100 meters) in familiar terrain before you ever try this somewhere unfamiliar or under stress.
- Carry a paper topo map, baseplate compass, pencil, waterproof map case, backup light, and whistle as your minimum kit.
- Stop every 10–15 minutes on any hike and confirm your position on the map — this single habit prevents most navigation errors.
Why Map-and-Compass Skills Still Matter
Here’s the question I get most from new preppers: “Can’t I just download an offline map app?” Sure, you can. I use one myself. But offline apps still depend on a charged phone, and a phone with a cracked screen, a dead battery, or a corrupted app after it takes a dunk in a creek is just a heavy paperweight. A paper map and a compass don’t care about any of that.
Map-and-compass skills give you options when the easy tools fail. You can choose safer routes around hazards you can see coming, locate water sources marked on the map, find shelter terrain, and reach evacuation points without needing a single bar of signal. Practiced navigation also cuts down on the panic-driven mistakes people make when they’re lost — and I’ve responded to enough search calls to tell you that panic, not terrain, is usually what turns a minor wrong turn into an overnight ordeal.
Every navigation problem boils down to three questions: Where am I? Where do I need to go? What’s the safest way to get there? Everything in this guide exists to help you answer those three things without a screen.
Key Terms You Need to Know
Before you touch a compass, get comfortable with this vocabulary. It shows up constantly, and half the confusion beginners feel comes from not knowing what these words actually mean.
- Orienteering — navigating with a map, compass, visible terrain, and natural cues instead of electronics.
- Topographic (topo) map — a map that shows elevation through contour lines, plus water, vegetation, trails, roads, and structures.
- Bearing — a direction measured in degrees clockwise from north, where 0 or 360 is north and 90 is due east.
- Magnetic declination — the angle between true north and magnetic north, which changes depending on your location and shifts slowly over time.
Reading a Topographic Map
 Interpreting contour lines and terrain features in the field
A topo map tells you the shape of the land before you ever walk it. Learn these five elements, and use them on every single trip, not just the complicated ones.
- Contour lines show elevation and the shape of the terrain.
- Scale — a common hiking-detail scale is 1:24,000, meaning one inch on the map equals 24,000 inches on the ground.
- The legend decodes symbols for trails, water, structures, and vegetation.
- The north arrow and declination note, usually printed in the map margin.
- Grid systems like UTM or latitude/longitude for pinpointing exact coordinates.
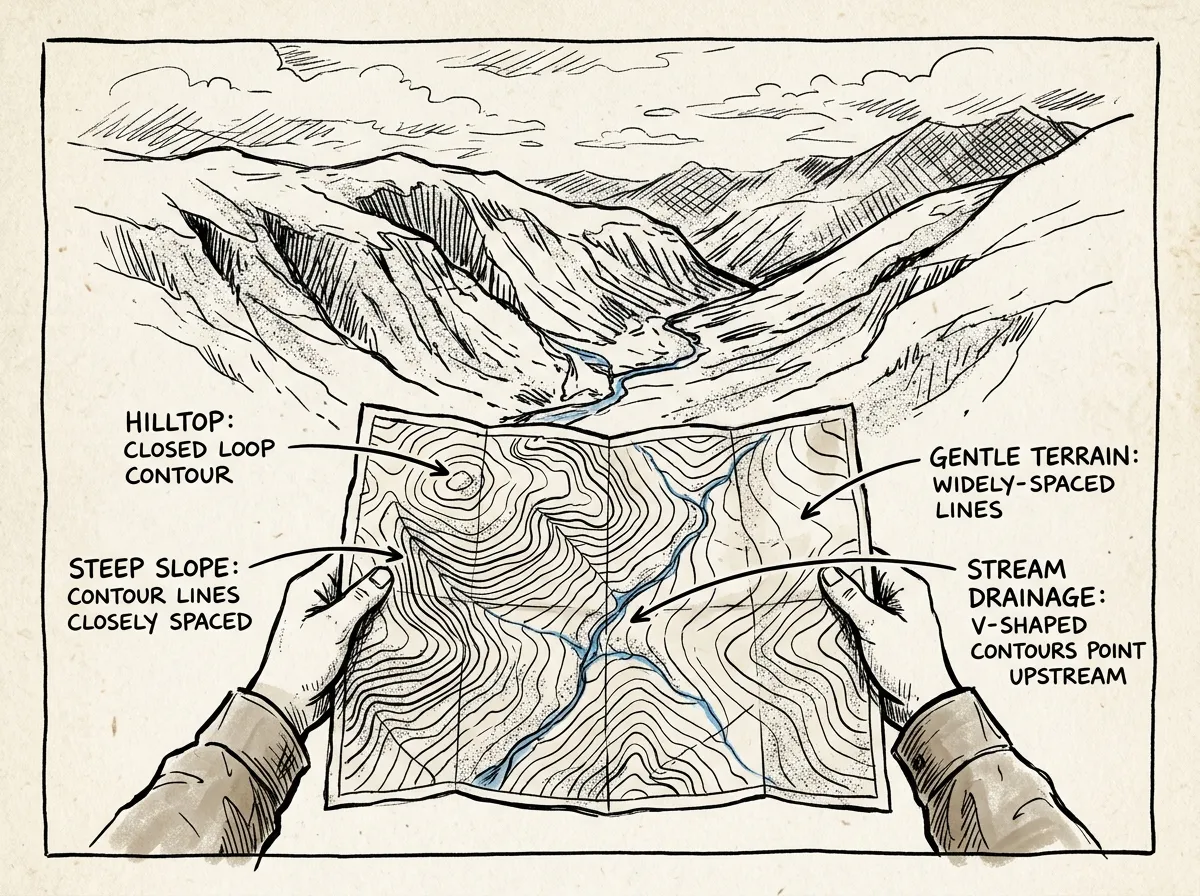
Contour Lines Cheat Sheet
This is the part that trips up almost every beginner, so slow down here.
- Lines packed tight together mean a steep slope — short distance, big elevation change.
- Lines spread far apart mean gentle, easy terrain.
- A closed loop of contour lines forms a hill or peak.
- V-shaped contours pointing uphill mark a stream, drainage, or valley.
Trace one finger along a contour line before you hike a new route. If the lines bunch up right where your planned trail crosses a slope, that’s your cue to look for an alternate path — don’t find out about the cliff band the hard way.
Orienting Your Map in the Field
An unoriented map is just a piece of paper with lines on it. Orienting it — lining it up with the actual terrain — is what makes it useful.
- Lay the map flat and locate the north arrow or a northing line
- Place your compass edge along that northing line, or between your known location and your destination
- Rotate the map (or your body) until the compass needle aligns with map north, adjusting for local declination
- Match visible terrain features — roads, ridges, streams — against what’s printed on the map
- Re-orient every time you stop, change direction, or feel uncertain about your position
That last step matters more than people think. I’ve watched hikers orient their map once at the trailhead and never touch it again for six miles — by the time they realize something’s wrong, they’ve got no idea where they went sideways. Stop every 10 to 15 minutes, glance at the terrain, and confirm you match the map. It takes fifteen seconds and it’s the single habit that prevents most of the “how did we end up here” moments I’ve responded to.
Mastering the Compass
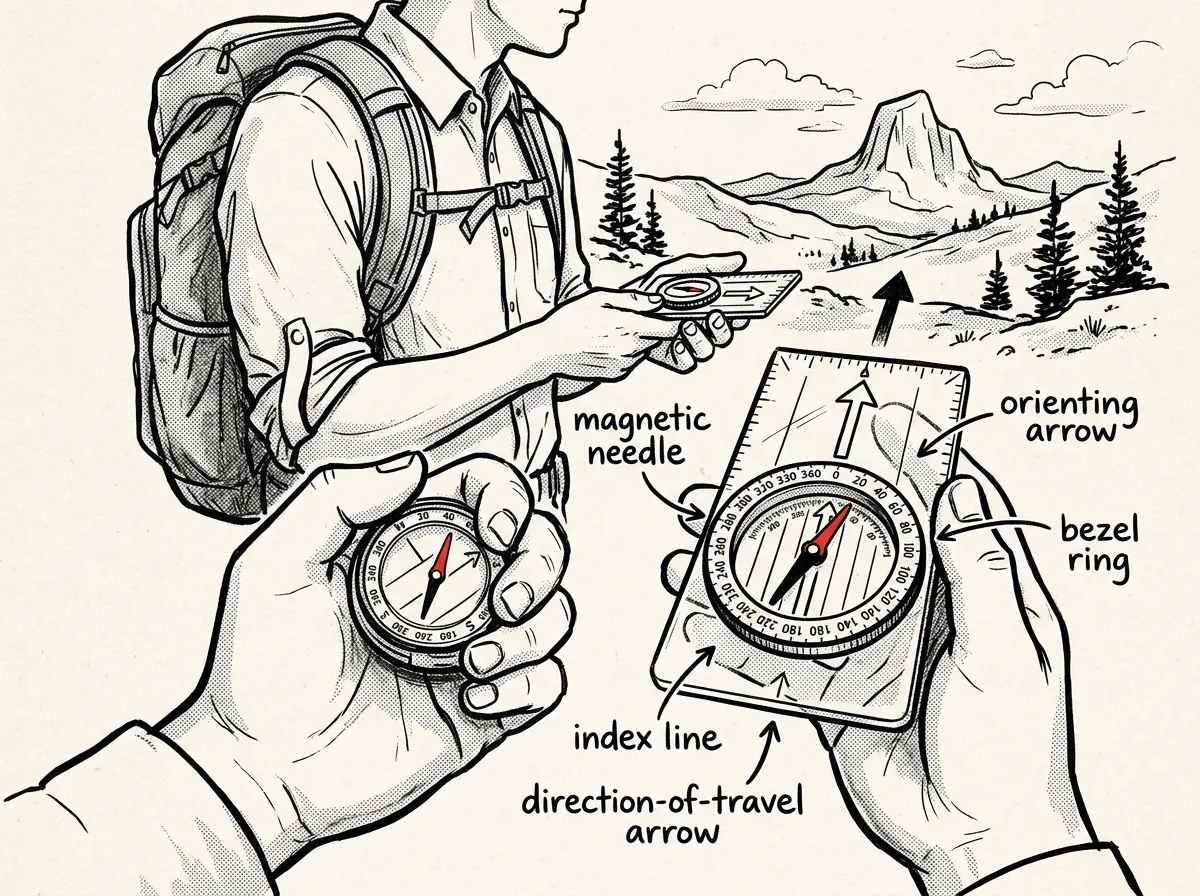 Proper compass grip and orientation technique
You want a transparent baseplate compass with a rotating bezel and declination markings — not the cheap button compass from a keychain. Learn these parts cold: the magnetic needle, the baseplate, the direction-of-travel arrow, the rotating bezel, the orienting lines inside the bezel, and the index line where you read your bearing.
Taking a Bearing From the Map
- Lay the compass edge between your known location and your destination.
- Rotate the bezel so the orienting lines point to the top of the map — true north.
- Read the bearing at the index line.
- Add or subtract your local magnetic declination to convert it to a compass bearing.
Following a Bearing in the Field
- Hold the compass level at chest height with the direction-of-travel arrow pointing away from you.
- Rotate your entire body — not just the compass — until the needle lines up inside the orienting arrow.
- Pick a visible landmark on that exact line and walk to it. Don’t walk while staring at the compass.
- Repeat the process from your new spot until you reach the target.
NOAA publishes free local magnetic declination values and an online calculator — bookmark it before you head out, not while you’re already lost.
I get asked constantly which compass to buy, and I’ll give you a real answer: the Suunto MC-2 — around $70 — is what’s clipped to my pack strap on every technical route I run. The mirror sighting feature genuinely improves bearing accuracy over a basic baseplate model, and the global needle handles travel between hemispheres without sticking. If you’re just starting out and don’t want to spend that much, a $15–20 basic baseplate compass with a rotating bezel will teach you everything in this guide just fine — you just won’t get the sighting precision when it matters most.
Beginner Compass Drills
- Cardinal practice — find north, east, south, and west until it’s automatic, no hesitation.
- Walk-a-bearing — hold a fixed bearing for 50 to 100 meters, then check your accuracy against a known landmark.
- Map-to-ground match — pick a feature on the map, take a bearing to it, then find it in the field.
- Box navigation — use four 90-degree bearings and pace counts to walk a square and return to your starting point.
Navigating Without Technology
Map and compass work best combined with natural cues, not instead of them. High desert is a different problem than dense Pacific Northwest timber — in open terrain you’ll rely more on distant landmarks, while in thick forest you’re leaning harder on pace counts and compass bearings because you often can’t see more than fifty feet ahead.
- Sun — rises roughly east, sets roughly west. Around midday in the Northern Hemisphere, it sits roughly south.
- Stars — Polaris marks north in the Northern Hemisphere and holds steady while everything else rotates around it.
- Terrain association — confirm ridges, valleys, streams, and lakes against your map constantly, not just at the start.
- Handrails, backstops, and attack points — a trail or river you can follow (handrail), a ridge or lake that stops your forward movement if you overshoot (backstop), and a distinct nearby landmark you navigate to before finding your final target (attack point).
Ask yourself these three questions on repeat while you move: What did I just pass? What should I see next? Does my current direction still match the map? If the answer to that last one is “I’m not sure,” stop and figure it out before you take another step.
Common Mistakes I See Constantly
The first time I taught a land nav course to a group of new preppers, half of them walked confidently in the wrong direction for twenty minutes because they never checked their bearing against a landmark — they just stared at the compass needle and walked. That’s the single most common mistake I see, and it’s an easy one to fix.
- Not re-orienting the map. Do it every time you stop, not just once at the trailhead.
- Ignoring declination. Learn your local value and apply it every single time.
- Checking position too rarely. Confirm at regular intervals and at every major terrain feature.
- Walking while staring at the compass. Take the bearing, pick a landmark, then look up and walk.
- Relying on one method only. Combine map, compass, terrain, and natural cues together.
- Skipping practice entirely. Start local, build the skill slowly, before you’re depending on it.
- Failing to plan ahead. Pre-identify checkpoints, hazards, and water sources before you move.
One thing I see constantly with new preppers: they buy a good compass, read the instructions once, and toss it in a bug-out bag thinking that counts as being prepared. It doesn’t. Muscle memory for compass work only comes from repetition, and the first time most people try to take a real bearing under stress — bad weather, low light, someone injured — is not the time to be figuring out which end of the needle is red. Practice this stuff in your backyard or a local park until it’s boring.
Minimum Gear Checklist
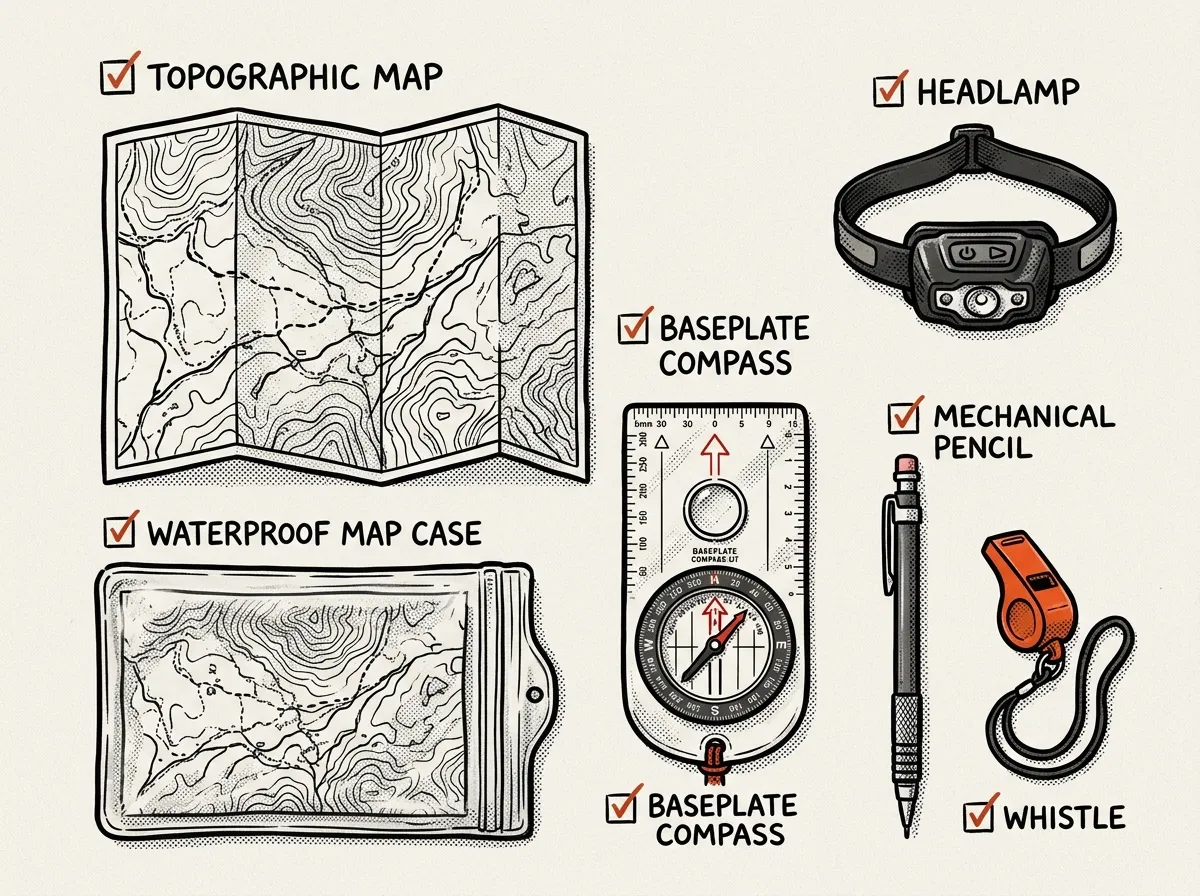 Essential orienteering kit for wilderness navigation
- Paper local topographic map
- Reliable baseplate compass with declination adjustment
- Pencil and small waterproof notebook
- Waterproof or protective map case
- Backup light and whistle
- Basic first-aid items and weather-appropriate layers
A waterproof map case is a cheap insurance policy — a soaked, disintegrating map in a downpour is genuinely useless, and I’ve seen it happen. Grab a paper local topo map from your national mapping agency or a local outdoor shop, not just a printout from a phone app, since printed USGS-style maps typically include better contour detail and a proper declination diagram in the margin.
One-Week Practice Plan for Beginners
You don’t need a wilderness expedition to build this skill. A week of short, focused sessions will get you further than one long, overwhelming trip.
- Day 1 — Study a local topo map for 30 minutes. Pick out a 1 to 2 mile practice route.
- Day 2 — Learn the compass parts and practice cardinal directions at home.
- Day 3 — Walk the route with map in hand. Stop every 10 minutes and confirm your location.
- Day 4 — Take and follow two or three bearings over 100 to 200 meters.
- Day 5 — Try night or sky navigation. Locate Polaris if you’re in the Northern Hemisphere.
- Day 6 — Practice box navigation and pace counting.
- Day 7 — Review your mistakes, repeat whatever felt weak, and pack your minimum gear for a longer outing.
FAQ: Basic Orienteering for Beginners
What is orienteering in simple terms? Finding your way using a map, compass, terrain, and natural signs instead of depending on a phone or GPS unit.
Why bother learning these skills? Because they let you move safely and with confidence the moment your electronics fail — and in an actual emergency, that’s exactly when they will.
How do I read a topographic map? Learn the legend, the scale, which way is north, and how contour lines describe elevation and slope steepness.
What’s the easiest way to start with a compass? Master cardinal directions first. Then practice simple short bearings. Keep the compass level, align the needle inside the orienting arrow, and walk to a landmark you can see.
Can I really navigate without GPS? Yes. Paper maps, a compass, landmarks, and natural cues have worked reliably for navigators long before satellites existed, and they still work in remote areas with zero signal.
What should a beginner carry for orienteering? A topo map, baseplate compass, pencil, waterproof map case, backup light, whistle, and basic first-aid supplies — nothing exotic, just the fundamentals covered above.
Build the Skill Before You Need It
Short, repeated practice sessions in terrain you already know beat one long, stressful attempt in unfamiliar territory every time. Get comfortable orienting a map and taking a basic bearing first, then layer in one natural navigation method at a time — sun position one week, Polaris the next. When you’re ready to push further, look into a field navigation course through a local outdoor organization, and check with regional search-and-rescue groups for area-specific training that accounts for your particular terrain, whether that’s coastal fog, high desert exposure, or dense mountain timber.
The gear in your pack matters. The skill in your head matters more. One works without batteries — make sure it’s the one you actually trust.
The Complete
Prepper's Reference.
149 articles synthesized into one comprehensive PDF — twelve chapters covering water, food, shelter, first aid, comms, and scenario-specific preparedness. Free with your email.
Unsubscribe anytime · We never share your email
You're in. Check your inbox.
Keep Reading
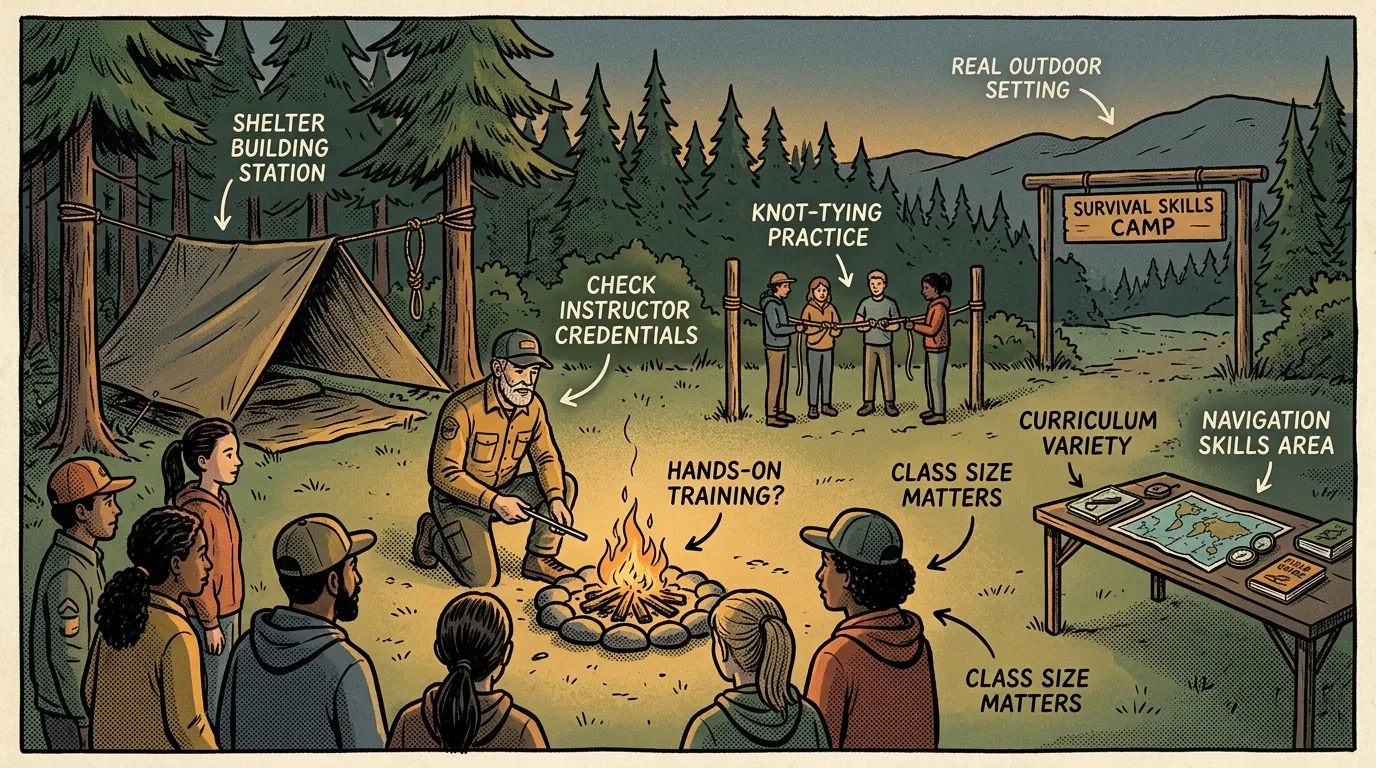
Survival Skills Camp: How to Choose the Right One
Choosing a survival skills camp? A Wilderness First Responder breaks down what to look for, red flags to avoid, and what real training teaches you.
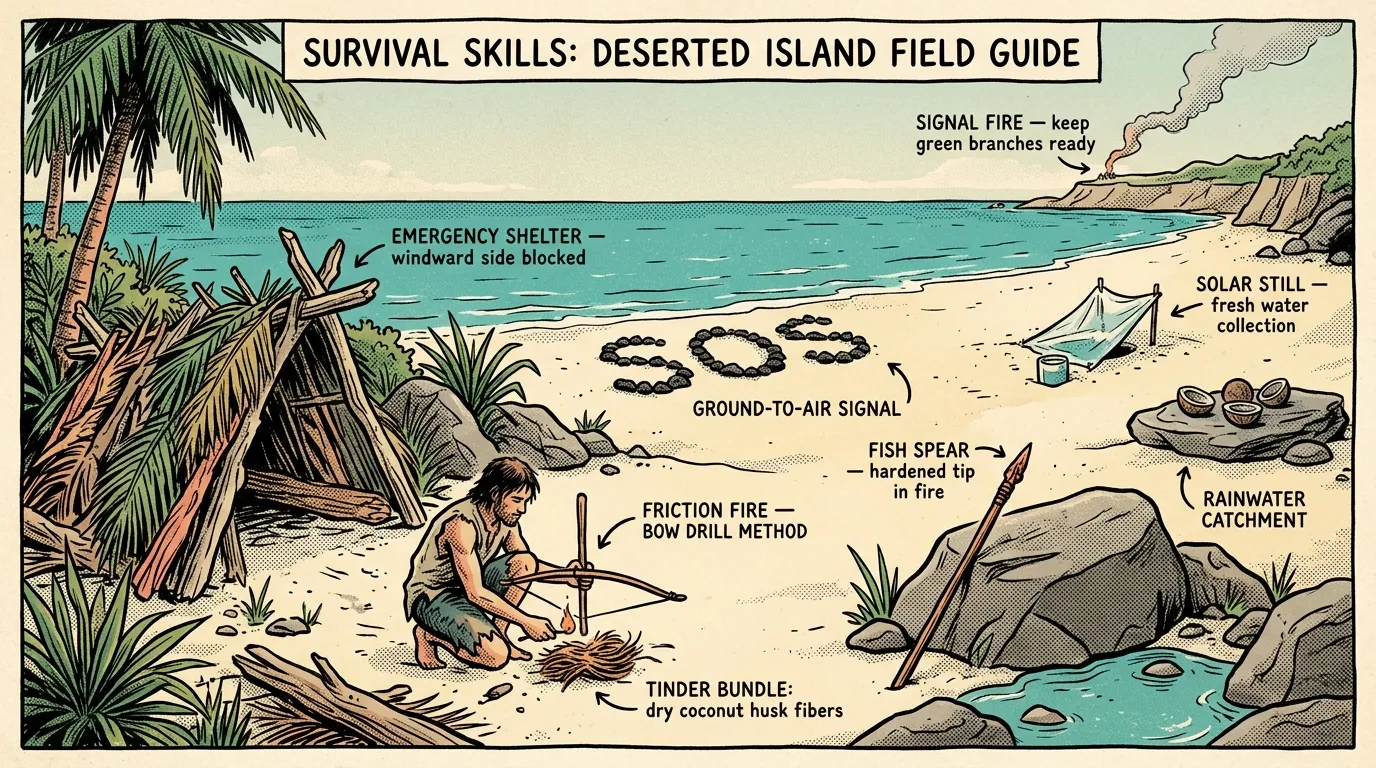
Survival Skills on a Deserted Island: Field Guide
Master survival skills on a deserted island — water, shelter, fire, food, and rescue signaling from a WFR with 12+ years of field experience. Start learning now.
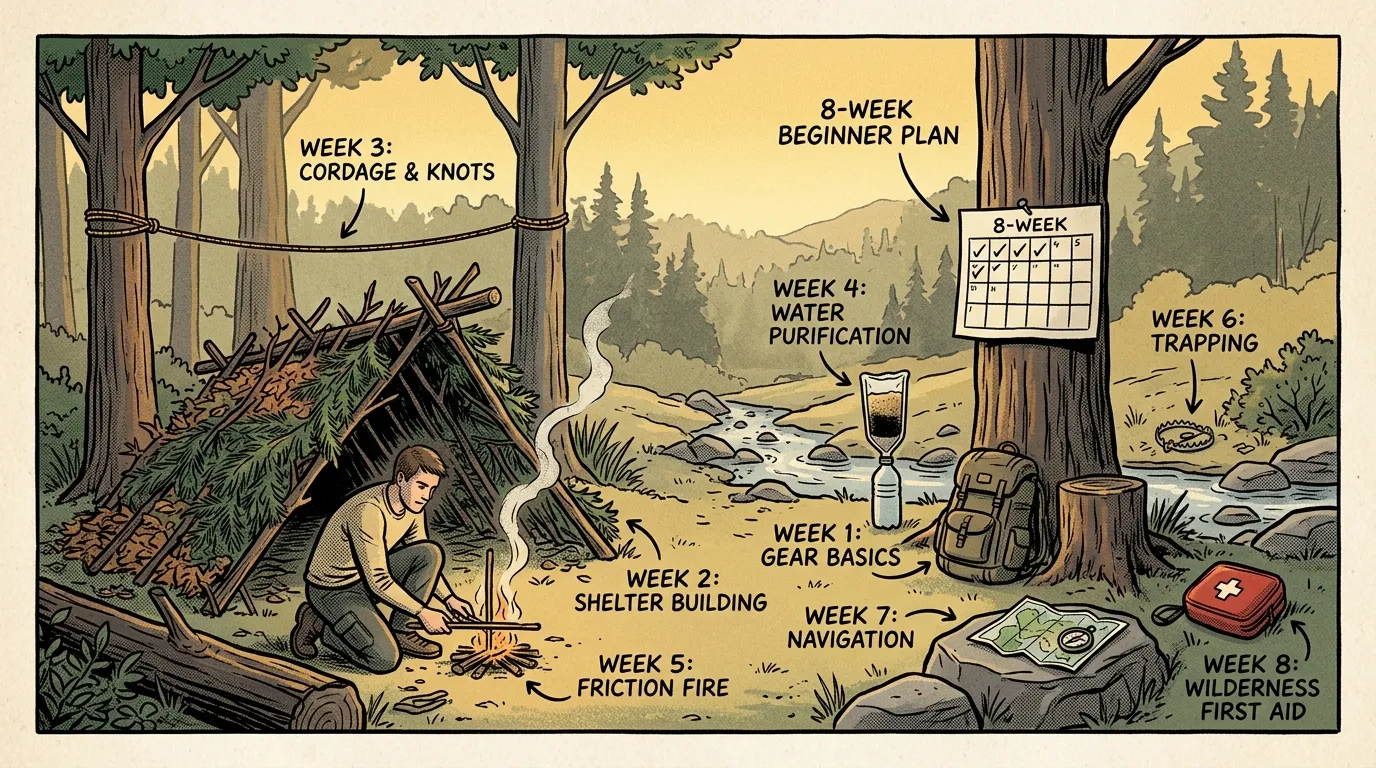
Survival Skills Training: 8-Week Plan for Beginners
Follow this 8-week survival skills training plan to master shelter, fire, water, navigation & first aid. Built by a FEMA-trained WFR. Start this weekend.