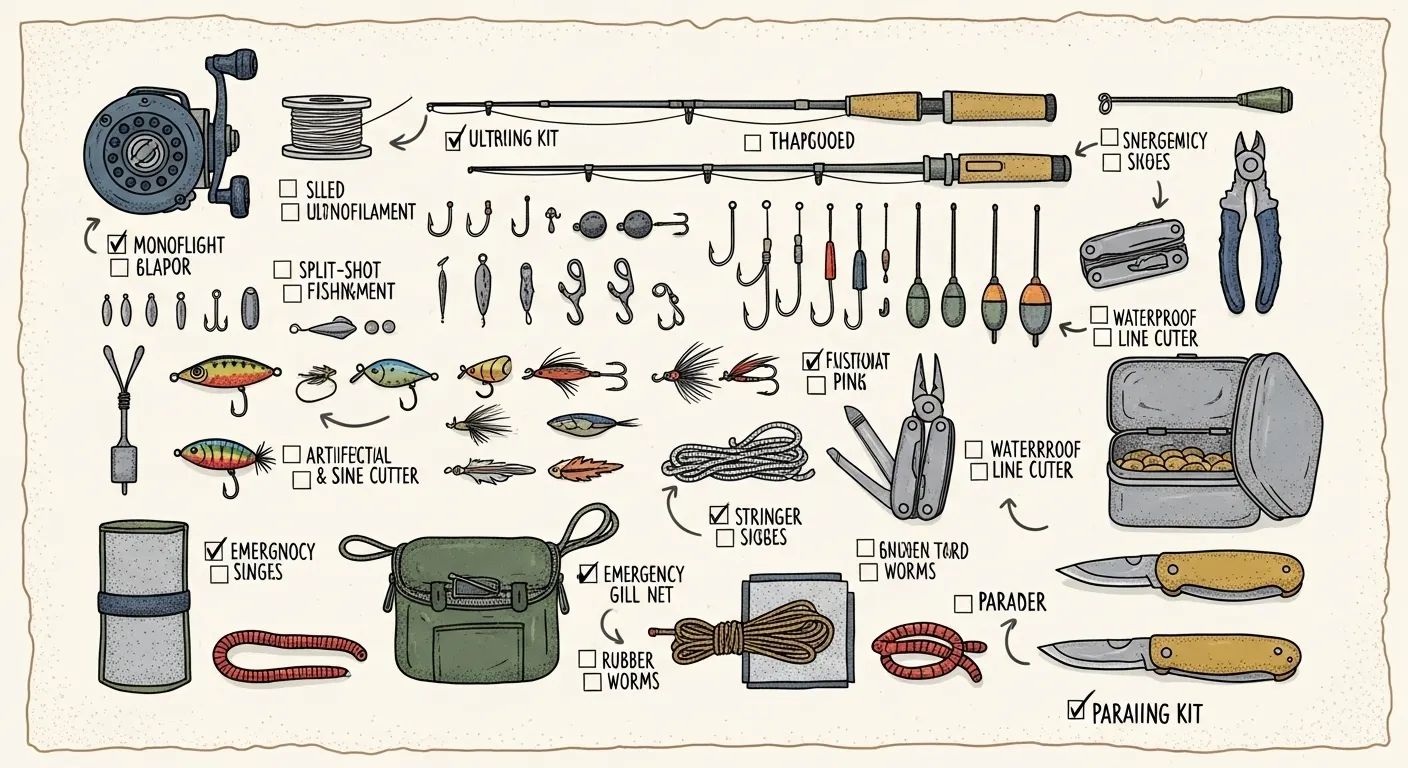
The best survival fishing kits include hooks, strong line, sinkers, swivels, bait or lures, and a compact waterproof case. For beginners, hand reel kits, all-in-one tackle kits, and telescopic rod-and-reel combos offer the best balance of portability, ease of use, and emergency food procurement value.
Best Survival Fishing Kits: Compact Tackle for New Preppers
Fish are one of the most underrated calorie sources in a long-term emergency, and most people carry the wrong gear to catch them. Food procurement training resources consistently note that a bloated tackle box does you no favors when you’re trying to move fast and light. What actually works is small, corrosion-resistant, and boring — the kind of gear you can rig blind, in the dark, with cold hands.
This piece walks through what belongs in a real survival fishing kit, which style fits your situation, and how to actually use one so it isn’t just dead weight in your bag.
Quick Summary
- Build or buy a kit with hooks sized #8 through 1/0, 50 to 200 ft of line, assorted sinkers, swivels, and a couple of small floats.
- Budget $20 to $80 for a practical starter kit; premium bushcraft-grade kits run $100 to $200.
- A hand-reel spool kit is your best bet for a bug-out bag; a compact telescopic rod and reel gets you faster results if you’ve got the space.
- Learn the improved clinch, Palomar, and uni knots before you ever need this gear in a real situation.
- Dry every metal part after use, rinse thoroughly after saltwater exposure, and replace dull hooks and frayed line before they fail you.
Why Fish Matter in a Survival Food Plan
Water and calories are the two things people underestimate the hardest when they’re planning for a disruption longer than a few days. Fish solve both problems better than almost anything else you can procure in the field — they’re dense in protein and fat, they don’t require you to track or stalk anything, and once you know a handful of productive spots, they’re relatively predictable.
That said, fish availability depends entirely on your location, the season, and whether the water you’re near actually has anything worth catching. High desert is a different problem than the Pacific Northwest — you might go a full day without a bite in one and fill a stringer in an hour in the other. Check your state’s Department of Natural Resources or fish and wildlife agency for local regulations before you plan around this as a food source, even in a grid-down scenario. Rules bend during real disasters, but knowing the baseline matters.
Building an elaborate 40-piece tackle kit for a bug-out bag and never casting a line before an emergency happens is backwards. A $15 hand-spool kit that’s been used a dozen times is more valuable than a $150 kit still in the blister pack. Skill is the multiplier here, not gear volume.
What a Good Survival Fishing Kit Actually Needs
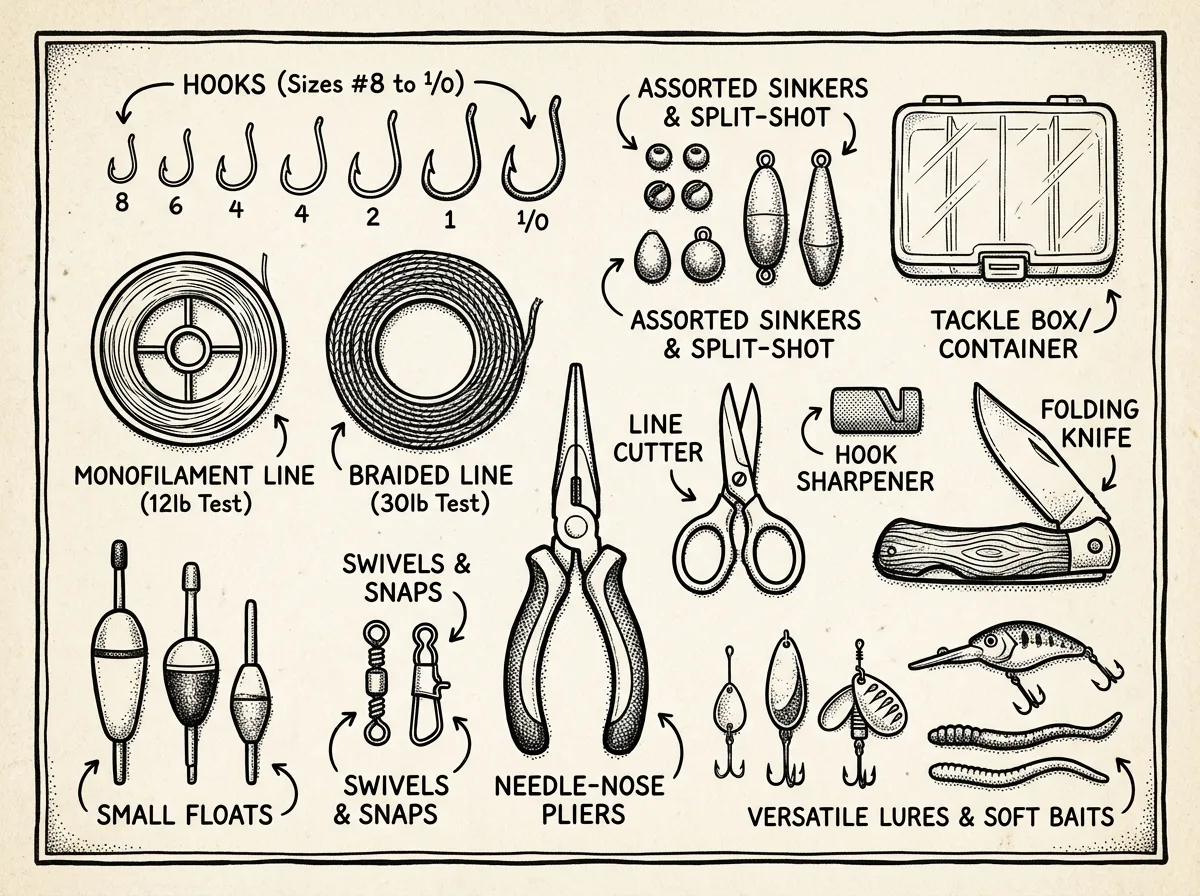 Essential components of a survival fishing kit laid out flat
A survival fishing kit isn’t a miniature tackle store. It’s a tight, purpose-built set of components that lets you rig a functional line with minimal fuss, even with cold or wet hands. The key things to look for are corrosion resistance, redundancy on the small stuff you’ll lose (hooks, split-shot), a genuinely waterproof case, and a couple of lures versatile enough to work across species and water types.
Here’s what belongs in the kit, at minimum:
- Hooks, several sizes from #8 to 1/0
- 50 to 200 ft of monofilament or braided line
- Assorted split-shot and small egg sinkers
- Swivels and snaps in a few sizes
- 2 to 3 small lures or soft plastics
- A couple of small floats or bobbers
- Hand spool or compact reel
- Waterproof case with compartments
Optional but genuinely useful additions: needle-nose pliers for hook removal and line cutting, a hook file or sharpener, and a small folding knife for cleaning your catch. None of these are dealbreakers if they’re missing, but pliers are worth prioritizing — you’ll need them more than you’d think, especially if a fish swallows the hook.
Terminal Tackle: The Part People Skimp On
Cheap hooks bend or dull after two fish. Budget bargain-bin hooks are prone to straightening on the hookset, which can cost you a fish just when you need it most. Stainless or chemically sharpened hooks cost a little more but hold their point through repeated use, which matters a lot when you can’t just run to the store for replacements.
Swivels matter more than beginners expect too. Without one, your line twists after a few casts and retrieves, and a twisted line tangles constantly — which wastes time you don’t have in an actual emergency.
Kit Styles and Which One Fits You
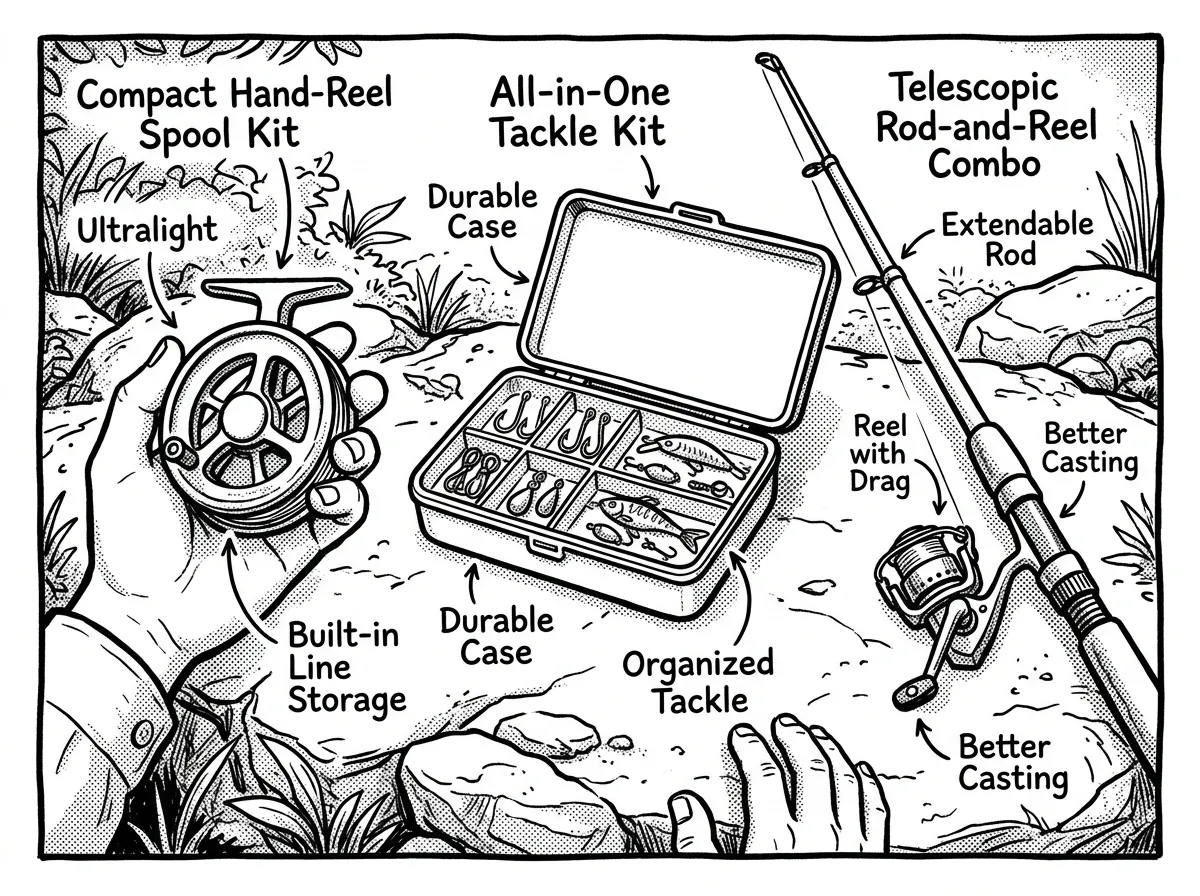 Three survival fishing kit styles compared side-by-side
Not every kit style suits every situation. Here’s how kit styles break down by use case.
Pocket survival kit — Best for ultralight carry, tucked into a jacket pocket or the lid of a pack. Extremely portable, extremely cheap, but limited on quantity. Typical cost: $10 to $30.
Hand reel (spool) kit — A solid default choice for a bug-out bag. Simple, reduces tangles better than you’d expect, reusable indefinitely if you maintain it. A little bulkier than a tin kit but still fits in a side pocket. Typical cost: $15 to $50.
All-in-one tackle box — Best for a vehicle kit or base camp setup where weight isn’t the limiting factor. Wide selection, great for learning different rigs. Heavier and bulkier than anything you’d want to hike with. Typical cost: $25 to $80.
Telescopic rod and reel — Best when you want faster results and easier casting than a hand-spool allows. A compact telescopic rod and reel collapses down small enough for most bug-out bags and gives you real casting distance, which matters on bigger water. More moving parts means more that can fail, so buy a decent one — budget reels in the $20 range are commonly reported in buyer reviews to seize up after a season of hard use. Typical cost: $30 to $120.
Premium bushcraft kit — Best for people who fish often and want gear that lasts years, not one season. Higher-quality components across the board. Typical cost: $100 to $200.
If you’re only buying one thing today, get a waterproof case — around $10 to $20 — even if you already have loose tackle rattling around in a ziplock bag. Rust from a leaky bag ruins hooks and swivels faster than almost anything else in your kit.
Which Kit Suits Most Beginners?
If pack space is tight or you’re building a true bug-out bag, go with a hand-reel or compact pocket kit. If you want faster catching and don’t mind the extra bulk, the telescopic rod and reel combo is worth it. If you’re still learning rigs and want backups on hand, an all-in-one tackle box at home or in the vehicle gives you room to experiment.
A common mistake: people buy the fanciest kit they can afford and never practice with it. Skill matters more than gear here, full stop. Practice rigging, casting, and knot-tying before you actually need it — not during.
How to Use Your Kit: A Process That Works
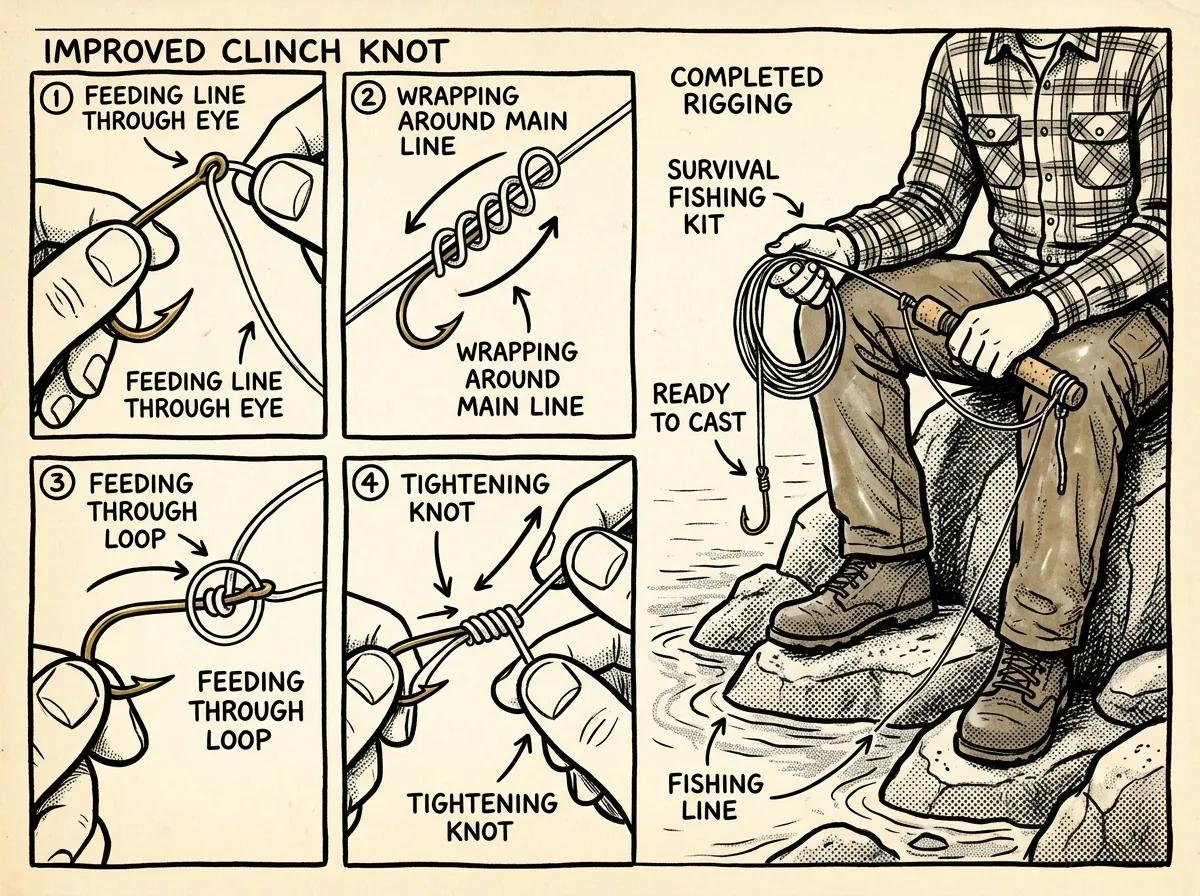 Step-by-step rigging and casting technique with survival fishing kit
Getting from “gear in a bag” to “fish on the line” isn’t complicated, but it does take a sequence. Here’s a process that works:
- Start simple — one small hook, one split-shot, a float, and natural bait or a small soft plastic
- Learn three knots cold: improved clinch, Palomar, and uni knot
- Fish productive spots — shoreline cover, creek inlets and outlets, dropoffs, and weedlines
- Target easy species first, like panfish, perch, small bass, or trout depending on your habitat
- Practice regularly at local water — skill beats gear every time
- Handle fish carefully with wet hands, minimize air exposure, and follow local regulations
Knots are the part people blow off, and it bites them every time. A hook tied with a bad knot slips loose at the exact moment you need it most — usually right as a fish takes the bait. Spend twenty minutes at home practicing the Palomar knot with your eyes closed. Sounds excessive. It isn’t, if you’re doing this after dark with cold hands.
New preppers who try tying the improved clinch knot in low light for the first time often fumble it completely — not because it’s hard, but because they’ve never practiced it under any stress at all. That’s the gap between owning gear and being prepared. Tie your knots at the kitchen table first, then again outside in the cold, then again with gloves on.
Lure Selection That Actually Works
You don’t need twenty lures. A couple of small spoons cover a surprising range of freshwater conditions — they flash, they sink at a controllable rate, and fish key in on the movement even in murky water. Pair those with a couple of soft plastics for slower presentations near cover, and you’ve got a versatile setup that handles most panfish, bass, and trout scenarios without carrying a full tackle store.
Maintenance and Storage
Gear that sits unused for months corrodes quietly, and you won’t find out until you’re standing at the water’s edge with a rusted-shut swivel. After every use, dry all metal parts before you pack the kit away. If you’ve fished saltwater, rinse everything in fresh water and let it dry completely — saltwater corrosion moves fast, especially on cheaper plated hardware.
Inspect your line periodically for UV damage or fraying, particularly if the kit lives in a hot vehicle or a bag that sees direct sun. Replace dull hooks and degraded soft plastics before they fail you mid-emergency, not after. And keep the kit somewhere you’ll actually grab it — a grab bag, glovebox, or emergency bin, not buried in a closet behind the holiday decorations.
Buying Checklist
When you’re comparing kits or building your own, run through this list:
- Hook material — stainless or chemically sharpened for corrosion resistance
- Line specs — pound test and material appropriate for your target species
- Quantity — enough spare hooks, sinkers, and terminal tackle for several outings, because you will lose gear to snags
- Case quality — genuinely waterproof or water-resistant, with organized compartments so nothing rattles loose
- Component quality — check recent reviews for hook sharpness, swivel strength, and reel smoothness before buying
- Saltwater compatibility — confirm marine-grade parts if you’re near coastal water, and commit to rinsing gear after every use
Prices and product specs shift constantly, so check current listings and recent buyer reviews before you commit to a specific kit — what was solid last year might’ve cut corners on materials this year.
Where This Fits in Your Broader Food Plan
A fishing kit isn’t a replacement for stored food — it’s a supplement that extends your options if a disruption runs longer than your pantry can cover. Pair it with basic knowledge of local waters, the patience to practice before you need the skill, and a realistic sense of what’s actually swimming near you. In extended scenarios, the people who do best aren’t the ones with the most gear — they’re the ones who’ve actually used what they own, under less-than-ideal conditions, more than once.
Match your kit to where you’ll actually carry it — pack, vehicle, or base camp — and build the skill before the emergency forces you to learn it on the fly.
The Complete
Prepper's Reference.
149 articles synthesized into one comprehensive PDF — twelve chapters covering water, food, shelter, first aid, comms, and scenario-specific preparedness. Free with your email.
Unsubscribe anytime · We never share your email
You're in. Check your inbox.
Keep Reading
Meal Prepping Ideas That Build Long-Term Food Security
Meal prepping ideas that go past Sunday batch-cooking — build rotating stockpiles, cut costs, and prep for real emergencies. See how.
Mylar Bags for Food Storage: Complete Guide (2026)
Learn how to use mylar bags for food storage to preserve dry goods 25+ years. Expert guide covers thickness, sealing, oxygen absorbers & mistakes to avoid.
Canned vs. Freeze-Dried: The Ultimate Prepper Showdown
Canned vs. freeze-dried food: compare shelf life, cost, nutrition, storage, and convenience so beginner preppers can build smarter emergency supplies.