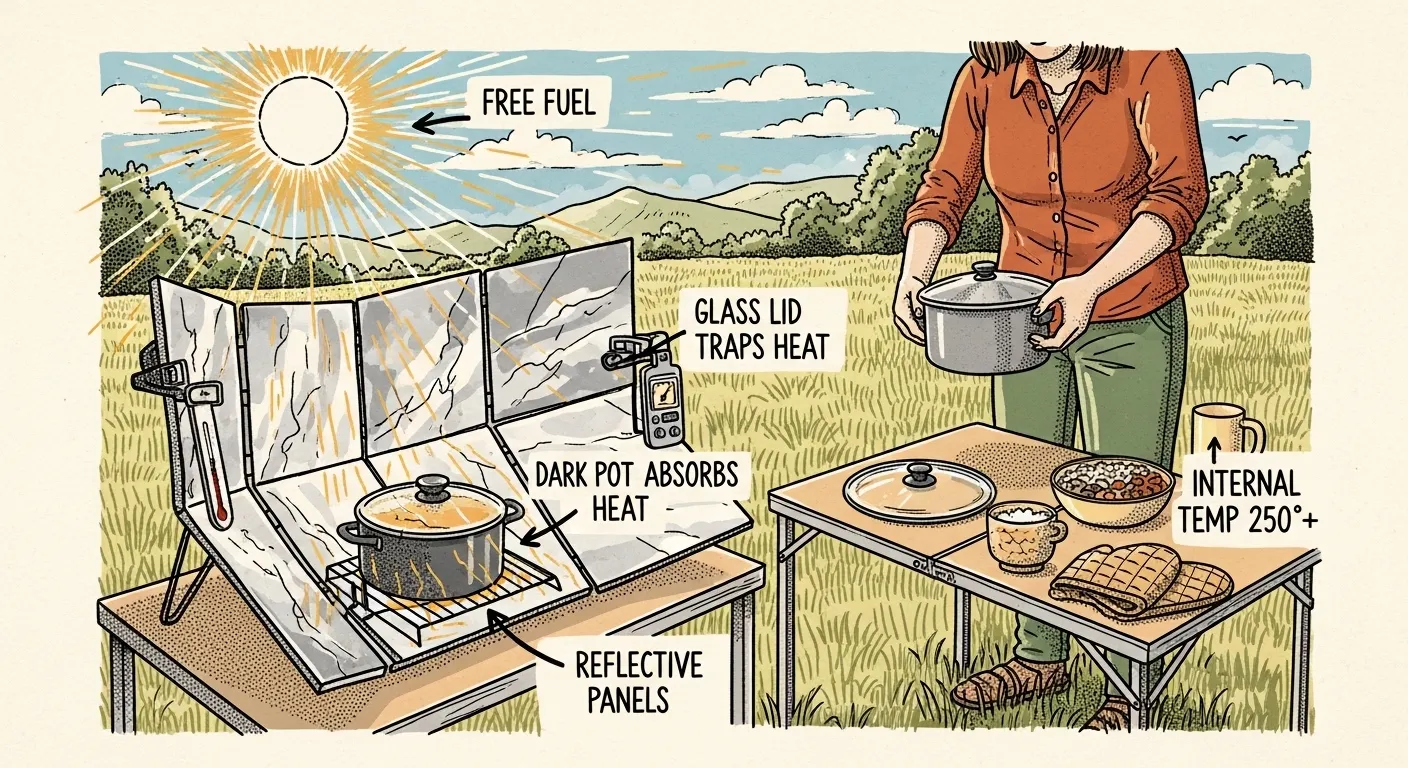
A solar oven is a fuel-free cooker that uses reflected sunlight and trapped heat to cook food, often reaching up to 400°F in ideal conditions. In emergencies, it helps conserve fuel, reduces smoke and burn risks, and can cook simple meals like rice, beans, casseroles, breads, and vegetables when set up in direct sun and adjusted regularly.
Key Takeaways
- Preheat your solar oven 20 to 40 minutes before loading food — it cuts variability and shortens overall cook time.
- Dark, thin metal pots with tight-fitting lids absorb heat far faster than glass or ceramic cookware.
- Reposition reflectors or the whole cooker every 30 to 60 minutes to keep the sun hitting the absorber directly.
- Confirm poultry hits 165°F, ground meats 160°F, and whole cuts 145°F with an instant-read thermometer — never estimate by time alone.
- Sealed dark jars of water added as thermal mass reduce temperature swings when a cloud passes overhead.
Solar Oven Cooking Tips: Sun-Powered Cooking for Emergencies
Common beginner mistakes with a box cooker — wrong angle, wrong cookware, checking the food too often so trapped heat keeps escaping — can leave you with lukewarm rice hours later. Solar cooking rewards patience and punishes fidgeting.
Solar cooking is often treated as an afterthought in emergency planning, but that’s a mistake. When fuel’s scarce or the grid’s down for days, a solar oven gives you a way to cook real food without burning through your propane reserves or risking carbon monoxide from an indoor flame. It’s quiet, it’s safe, and once you understand the physics, it’s dead simple to run.
Quick Summary
- A solar oven traps reflected sunlight behind glazing, using dark cookware to convert light into heat — no fuel, no flame, no smoke.
- Preheat 20 to 40 minutes before loading food, and reposition the cooker every 30 to 60 minutes to track the sun.
- Dark, thin metal pots with tight lids cook noticeably faster than glass or ceramic — this is the single biggest variable people get wrong.
- Cook times run long: 1 to 4 hours depending on the dish, so plan around sun hours, not the clock.
- Always confirm doneness with an instant-read thermometer using standard USDA temperatures — never eyeball meat safety in a solar cooker.
- Box cookers are the most forgiving style for beginners; parabolic cookers run hot but demand constant attention.
What Is a Solar Oven, Really?
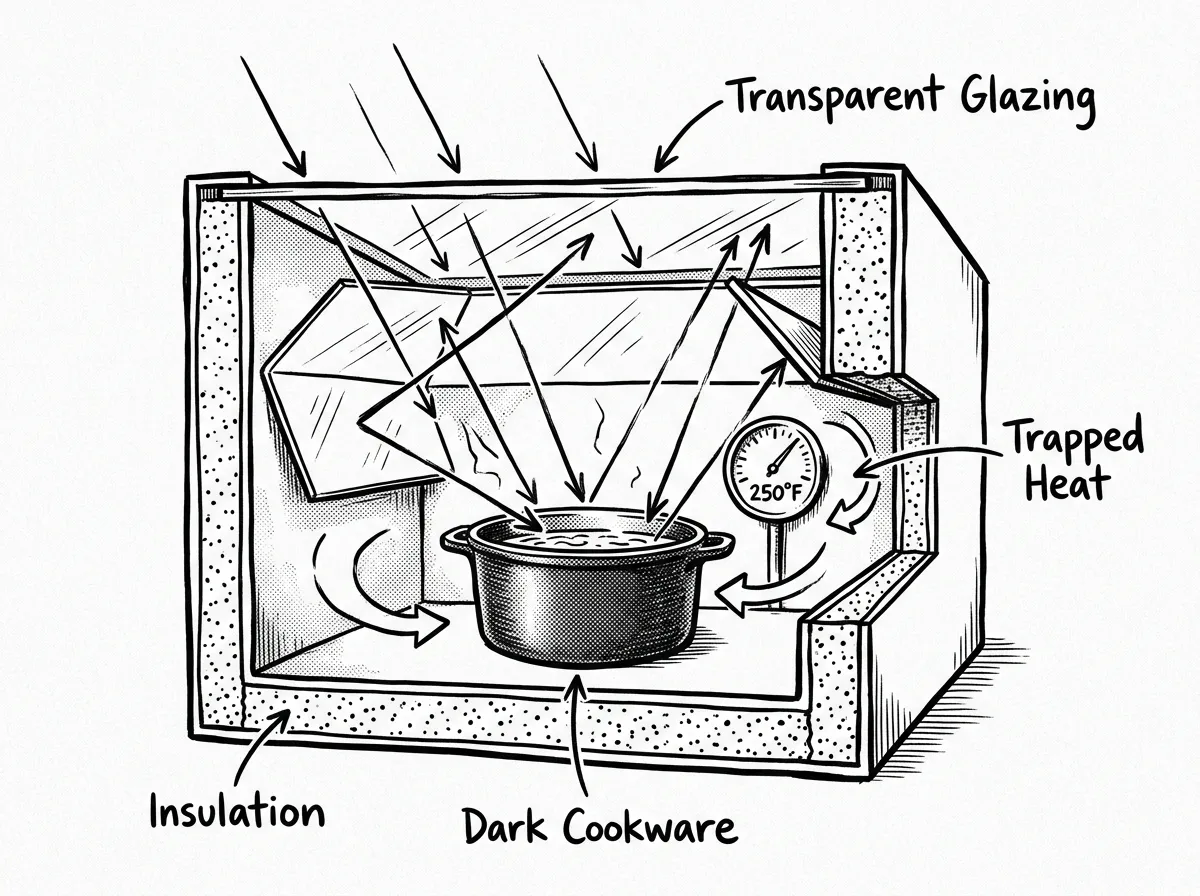 Cross-section view of solar oven heat trapping
Think of it as a portable greenhouse built to cook, not grow tomatoes. A solar oven collects sunlight, converts it to heat using dark absorbing surfaces, and then traps that heat behind insulation and a transparent cover so it doesn’t just radiate back out. That’s the whole concept. No moving parts, no batteries, no fuel line.
Every functional solar oven relies on four components working together:
- Reflectors — aluminum foil, Mylar, or polished metal panels that funnel extra sunlight into the cooking chamber.
- Absorber — dark surfaces or dark cookware that soak up light and turn it into usable heat.
- Insulation — rigid foam, fiberglass, or wool lining that keeps the heat from bleeding out the sides.
- Glazing — tempered glass or polycarbonate that lets light in but holds heat inside, similar to a car windshield on a hot day.
The Three Common Types
Box cookers are insulated boxes with reflective flaps that fold open to funnel light inside. They’re stable, forgiving, and the easiest style for a beginner to learn on. Box cookers are recommended for almost anyone starting out — they hold temperature well and don’t need babysitting.
Panel cookers use flat reflective panels folded around a pot to concentrate sunlight. They’re lightweight, cheap, and pack down flat, which makes them a decent bug-out bag addition, but they lose heat fast in wind and need more frequent adjustment.
Parabolic cookers use a dish-shaped reflector to concentrate sunlight onto a single point, similar to how a satellite dish focuses signal. These get hot — sometimes hot enough to sear — but that concentrated beam means real burn risk if you’re not paying attention, and you’ll be re-aiming it constantly.
Box cookers hold a steady moderate temperature for long stretches with minimal repositioning, while parabolic cookers reach a much higher peak temperature but shed it quickly unless they are re-aimed as the sun moves. For emergency prep situations where attention is divided among multiple tasks, a box cooker’s forgiving nature makes it the more practical choice. Parabolic cookers suit situations where cooking can be the sole focus.
How a Solar Oven Actually Works
The process is straightforward once you break it down into steps.
- Reflectors gather ambient sunlight and funnel it into the cooking chamber
- Dark cookware or a dark absorber plate soaks up that light and converts it into heat
- Insulation and glazing trap the heat inside instead of letting it escape
- Thermal mass, like sealed water jars, stores extra heat and evens out temperature swings when clouds pass over
That last step matters more than people think. Solar output isn’t constant — a cloud bank rolling through can drop your interior temp by 50 degrees in minutes. Thermal mass acts like a buffer, releasing stored heat during those dips so your food keeps cooking instead of stalling out.
Why a Solar Oven Belongs in Your Emergency Plan
Why bother with something this slow when you could just fire up a camp stove? Fair question. Here’s the case for keeping one around.
A solar oven needs zero fuel to operate — that’s the whole appeal when propane’s rationed or the gas station lines stretch around the block. It’s also significantly safer than an open flame: less smoke, no carbon monoxide buildup, and a much lower fire risk if you’re cooking near dry brush or in a tight urban space. It runs quiet too, with a low visual profile, which matters more than people expect in a grid-down situation where you’d rather not advertise that you’ve got food cooking.
It handles grains, beans, casseroles, breads, and roasted vegetables well. What it doesn’t do is high-heat searing or frying — don’t expect to crisp bacon or sear a steak. This is a slow, moist-heat tool, not a stovetop replacement.
For technical guidance, Solar Cookers International and your local public health department both maintain solid reference material on safe solar cooking practices.
Getting Started: Practical Tips for Predictable Results
Choose the Right Day and Spot
Clear skies matter more than anything else. Aim for peak sun hours — roughly late morning through mid-afternoon — and pick a spot with several uninterrupted hours of direct sun. Wind is the silent killer of solar cooking performance, so if you’re in a windy plains region or an exposed coastal spot, block the cooker with a windbreak or position it in a sheltered corner.
Preheat Before You Load Food
Aim the cooker at the sun and let it preheat for 20 to 40 minutes before you add anything. This one step cuts down on inconsistent results more than any other adjustment you can make. A cold chamber means your food spends its first hour just bringing the oven up to temperature instead of actually cooking.
Use the Right Cookware
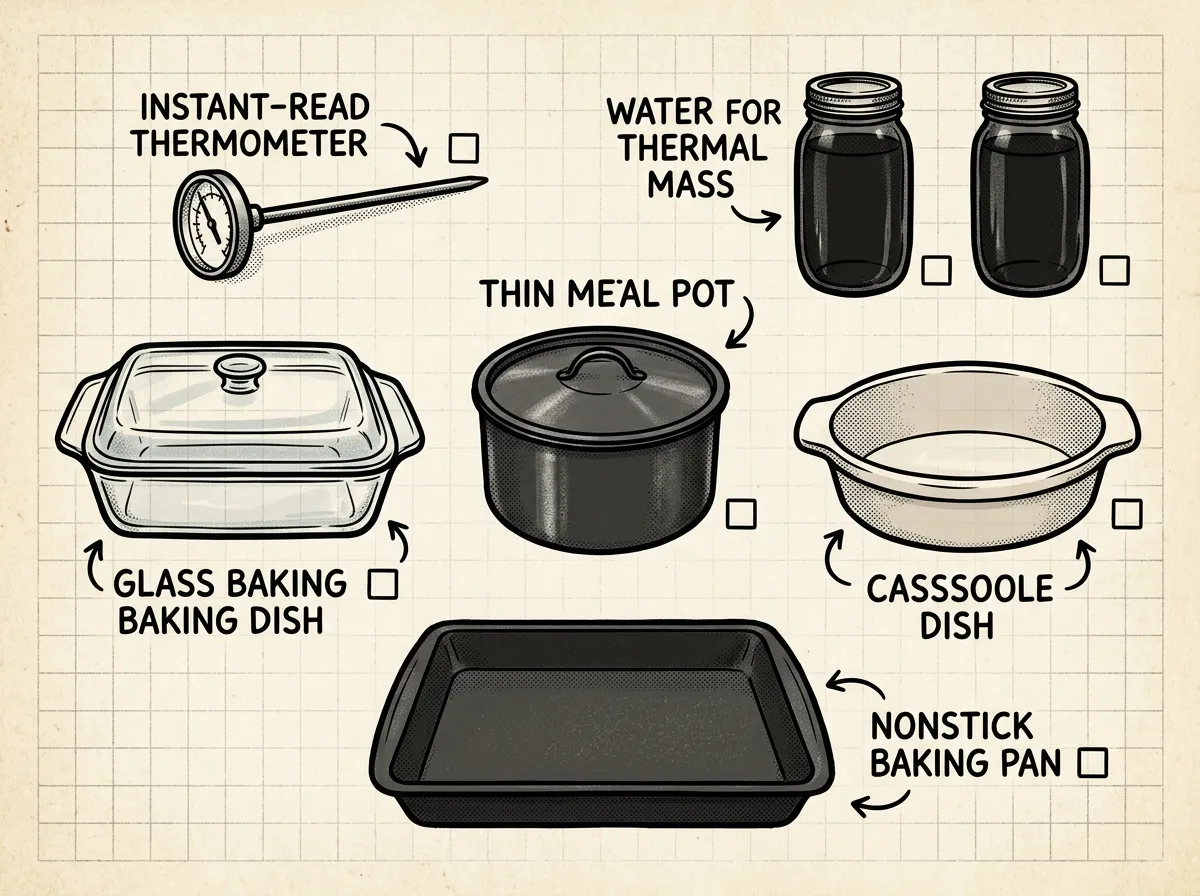 Essential solar cooking cookware kit
A common mistake is grabbing whatever pot’s on hand — usually something shiny and light-colored — and wondering why nothing’s cooking after two hours.
Dark, thin metal pots and pans absorb heat dramatically faster than glass or ceramic. If your only options are light-colored, wrap the outside in a layer of dark cloth or paint it with high-heat matte black paint before your next outing.
Glass and ceramic will work, but budget significantly more time. Always use a tight-fitting lid — it traps steam, which speeds cooking and keeps moisture in the food where you want it.
Prepare Food for Slow, Even Cooking
- Cut vegetables into uniform pieces so everything finishes at roughly the same time.
- Soak grains and beans ahead of time when the recipe calls for it.
- Add enough liquid. Solar ovens cook largely through conduction and trapped steam, not dry radiant heat like a conventional oven.
Aim and Adjust Regularly
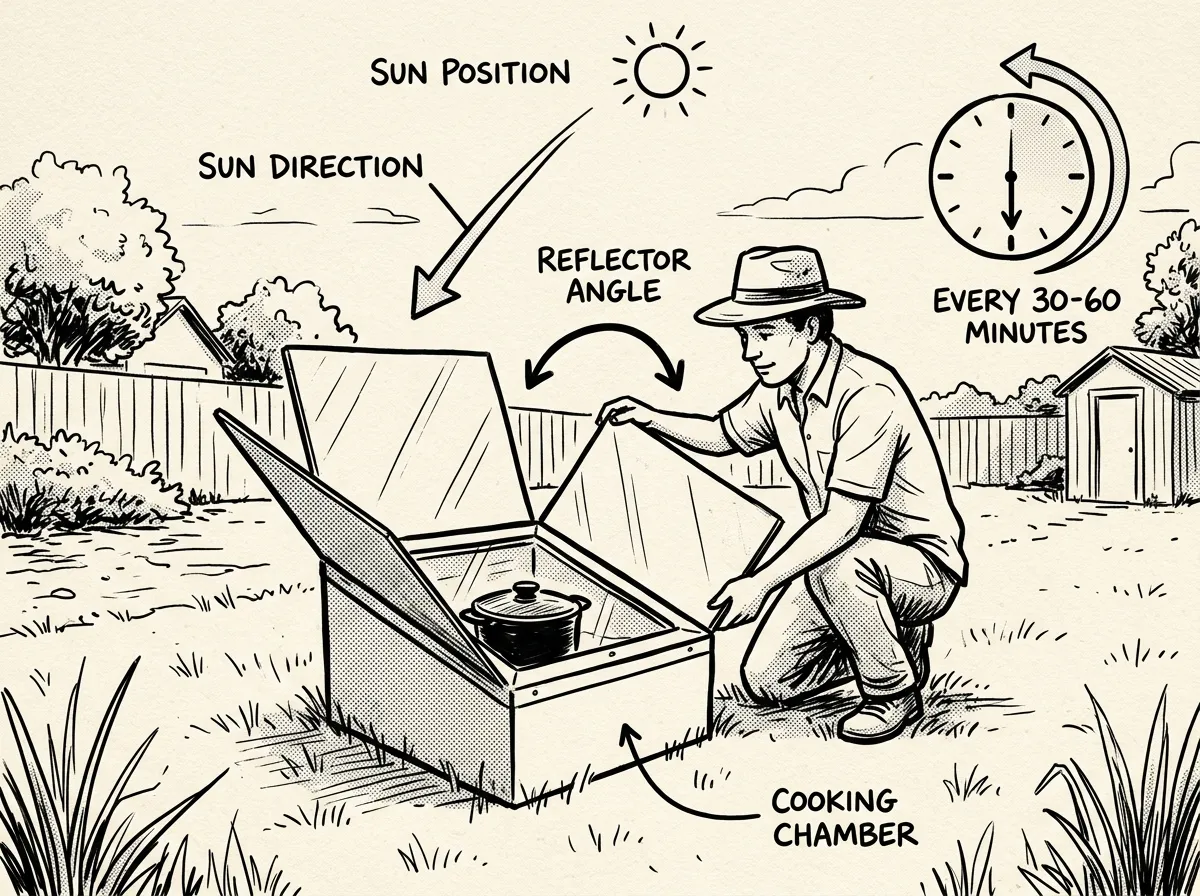 Repositioning a solar oven to track the sun
Realign your reflectors — or reposition the whole cooker — every 30 to 60 minutes to keep the sun hitting the absorber directly. The sun moves faster than you’d think, and a cooker aimed even 20 degrees off can lose real cooking power.
Build in Extra Time
Solar cooking runs slower than your kitchen oven, full stop. Plan your meal timing around sun availability, not a fixed clock, and always verify doneness with temperature checks instead of guessing based on elapsed time.
Verify Food Safety Every Time
Use an oven thermometer to track interior chamber temperature and an instant-read thermometer to confirm the food itself is done. Follow standard USDA internal-temperature guidelines: poultry to 165°F, ground meats to 160°F, and whole cuts to 145°F with a rest period. If you can’t confirm a safe internal temperature, keep cooking — don’t serve it on a guess.
Typical Solar Oven Cooking Times
| Food type | Typical time range (sunny day) | Notes |
|---|---|---|
| White or brown rice | 1 to 2 hours | Tight lid; roughly 2 to 2.5 cups liquid per cup of rice |
| Vegetables (chopped) | 1 to 2 hours | Root vegetables run toward the longer end |
| Casseroles and one-pot meals | 2 to 3 hours | Covered pan; check internal temperature before serving |
| Beans (pre-soaked) | 2 to 4 hours | Dry, unsoaked beans often need pre-cooking first |
| Cornbread and muffins | 1.5 to 2.5 hours | Dark pans speed things up considerably |
| Baked fruit and cobbler | 1 to 2.5 hours | Bake until bubbly and tender throughout |
These are starting points, not guarantees. Your specific oven, the sun angle, and ambient temperature all shift these ranges. High desert conditions with intense, direct sun will run faster than a hazy coastal afternoon even at the same time of year.
Practical Recipes and Meal Ideas
- Solar rice and beans — 1 cup rice plus canned or pre-cooked beans, 2 to 2.5 cups liquid, covered in a dark pot, roughly 1.5 to 2 hours.
- Vegetable bake — chopped vegetables tossed in oil and herbs, covered in a dark pan, 2 to 3 hours.
- Solar chili — canned tomatoes, beans, and seasoning, simmered covered for 2 to 3 hours.
- Cornbread or muffins — baked in a dark baking pan for 1.5 to 2.5 hours.
- Baked fruit or cobbler — dark pan, bake until bubbly and the fruit’s soft through.
Don’t try high-heat frying or a quick sear in one of these. Solar ovens are built for slow, moist, or baked dishes — trying to force a stovetop technique out of one just wastes daylight and leaves you with undercooked food.
Food Safety and Water Pasteurization
- Confirm internal temperature with an instant-read thermometer before serving anything
- Follow USDA minimums: 165°F poultry, 160°F ground meat, 145°F whole cuts plus rest time
- For water pasteurization, use a dedicated thermometer and treat boiling as your fallback method
- Never rely on elapsed cooking time alone as a doneness indicator
Solar cookers can pasteurize water, but boiling remains the most foolproof method when you have any doubt about a water source. If you’re leaning on solar pasteurization, follow your local public health department’s specific temperature and hold-time guidance rather than a generic rule of thumb.
Maintenance and Care
A solar oven’s a simple device, but neglect still catches up with it. Clean the interior and glazing after each use to keep residue from building up and dulling reflective surfaces. Keep reflective panels clean and avoid abrasive cleaners that scratch the coating — a scratched reflector loses efficiency fast. Inspect seals, hinges, and insulation periodically, and replace anything that’s degraded. Store it dry and out of prolonged UV exposure when you’re not using it, since UV breaks down glazing and gaskets over time.
A common mistake is buying a solar oven, stashing it in the garage, and never testing it until the day it’s actually needed. That’s backwards. Practice on clear weekend days so you know your specific unit’s preheat time, typical cook durations, and quirks before you’re depending on it during an actual outage.
For a ready-made unit instead of a DIY box cooker, the All American Sun Oven (around $300) is built with heavy-duty construction and insulation designed to hold temperature well even with intermittent clouds, according to manufacturer specifications. The GoSun Sport (around $130) is lighter and more portable but runs hotter in a narrower cooking chamber, making it less forgiving for those new to solar cooking. Beginners may find the Sun Oven’s steadier performance easier to work with, saving the GoSun for once the learning curve is understood.
Build a Simple Solar Oven Meal Kit
Having the oven itself isn’t enough — you need the supporting gear staged and ready to go.
- Dark pot with tight-fitting lid
- Dark baking pan for breads and fruit
- Oven thermometer for interior temperature readings
- Instant-read food thermometer
- Heat-resistant oven mitts
- Basic seasonings and shelf-stable staple dry goods
- A quick-start card noting your specific oven’s measured preheat and cook times
That last item matters more than it sounds like it should. Write down your oven’s real preheat time and typical cook durations after a few practice runs, and keep that note with the kit. During an actual emergency, you don’t want to be relearning your equipment from scratch.
FAQ
Can a solar oven cook food safely? Yes. As long as you’ve got enough sun exposure and you verify safe internal temperatures with a thermometer, solar cooking is just as safe as any other cooking method — it’s just slower.
Do solar ovens work on cloudy days? Performance drops fast under heavy cloud cover. Partly cloudy conditions might warm food somewhat, but you shouldn’t count on a full, safe cook through intermittent clouds — treat those days as practice, not meal prep.
Can I use a solar oven in winter? Yes, when you’ve got bright, direct sun, even in cold air. The low sun angle in winter means you’ll need longer cook times and more frequent repositioning, but it still works even with snow on the ground nearby.
Which solar oven is best for beginners? Box-style cookers. They’re forgiving of imperfect aim, hold heat steadily, and don’t demand the constant attention a parabolic design requires.
Can I cook meat in a solar oven? Yes, provided you’ve got adequate sun, enough time, and you confirm safe internal temperatures with an instant-read thermometer before serving. Don’t rush it, and don’t guess.
Practice Before You Need It
Position the cooker well, use dark cookware with a tight lid, and verify temperatures with real thermometers instead of guesswork. None of that helps if the first time you try it is during an actual crisis. Run a few practice meals on ordinary sunny weekends, log your oven’s real preheat and cook times, and you’ll walk into any grid-down situation already knowing exactly how your equipment performs — which is half the battle in any emergency.
The Complete
Prepper's Reference.
149 articles synthesized into one comprehensive PDF — twelve chapters covering water, food, shelter, first aid, comms, and scenario-specific preparedness. Free with your email.
Unsubscribe anytime · We never share your email
You're in. Check your inbox.
Keep Reading
Meal Prepping Ideas That Build Long-Term Food Security
Meal prepping ideas that go past Sunday batch-cooking — build rotating stockpiles, cut costs, and prep for real emergencies. See how.
Mylar Bags for Food Storage: Complete Guide (2026)
Learn how to use mylar bags for food storage to preserve dry goods 25+ years. Expert guide covers thickness, sealing, oxygen absorbers & mistakes to avoid.
Canned vs. Freeze-Dried: The Ultimate Prepper Showdown
Canned vs. freeze-dried food: compare shelf life, cost, nutrition, storage, and convenience so beginner preppers can build smarter emergency supplies.