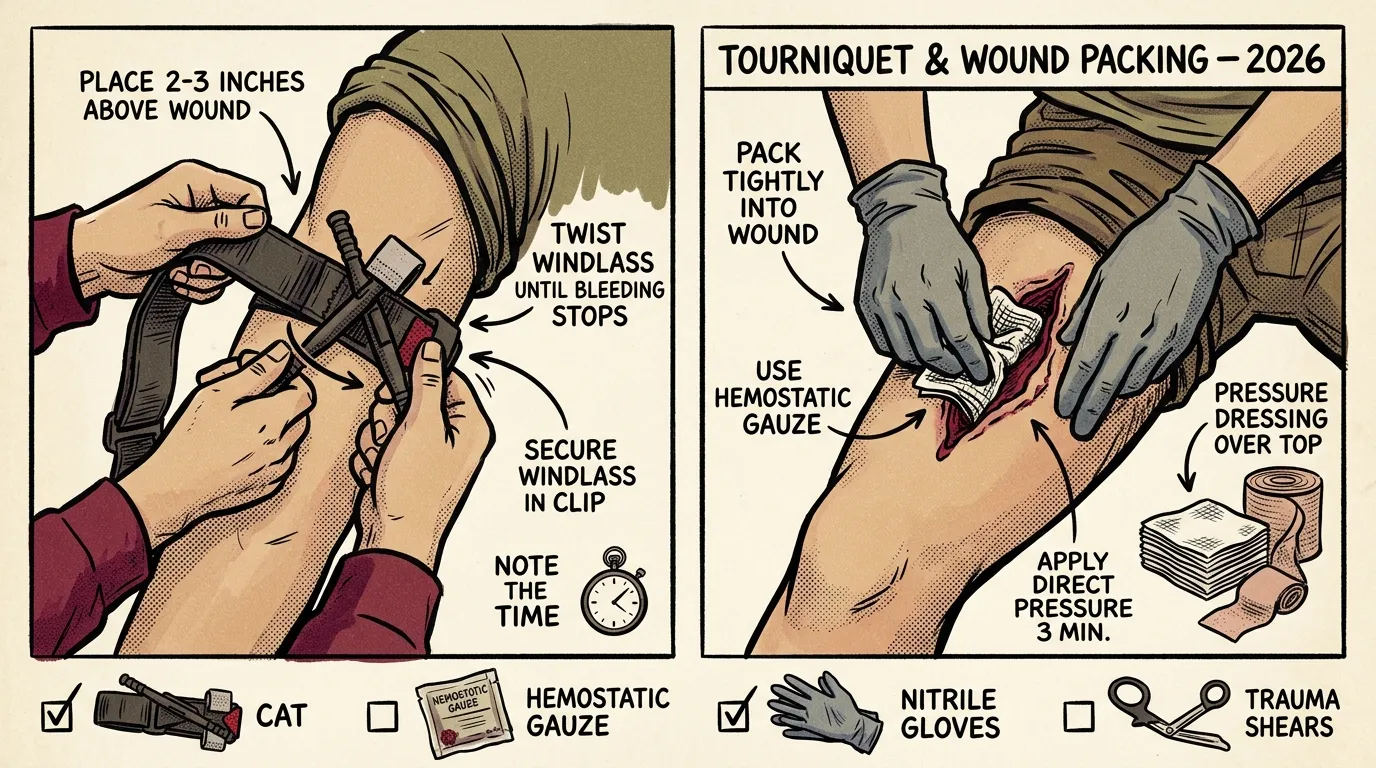
This article teaches step-by-step hemorrhage control techniques including how to use a tourniquet and pack a wound, covering tourniquet placement, common application mistakes, wound packing with hemostatic and plain gauze, and when to use each method.
Key Takeaways
- Apply the tourniquet first, then pack the wound — the tourniquet buys you time to set up effective wound packing underneath.
- Place the tourniquet 2-3 inches above the wound and tighten until all bleeding stops — a loose tourniquet makes bleeding worse.
- Pack wounds by pushing gauze deep into the wound cavity with two-finger pressure, filling the entire space tightly.
- Never place a tourniquet on a joint, directly on a wound, or on the head, neck, or torso — those areas require wound packing and direct pressure only.
- Carry at least one commercial tourniquet (CAT Gen 7 or SOF-T Wide) and gauze in your vehicle, pack, and home kit.
- Take a free Stop the Bleed course and practice tourniquet application monthly — reading alone does not build the muscle memory you need.
Severe bleeding can be loud — a wet, rhythmic sound of blood leaving the body faster than it should. In those moments, knowing how to use a tourniquet and pack a wound isn’t theoretical. It’s the difference between someone making it to the hospital and someone not making it at all.
These skills aren’t complicated. But they demand practice, and they demand that you understand the why behind every step, not just the mechanics.
This guide follows the American College of Surgeons Stop the Bleed 2.0 curriculum and current Tactical Combat Casualty Care (TCCC) guidelines. It covers both tourniquet application and wound packing technique in detail — because in a real hemorrhage emergency, you’ll likely need both.
Important: This guide is educational and does not replace hands-on training. Hemorrhage control is a physical skill that requires practice on training mannequins under qualified instruction. After reading, take a certified Stop the Bleed course.
Quick Steps: How to Use a Tourniquet and Pack a Wound
To use a tourniquet and pack a wound for life-threatening bleeding, follow these steps:
- Expose the wound by tearing or cutting clothing away to identify the bleeding source.
- Apply a tourniquet 2-3 inches above the wound on the limb, pulling the strap tight through the buckle.
- Twist the windlass rod until all bleeding stops completely, then lock it into the clip.
- Pack the wound cavity by pushing gauze deep into the wound with firm two-finger pressure, filling the entire space.
- Apply a pressure dressing over the packed wound and hold continuous pressure for at least three minutes.
- Write the time of tourniquet application on the device or the patient’s skin, and do not remove the tourniquet.
This combined approach — tourniquet first to stop blood flow, then wound packing for sustained local hemorrhage control — gives the patient the best chance of surviving until professional medical help arrives.
When Bleeding Becomes Life-Threatening
Not every cut needs a tourniquet. Most bleeding you’ll encounter can be handled with direct pressure and a bandage. But there’s a threshold where bleeding shifts from “urgent” to “you have minutes.”
Here’s a simple decision framework: if blood is spurting in rhythmic pulses, that’s arterial bleeding — bright red, pulsatile, and potentially fatal within minutes. That’s tourniquet territory. If blood is dark red and flowing steadily, that’s venous bleeding — serious, but direct pressure usually controls it.
Act immediately when you see any of these:
- Blood spurting or pulsing from a wound
- Blood pooling rapidly on the ground
- Clothing soaked through with blood
- A partial or complete amputation
- The patient becoming confused, pale, or losing consciousness
To put blood loss in tangible terms: an adult has roughly five liters of blood. Losing one to two liters — picture one or two standard water bottles — can trigger shock. At 40 percent loss (about two liters), death becomes likely without intervention.
The two tools you have are tourniquets (for limbs) and wound packing (for everywhere, including junctional areas like the groin and armpit). Let’s break both down.
How to Use a Tourniquet: Step-by-Step Application
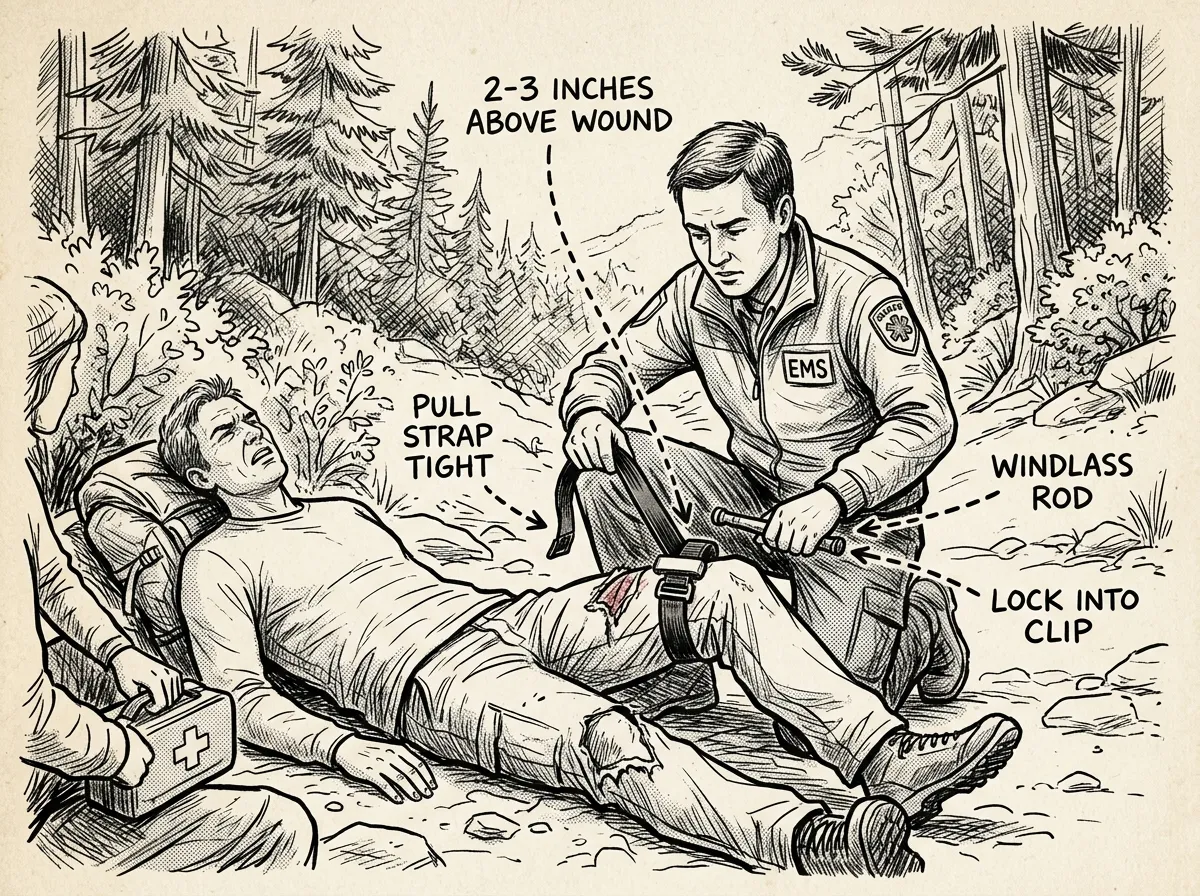 Step-by-step tourniquet application on an injured limb
This section walks through application using a commercial windlass tourniquet — specifically the CAT (Combat Application Tourniquet), which is the current military standard per CoTCCC guidance. Improvised methods are covered below.
- Expose the wound — tear or cut clothing away so you can see exactly where the bleeding is coming from
- Position the tourniquet 2-3 inches above the wound, between the injury and the heart — go high and tight if you can’t identify the exact wound location
- Pull the strap tight through the buckle and secure it — this initial tightening matters
- Twist the windlass rod until bleeding stops completely — check distal to the tourniquet for pulse or continued bleeding
- Lock the windlass rod into the clip and secure it
- Write the time of application on the tourniquet or directly on the patient’s forehead or arm with a marker
That’s the mechanical process. Now let me add the nuance that actually matters.
How Tight Should a Tourniquet Be?
Here’s the thing most people get wrong: they don’t tighten enough. In Stop the Bleed courses, it’s common to see a tourniquet applied with only one or two turns of the windlass before stopping because the patient (or training partner) says it hurts.
It’s supposed to hurt. A lot.
A properly applied tourniquet compresses the artery against the bone hard enough to completely occlude blood flow. That pressure is intense. The windlass should be turned until the bleeding stops completely — and then checked. If there’s still any bleeding distal to (below) the tourniquet, tighten more. A partially tightened tourniquet is actually worse than none at all, because it can block venous return while allowing arterial flow, which increases bleeding.
A tourniquet that doesn’t hurt isn’t working. Tighten until the bleeding stops — period.
Tourniquet Placement: Where Exactly Does It Go?
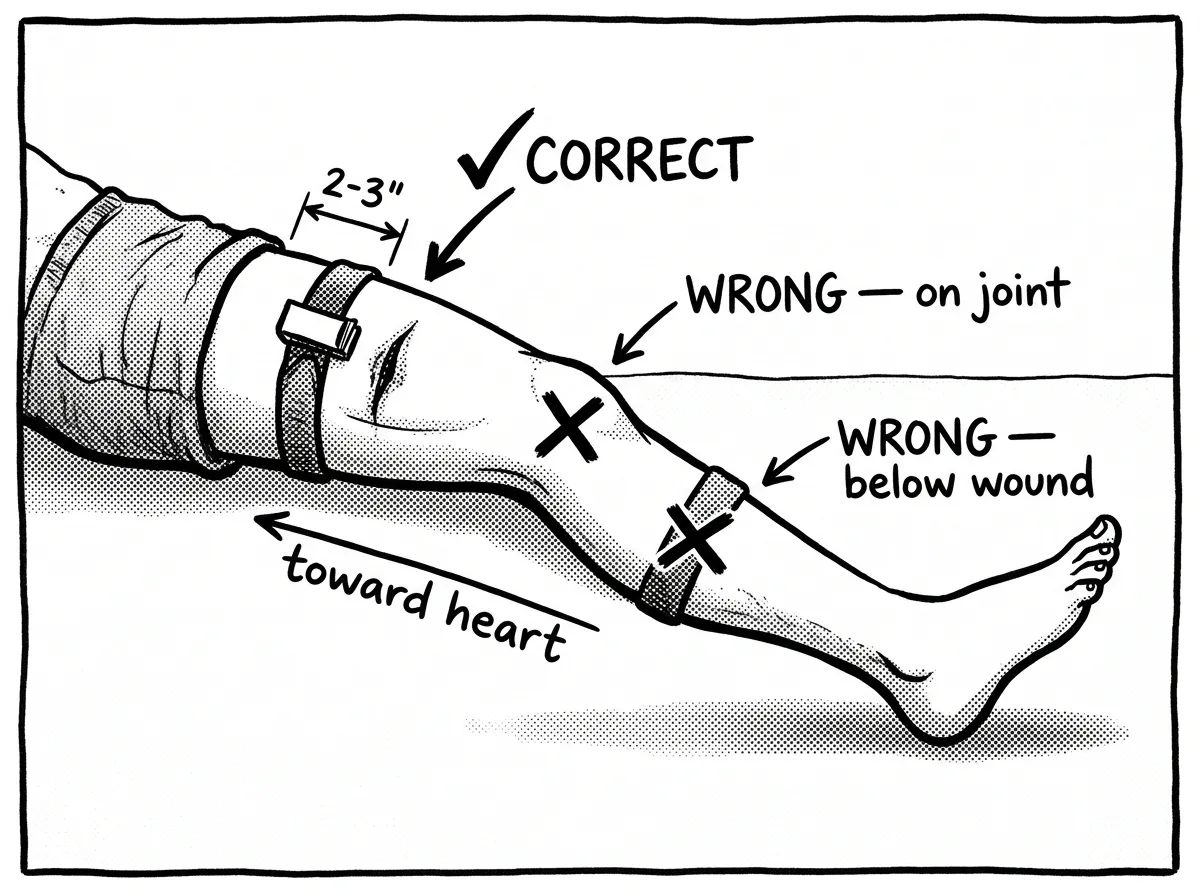 Correct and incorrect tourniquet placement locations on a limb
You want the tourniquet above the wound — meaning closer to the heart. The standard is 2-3 inches proximal to the injury. If the wound is on the forearm, the tourniquet goes on the upper arm. If it’s on the lower leg, it goes on the thigh.
Can’t identify the exact wound location because there’s too much blood? Go high and tight — as high on the limb as possible, right up near the armpit or groin. This is the military protocol, and it works. You can always reposition once bleeding is controlled and you have a better picture.
Never place a tourniquet:
- Directly on a wound
- Over a joint (knee, elbow) — it won’t compress effectively
- Below the wound (farther from the heart)
Improvised Tourniquet: When You Don’t Have the Real Thing
You can improvise. It won’t be as effective as a CAT or SOF-T Wide, but it can work. You need two things: a band of material at least 1.5 inches wide (a torn shirt, a bandana folded lengthwise, a scarf) and a rigid object for a windlass (a sturdy stick, a pen, a wrench — anything you can twist).
Tie the band around the limb with a square knot. Place the rigid object on top of the knot. Tie another knot over the rigid object. Twist until bleeding stops. Secure the windlass so it can’t unwind.
Improvised tourniquets have a significantly higher failure rate than commercial ones. Belts tend to perform poorly because they’re too stiff to cinch tightly and they slip. A triangular bandage or torn T-shirt with a solid stick works better. The more reliable option is to carry a real tourniquet — the CAT Gen 7 runs about $30, and the SOF-T Wide is around $28. Keeping one in a vehicle, a pack, and a home kit ensures one is within reach when needed.
How to Pack a Wound for Hemorrhage Control
Wound packing is the technique you’ll use when a tourniquet either isn’t appropriate (torso, junctional areas, head/neck) or when you want to provide additional hemorrhage control under an already-applied tourniquet.
So what does it actually mean to “pack” a wound? You’re filling the wound cavity with gauze — pushing it in firmly with your fingers — to create internal pressure directly against the damaged blood vessel. External pressure alone can’t reach a deep bleeder. You need material physically inside the wound.
How to Pack a Wound With Gauze Step by Step
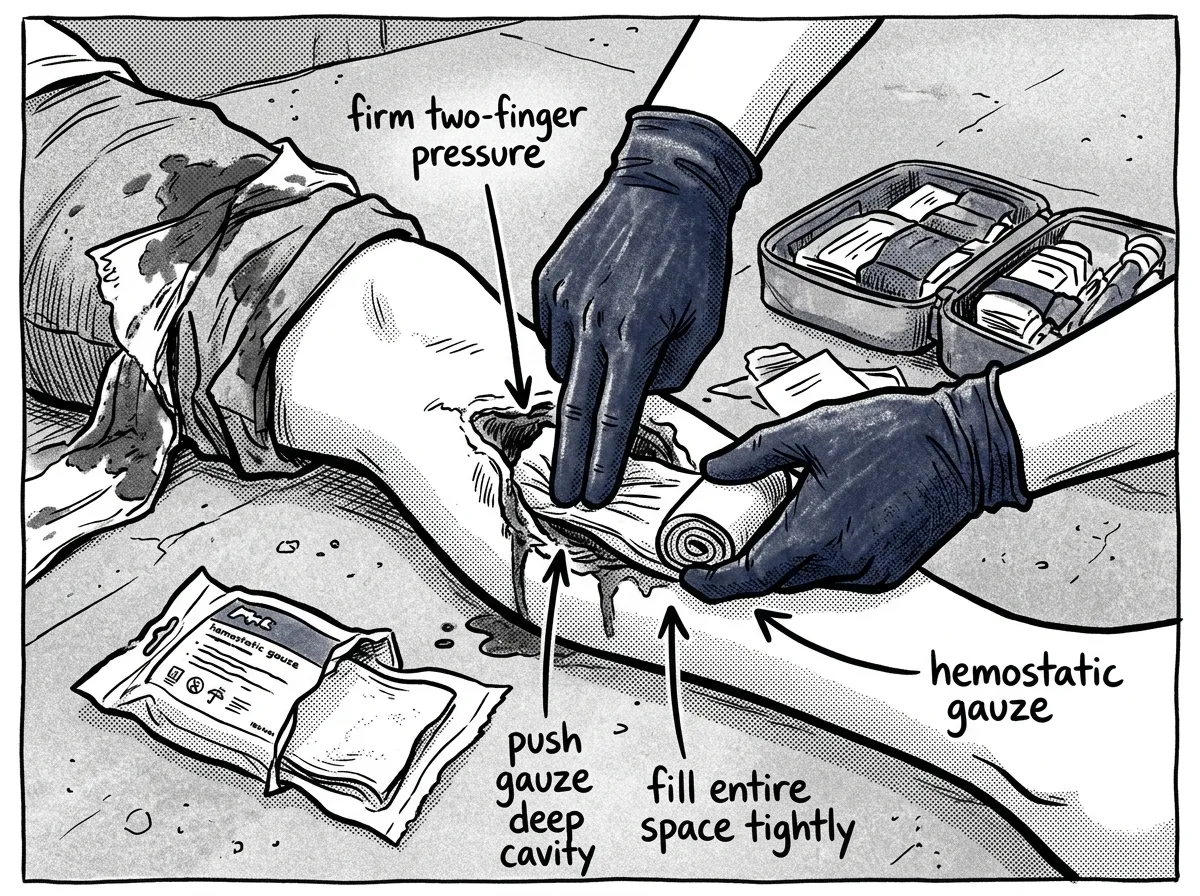 Packing a wound cavity with gauze using firm two-finger pressure
- Expose the wound completely — you need to see the wound cavity
- Take your gauze (hemostatic gauze like QuikClot Combat Gauze is ideal, but plain rolled gauze works) and feed one end directly into the deepest part of the wound
- Using two fingers — usually your index and middle finger — push the gauze firmly into the wound cavity, maintaining constant pressure as you feed more gauze in
- Continue packing until the entire wound cavity is filled — the gauze should be tight, not loosely stuffed
- Apply a pressure dressing over the packed wound and maintain direct pressure for a minimum of 3 minutes (5 minutes for hemostatic gauze to fully activate)
- Do not remove the packing to “check” — if blood soaks through, pack more gauze on top
This Will Be Uncomfortable — For Both of You
I’m not going to sugarcoat this. Pushing gauze into someone’s open wound is one of the most psychologically difficult things you’ll do in a trauma first aid scenario. The patient will likely scream. They may try to push you away. And your instinct will be to stop.
Don’t stop.
The reality of pushing material into someone’s body while they’re yelling is fundamentally different from practicing on a training mannequin. Pushing through matters because the alternative is watching them bleed out. Repeated practice helps ensure trained muscle memory takes over before hesitation can — which is why practice matters, not just once, but repeatedly.
Use both hands when packing — one to feed gauze, the other to maintain pressure with your fingers deep in the wound cavity. You’ll get more effective compression this way.
Hemostatic Gauze vs. Plain Gauze
Hemostatic gauze is significantly more effective than plain gauze for deep wounds with heavy bleeding. But not all hemostatic products work the same way, and understanding the differences matters — especially if you’re building a trauma kit or buying for someone on blood thinners.
QuikClot Combat Gauze (kaolin-based, ~$45/roll) is the current standard carried by U.S. military Combat Medics per the Committee on Tactical Combat Casualty Care (CoTCCC) recommendation. Kaolin activates Factor XII in the clotting cascade, accelerating your body’s natural clotting process. It’s extremely effective in healthy individuals.
Celox Gauze (chitosan-based, ~$35-40/roll) works through ionic bonding rather than the clotting cascade. This is a critical distinction: Celox can work on patients taking blood thinners like warfarin or heparin, because it doesn’t depend on clotting factors. If you or someone in your household takes anticoagulant medication, Celox is the better choice for your kit.
Plain compressed gauze ($3-5/roll) absolutely works when packed correctly with sustained pressure. The mechanical pressure you create by tightly filling the wound cavity does most of the work. Hemostatic agents are a significant advantage, not a strict requirement.
All hemostatic gauze requires a minimum three-minute hold time with continuous pressure to activate — don’t pack it in and walk away. Shelf life is typically three to five years for hemostatic products. Check expiration dates annually and store them in cool, dry conditions. Vacuum-sealed packaging extends viability.
Label your hemostatic gauze with the purchase date using a permanent marker. Set a phone reminder to check expiration every January when you review your emergency kit.
Do You Pack a Wound Before or After a Tourniquet?
This is one of the most common questions in hemorrhage control training, and the answer is straightforward: tourniquet first.
If you’ve got life-threatening bleeding from a limb, the tourniquet is faster to apply — we’re talking 20-30 seconds — and it controls bleeding immediately while you prepare to pack. Here’s the sequence for a severe extremity hemorrhage:
- Apply tourniquet high and tight
- Expose and assess the wound
- Pack the wound with gauze
- Apply a pressure dressing over the packing
- Note the time, monitor the patient
Why bother packing after the tourniquet’s already on? Because wound packing provides localized hemorrhage control that can potentially allow medical providers to convert the tourniquet later — especially if transport to a hospital takes time. In a wilderness setting, where evacuation might take hours, this matters enormously.
For wounds that can’t receive a tourniquet — torso wounds, groin bleeds, neck injuries — wound packing with direct pressure is your primary and often only option. No standard tourniquet works on the trunk of the body.
Four Common Tourniquet Mistakes That Can Kill
Let’s address these directly — they are among the most common errors seen in both training and real incidents.
1. Not tightening enough. I’ve already covered this, but it bears repeating. A loose tourniquet increases bleeding by creating a venous tourniquet effect — it blocks blood from leaving the limb while arterial blood keeps pumping in. The result is more bleeding, not less. Crank it down. Check for cessation of bleeding distal to the device.
2. Placing it too close to the wound. If the tourniquet sits on or immediately adjacent to the wound, it can’t create effective compression proximal to the damaged vessel. Maintain that 2-3 inch gap. When in doubt, go higher.
3. Placing it over a joint. The elbow and knee have irregular bony anatomy that prevents the tourniquet from compressing evenly. It simply won’t occlude the artery. Go above the joint — upper arm for elbow-area injuries, upper thigh for knee-area injuries.
4. Removing or loosening the tourniquet in the field. Once it’s on and working, leave it. This is a decision for a surgeon, not a bystander. The only exception: if you’re a trained provider performing a tourniquet-to-wound-packing conversion in a prolonged field care scenario. If that doesn’t describe you, don’t touch it.
You’re loading gear at a trailhead parking lot when someone using a hatchet to split kindling hits their femoral artery on the inner thigh. Blood is pulsing out with each heartbeat, pooling on the ground within seconds. They’re 45 minutes from the nearest hospital. You have your pack nearby with a CAT tourniquet and a roll of compressed gauze.
In that scenario, you’d apply the tourniquet high on the upper thigh — as close to the groin as possible — and twist until the bleeding stops. Then you’d expose the wound, pack it with gauze using sustained two-finger pressure, and apply a pressure bandage. Note the time. Call 911. Keep the patient warm and monitor for shock. If you need to manage their body temperature, use whatever insulation you have — a sleeping bag, emergency blanket, or extra jacket under and over them.
How Long Can a Tourniquet Stay On?
This is one of the most asked questions in Stop the Bleed classes, and the answer has changed dramatically from what many people learned years ago.
The current medical consensus, supported by both military data and civilian trauma research, is that a tourniquet can safely remain in place for up to two hours with very low risk of permanent limb damage. Some studies — particularly from military combat casualty data — suggest that tourniquets have been left on for four to six hours without resulting in amputation, though risk increases with time.
Here’s why noting the time matters: it’s not for you — it’s for the surgical team at the hospital. When the patient arrives, the trauma surgeon uses that tourniquet time to make decisions about limb salvage strategy, vascular repair priority, and reperfusion protocols. Writing “TQ 14:32” on the patient’s forehead or on the tourniquet itself gives that team critical information.
What you should never do is loosen the tourniquet periodically to “let blood flow.” This was taught for decades, and it’s wrong. The old “loosen every 15 minutes” advice is now considered dangerous by every major trauma authority, including the American College of Surgeons and the CoTCCC. Loosening causes re-bleeding, washes out any clots that have formed, and can push the patient back into hemorrhagic shock.
Once the tourniquet is on and working, your only job is to note the time and keep the patient alive until they reach a hospital. Don’t loosen it. Don’t remove it. That’s the surgeon’s call.
Tourniquet Myths That Need to Die
There’s more bad information about tourniquets circulating online than almost any other first aid topic. Let me kill the worst myths right now.
Myth: Tourniquets cause automatic amputation. This is the big one, and it’s dangerously wrong. Modern data — including a comprehensive review published in the Journal of Trauma and Acute Care Surgery — shows that limb loss directly caused by tourniquet application alone is extremely rare. What causes amputation is the injury itself, delayed care, or infection. A tourniquet that keeps someone alive long enough to reach a surgeon is saving limbs, not costing them.
Myth: Only medical professionals should use tourniquets. False. The entire Stop the Bleed program — developed by the American College of Surgeons after the Boston Marathon bombing in 2013 — was specifically designed to train laypersons. Bystanders with basic training have successfully applied tourniquets that saved lives in mass casualty events, car accidents, and industrial incidents. You don’t need a medical license. You need 30 seconds and a tourniquet.
Myth: Try other methods first — tourniquets are a last resort. This outdated advice has been formally abandoned by both TCCC and civilian trauma guidelines. For life-threatening limb hemorrhage — blood spurting, pooling on the ground, or from an amputation — the tourniquet is the first intervention, not the last. Direct pressure takes longer to set up, requires sustained effort, and may not control arterial bleeding. The tourniquet buys you time to do everything else.
Myth: You should loosen the tourniquet every 15 minutes. Covered above, but worth repeating here: this advice is outdated and dangerous. It was based on old assumptions about tissue necrosis that modern evidence has debunked. Re-bleeding from a loosened tourniquet can kill faster than any theoretical tissue damage from sustained compression.
The shift in civilian trauma care since 2013 has been profound. Tourniquets have moved from “scary last resort” to “essential first-line intervention.” If you’re still hesitant about using one, that hesitation is based on myths, not medicine.
Special Situations: Head, Neck, and Torso Bleeds
What about life-threatening bleeding from areas where you can’t use a tourniquet?
Junctional Hemorrhage: Groin and Armpit Bleeding
The groin (inguinal area) and armpit (axilla) are the two most common junctional bleed sites in trauma — and they’re among the deadliest because major arteries run through these areas while being inaccessible to standard tourniquets.
The technique for wound packing for groin and armpit bleeding is specific: the gauze goes deep into the crease of the joint, packed tightly against the bleeding vessel. You’re essentially trying to compress the artery between the gauze and the underlying bone. Once packed, hold pressure with both hands or apply a pressure dressing and lean your body weight into it. This requires sustained effort — you may need to hold pressure for 10-15 minutes or longer until EMS arrives.
In a vehicle accident, be aware of potential pelvic fracture bleeds. A fractured pelvis can produce massive internal hemorrhage that wound packing alone won’t control. An improvised pelvic binder — a bedsheet wrapped tightly around the hips and tied or clamped at the front — can provide circumferential compression that helps reduce pelvic volume and slow bleeding. SAM Pelvic Slings serve this purpose in professional kits.
Head Wounds
Head wounds bleed impressively because the scalp is extremely vascular. Most head bleeding looks worse than it is. Apply direct pressure with gauze. If the wound is deep enough to pack, pack it. Do not apply a tourniquet to the neck to control a head bleed.
Neck Wounds
Pack and hold direct pressure. Be extremely careful not to compress both sides of the neck simultaneously — you’ll cut off blood flow to the brain. Press on the wounded side only. This is a scenario where hemostatic gauze provides a meaningful advantage.
Torso Wounds: Chest and Abdomen
These are the hardest to manage with basic first aid. For penetrating chest wounds, a chest seal prevents air from entering the pleural space. For abdominal wounds, apply bulky dressings and direct pressure. Do not try to push organs back in. Do not remove embedded objects. Do not attempt to pack deep abdominal wounds unless you have specific training — blind packing into the abdomen can cause additional organ damage.
For all of these, the principle is the same: direct pressure, applied as close to the source of bleeding as possible, maintained until professional medical help arrives.
Building a Hemorrhage Control Kit
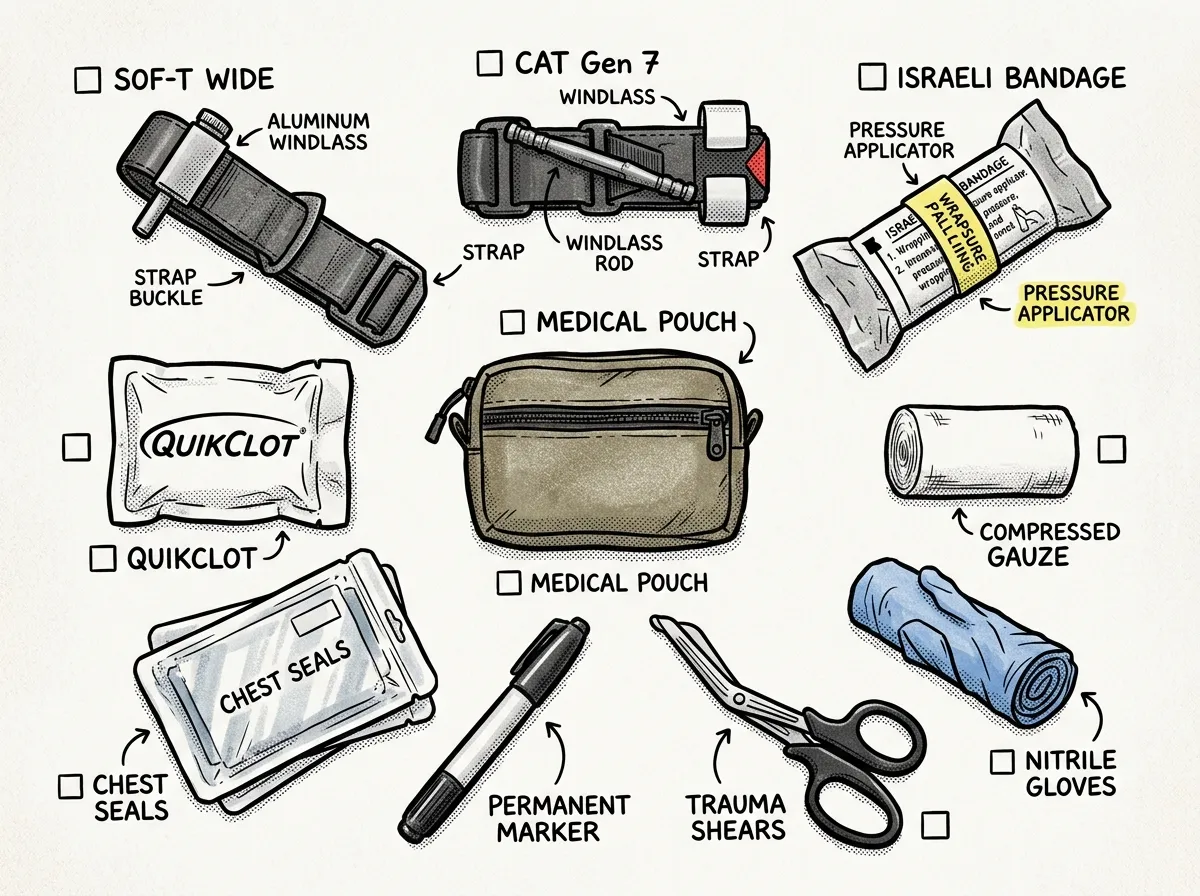 Essential hemorrhage control kit contents laid out for inspection
You don’t need a $200 tactical medical bag. Here’s what actually matters:
- CAT Gen 7 or SOF-T Wide tourniquet (carry at least two)
- QuikClot Combat Gauze or Celox Gauze (hemostatic, 1-2 rolls)
- Plain compressed gauze (2 additional rolls)
- 4-inch Israeli Emergency Bandage (pressure dressing)
- Medical shears — for cutting clothing fast
- Nitrile gloves — two pairs minimum
- Permanent marker — for noting tourniquet time
- Chest seal (vented, for penetrating chest wounds)
This kit fits in a small vacuum-sealed pouch small enough for a daypack, glove compartment, or cargo pocket. Total cost runs under $80 with plain gauze instead of hemostatic, or around $120 with QuikClot. Low-cost tourniquet knockoffs, often priced at $8-12, are widely reported to fail under load — velcro that releases under tension, windlass rods that bend, and stitching that separates. A genuine CAT from North American Rescue, the manufacturer that supplies the U.S. military, is the more reliable choice for gear meant to save a life.
This hemorrhage control kit should be part of your broader prepper first aid setup. It’s purpose-built for the one emergency where seconds genuinely matter.
Where to Take a Free Stop the Bleed Course
This is the single most important thing you can do after reading this article: take a hands-on class.
Stop the Bleed courses are free, typically last about two hours, and are offered through hospitals, fire departments, community colleges, and civic organizations across the country. The program was launched by the Department of Homeland Security and the American College of Surgeons, and it’s trained millions of civilians since 2015.
To find a course near you, visit stopthebleed.org and use their course finder. Enter your zip code, and you’ll see upcoming classes in your area. Many classes are offered monthly in larger metro areas.
A few things to know:
- Many courses provide a free tourniquet upon completion — that alone is worth the $30 value of attendance
- The American Red Cross also covers bleeding control within their First Aid/CPR/AED courses, though it’s not as focused as a dedicated Stop the Bleed class
- If you can’t find an in-person course, some organizations offer virtual options — but in-person is strongly recommended, because the hands-on practice component is where the real learning happens
- Bring your own tourniquet to class if you have one — you’ll learn on the exact device you carry
After the course, keep practicing. Applying a tourniquet to one’s own thigh once a month and timing the process is a useful ongoing exercise. Practice wound packing on a rolled towel with a hole cut in it. Build the muscle memory alongside your other survival skills. Reading about how to apply a tourniquet to stop bleeding is a starting point. Hands-on repetition is what makes it work under pressure.
Set a quarterly calendar reminder to practice tourniquet application. Skills you don’t rehearse are skills you don’t have when it counts.
Frequently Asked Questions
Do you pack a wound before a tourniquet?
No. If bleeding is life-threatening and coming from a limb, get the tourniquet on first. Tourniquet application takes 20-30 seconds and immediately controls blood flow. Once the tourniquet is working, you can then expose the wound, pack it with gauze, and apply a pressure dressing underneath. The tourniquet buys you the time to do the more involved wound packing procedure calmly and effectively.
What are the four common mistakes when applying a tourniquet?
The four most common mistakes are: (1) not tightening enough — a partial tourniquet increases bleeding by blocking venous return while allowing arterial flow; (2) placing it too close to or directly on the wound instead of 2-3 inches above; (3) placing it over a joint like the knee or elbow where it can’t compress effectively; and (4) failing to note the time of application, which the surgical team needs for treatment decisions.
Do you put a tourniquet over or under the wound?
A tourniquet goes above the wound — meaning between the wound and the heart, 2-3 inches proximal to the bleeding site. If the wound is on the lower leg, the tourniquet goes on the thigh. If you can’t identify the exact wound location, go high and tight — as high on the limb as possible. Never place a tourniquet directly on a wound or below it (farther from the heart).
Can you use a tourniquet on the neck, head, or torso?
No. Tourniquets only work on extremities — arms and legs. For life-threatening bleeding from the head, neck, or torso, wound packing with direct pressure is your primary option. Junctional areas like the groin and armpit should be packed deeply with gauze and held with sustained two-handed pressure or a pressure dressing.
You Might Be the Only Help Available
Here’s the reality that drives everything in this guide on how to use a tourniquet and pack a wound: in the minutes after a severe injury, professional help isn’t there. Average EMS response time in urban areas is 7-10 minutes. In rural or wilderness settings, it can be an hour or more. A severed femoral artery can cause fatal blood loss in under five minutes.
You’re the first responder. Not paramedics, not ER doctors — you.
Knowing hemorrhage control techniques — tourniquet application, wound packing, pressure dressings — puts you in the small percentage of people who can actually do something meaningful when it matters most. The people who perform best in real emergencies aren’t the ones who read the most. They’re the ones who practiced the most.
Get the gear. Take the free Stop the Bleed course. Practice until the steps are reflexive. That’s not fear-mongering — that’s being ready for a world that doesn’t wait for the ambulance.
The Complete
Prepper's Reference.
149 articles synthesized into one comprehensive PDF — twelve chapters covering water, food, shelter, first aid, comms, and scenario-specific preparedness. Free with your email.
Unsubscribe anytime · We never share your email
You're in. Check your inbox.
Keep Reading
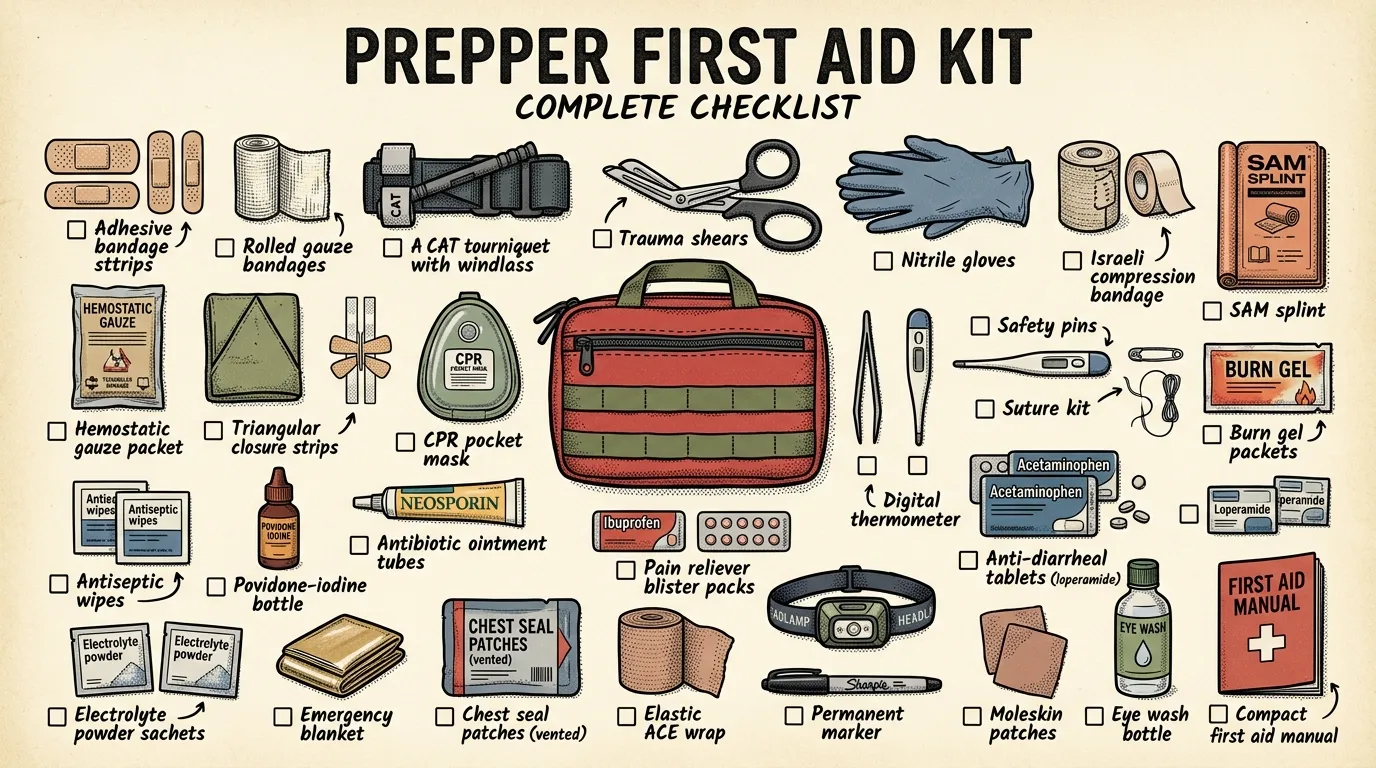
Prepper First Aid Kit: Complete Checklist & Guide
Build the ultimate prepper first aid kit with our complete checklist, budget tiers, and maintenance plan.
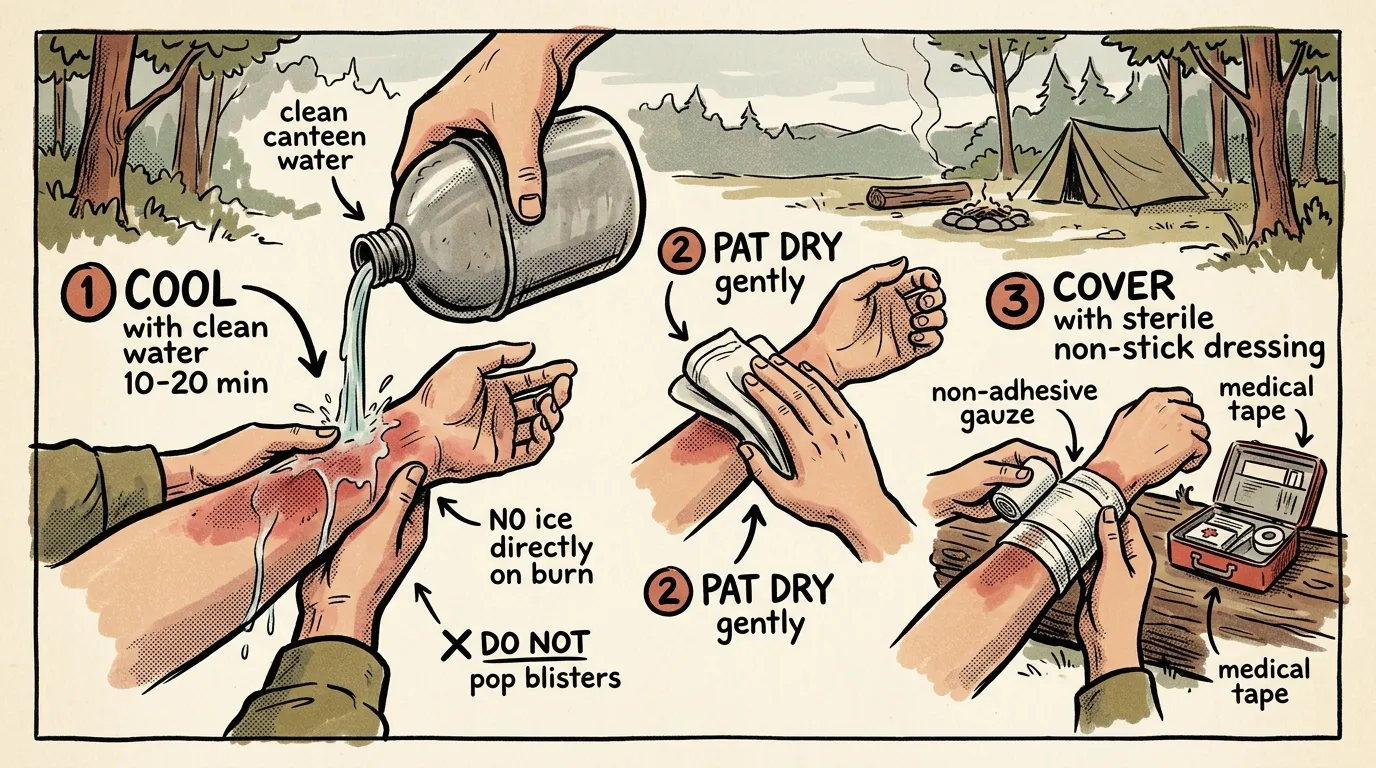
How to Treat Burns in the Field: Step-by-Step Guide
Learn how to treat burns in the field with this protocol. Cool, clean, cover — plus when to evacuate. Step-by-step guide.
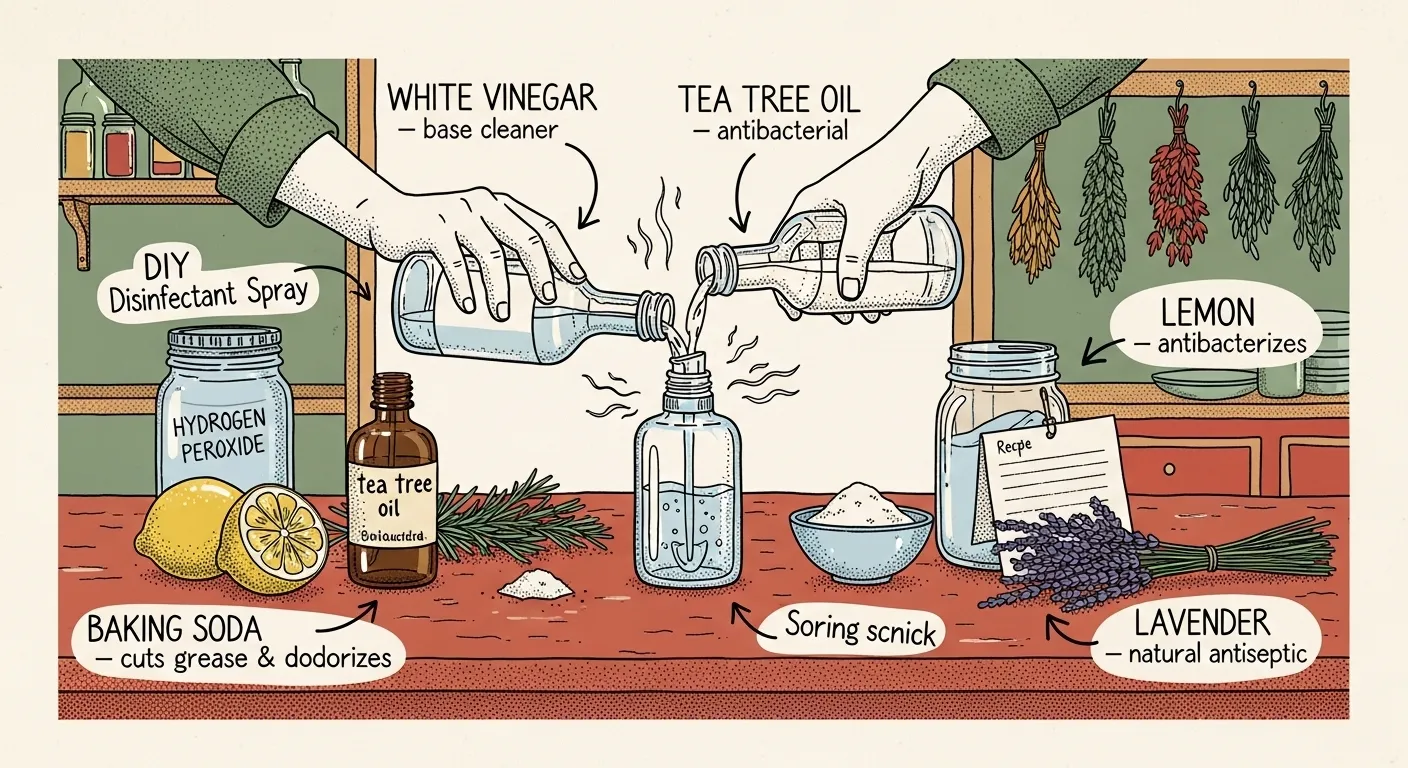
How to Make Your Own Natural Disinfectants
Learn how to make DIY natural disinfectants with simple ingredients, safe storage tips, and prepper-friendly recipes for a cleaner home.