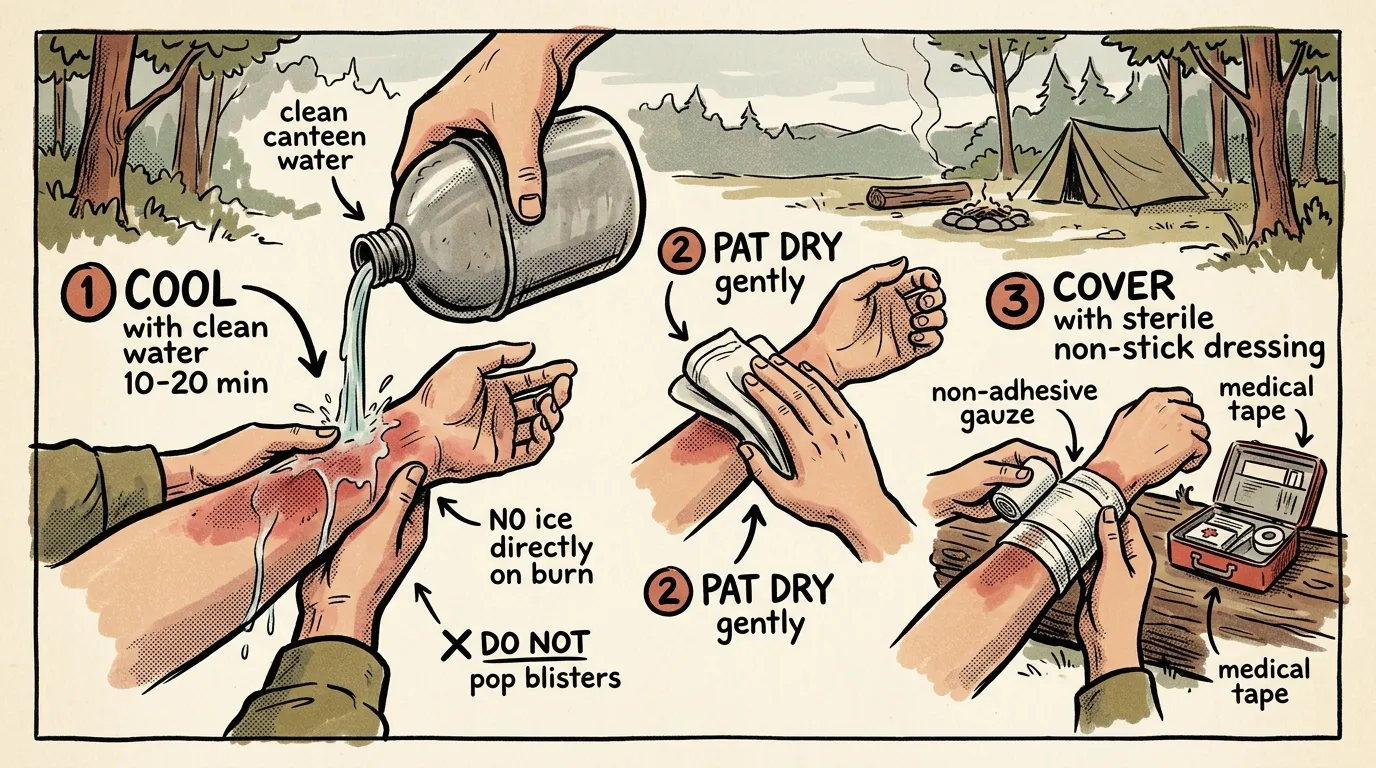
This article teaches how to treat burns in the field using wilderness first aid protocols, covering burn classification, cooling techniques, wound care, pain management, infection prevention, and evacuation criteria for backcountry and off-grid scenarios.
Key Takeaways
- Cool every burn with clean, cool running water for at least 10 minutes — never use ice, snow, or freezing water.
- Classify the burn by depth (superficial, partial-thickness, full-thickness) before choosing your treatment plan.
- Leave blisters intact — they're sterile natural dressings that protect against infection in dirty field environments.
- Evacuate immediately for full-thickness burns, burns to the face/hands/feet, circumferential burns, or any signs of inhalation injury.
- Carry a dedicated field burn kit (under 8 oz) with Water-Jel dressings, bacitracin packets, and non-adherent gauze.
- Stack ibuprofen and acetaminophen together for significantly better pain control than either drug alone.
A common mistake in field burn treatment is using ice-cold water to numb the pain quickly. It feels like it’s helping, but ice-cold water constricts blood vessels and can actually deepen burn damage. Cool — not cold — water is the standard recommended by wilderness medicine guidelines.
Knowing how to treat burns in the field isn’t optional when you spend time in backcountry environments. Camp stoves tip over. Embers pop. Boiling water splashes. And when the nearest emergency room is a six-hour hike and a helicopter ride away, what you do in the first 20 minutes determines whether someone heals cleanly or ends up with a serious infection — or worse.
Quick Summary
- Cool the burn with clean, cool (not cold) water for 10-20 minutes. Never use ice.
- Classify the burn by depth — superficial, partial-thickness, or full-thickness — to decide your treatment plan.
- Clean gently with drinkable-quality water and mild soap if available. Don’t scrub.
- Cover with a non-adherent dressing and secure loosely. Change dressings at least once daily.
- Manage pain aggressively with ibuprofen and acetaminophen stacked together.
- Know your evacuation triggers — face, hands, circumferential burns, or anything larger than the patient’s palm needs professional care.
Why Burns Are Different in the Field
Here’s the thing about burns that makes them uniquely dangerous in wilderness and off-grid settings: they don’t stop injuring tissue immediately. Even after the heat source is gone, the thermal energy stored in skin layers keeps cooking deeper tissue for several minutes. That’s why cooling matters so much — you’re not just soothing pain, you’re halting active tissue destruction.
The other problem? Burns destroy your skin’s barrier function. Out in the field, you’re surrounded by dirt, ash, bacteria, and limited hygiene options. A burn that would heal fine at home with daily shower access and fresh gauze can turn into a raging infection when you’re three days from a trailhead.
There’s a third factor that doesn’t get talked about enough: hypothermia risk during burn treatment. Cooling a burn for 10-20 minutes in a cold or wet environment can drop core body temperature, especially with larger burns that compromise the skin’s thermoregulatory function. Wilderness medicine guidance notes that stove and scald burns treated in cold conditions can lead to hypothermia during the cooling phase if the rest of the patient isn’t kept warm. The fix is straightforward: cool the burn site specifically, but keep the rest of the patient warm with insulation layers, a sleeping bag, or a space blanket. Wrap everything except the burn area. In cold, wet climates like the Pacific Northwest, this isn’t optional — it’s part of the protocol.
Classifying Burns: Know What You’re Looking At
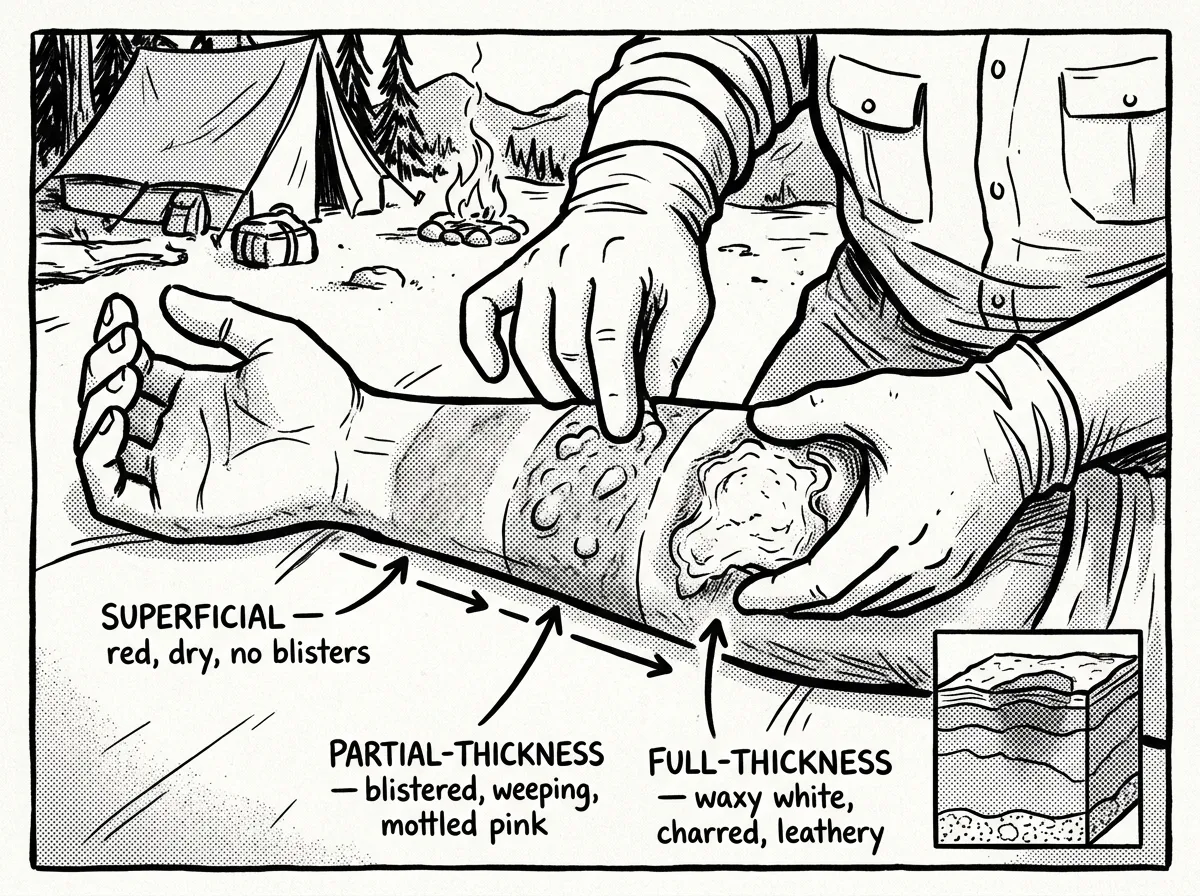 Visual comparison of burn depth classifications
Before you can treat effectively, you need to know what you’re dealing with. The burn classification system used in wilderness medicine tells you what’s happening to the tissue and directly determines your treatment approach.
Superficial Burns (Old “First Degree”)
Appearance: Red, dry skin without blisters. Sensation: Painful to touch. Healing time: 3-7 days. Field treatment: Cool, moisturize, manage pain. No dressing required unless the area will be exposed to friction or dirt.
Think sunburn or a brief touch against a hot pan. These hurt, but they’ll heal on their own without scarring. The skin’s barrier is still intact.
Partial-Thickness Burns (Old “Second Degree”)
Appearance: Blisters, weeping fluid, pink or red moist skin beneath blisters. Sensation: Intense pain — often the most painful burn depth. Healing time: 2-3 weeks. Field treatment: Full protocol — cool, clean, cover, monitor daily for infection.
These are the most common burns in field settings — boiling water splashes, contact with hot cookware, steam burns from improperly opened cook pots. They carry real infection risk and can scar.
Full-Thickness Burns (Old “Third Degree”)
Appearance: Waxy white, brown, leathery, or charred tissue. Sensation: Reduced or absent pain — nerve endings are destroyed. Healing time: Won’t heal without medical intervention. Field treatment: Cool, cover, and begin evacuation immediately.
Here’s the counterintuitive part: these often don’t hurt much. If someone says “it doesn’t hurt that bad” but the burn looks white or leathery — that’s a bad sign, not a good one.
Mixed-Depth Burns: What You’ll Actually See
Here’s something the textbooks gloss over: most real-world burns present as mixed-depth. A scald from boiling water might have superficial damage at the edges where the water cooled as it ran across the skin, and partial-thickness injury at the center where contact time was longest. A contact burn from a hot grate might have full-thickness damage at the point of impact surrounded by a ring of partial-thickness blistering.
Always treat a mixed-depth burn according to the most severe depth present. If any area looks full-thickness, your entire treatment plan escalates to that level, including evacuation.
A quick field test: if you press on the burned skin and it doesn’t blanch (turn white then return to color), you’re likely looking at a full-thickness burn that needs evacuation.
How to Treat Burns in the Field: Step-by-Step Protocol
- Remove the person from the heat source and ensure the scene is safe — check for ongoing fire, fuel spills, or electrical hazards.
- Cool the burn with clean, cool running water for 10-20 minutes — use a water bottle, hydration bladder, or gravity filter output.
- Remove jewelry, watches, and clothing near the burn before swelling starts.
- Assess burn depth and estimate total burn size using the Rule of Palms.
- Clean the wound gently with drinkable-quality water and apply a thin layer of bacitracin or burn gel.
- Cover with a non-adherent dressing, secure loosely with gauze, and initiate evacuation if criteria are met.
This protocol aligns with the 2024 Wilderness Medical Society Clinical Practice Guidelines for burn management. Here’s each step in detail.
The Cooling Phase — Get This Right
This is the single most important thing you’ll do. Cool running water for a minimum of 10 minutes — 20 is better. That can feel like an eternity when someone’s in pain and the instinct is to move to the next step. Set a timer on your watch or phone. Don’t cheat this.
If you don’t have running water, soak a clean cloth or bandana and lay it over the burn. Re-wet it every 2-3 minutes so it doesn’t warm up and trap heat against the skin.
What you absolutely don’t do: no ice, no ice water, no snow directly on the burn. This is a common mistake in mountain environments, where snow is right there, tempting you. Cool water — think “comfortable swimming pool temperature” — is what you want.
Cool water saves tissue. Cold water destroys it. That distinction matters more than almost anything else in burn first aid.
Cleaning the Wound
After cooling, you need to clean the burn before covering it. Use water that’s clean enough to drink — if you wouldn’t put it in your mouth, don’t put it on a burn. If you’re carrying a portable water filter, run water through it first. A gentle irrigation with a squeeze bottle works perfectly.
Don’t scrub. Don’t pick at dead skin. If there’s debris embedded in the wound, irrigate it out with pressure from a water bottle squeeze, but don’t dig at it with tweezers or your fingers.
If you have mild soap (like a diluted camp soap), a very gentle wash around — not directly on — the burn helps. Then rinse thoroughly.
The Blister Question
Should you pop burn blisters in the backcountry? In a field setting, the answer is almost always no. That blister is a sterile, natural dressing your body created. Once you pop it, you’ve got an open wound in a dirty environment.
The exception: if a blister is so large it’ll inevitably rupture from movement or gear contact, it’s better to drain it in a controlled way. Use a sterilized needle (flame-sterilize or use an alcohol swab), puncture at the base, let fluid drain, but leave the blister roof intact as a biological bandage. Then dress it like an open wound.
This blister advice goes against what some older wilderness medicine textbooks say, but current wilderness medicine guidance favors leaving blisters intact whenever possible. Blisters that are popped too early in dirty field conditions are far more likely to become infected. Leave them alone unless they’re the size of a silver dollar and in a high-friction area.
Dressing and Covering
You need a non-adherent layer against the burn. Regular gauze will bond to the wound and cause agony during dressing changes. This is non-negotiable.
The Water-Jel burn dressing — around $8-12 for a 4x4, per manufacturer pricing — is a solid choice for a first aid kit. It’s a gel-soaked, non-adherent pad that cools and protects simultaneously. If you don’t have one, plastic wrap (yes, regular kitchen cling wrap) is actually an excellent field dressing. It’s non-adherent, see-through so you can monitor the wound, and provides a moisture barrier. Most wilderness medicine instructors have come around on this one.
Over the non-adherent layer, wrap loosely with gauze or a clean bandana. Don’t wrap tightly — burns swell, and a tight wrap can become a tourniquet.
How to Estimate Burn Size Using the Rule of Palms
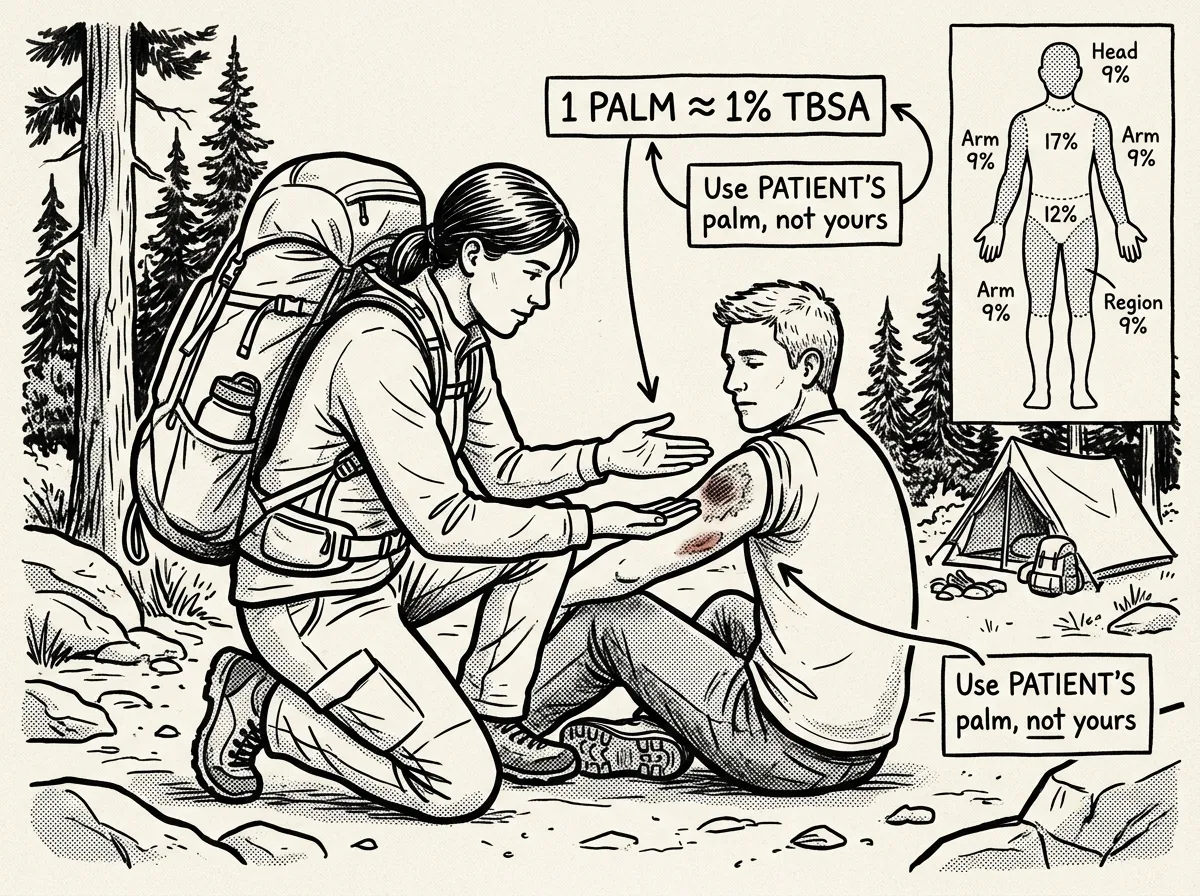 Using the patient’s palm to estimate burn area
Knowing how deep a burn goes is only half the assessment. You also need to estimate how much body surface area (BSA) is affected, because burn size directly drives evacuation decisions. Here’s how to do it quickly in the field.
The Rule of Palms: The patient’s palm — fingers together but not including the wrist — represents approximately 1% of their total body surface area (TBSA). To estimate the size of an irregular burn, mentally “tile” the patient’s palm across the burned area and count how many palms it takes to cover.
A burn across someone’s entire forearm? That’s roughly 3% TBSA. Their whole upper back? About 9%. The entire front of one leg? Around 9%.
For larger burns, a simplified Rule of Nines helps as a cross-reference:
- Head and neck: 9%
- Each arm (entire): 9%
- Front of torso: 18%
- Back of torso: 18%
- Each leg (entire): 18%
- Groin: 1%
Any burn exceeding 10% TBSA in an adult — or 5% in a child — requires evacuation. The Rule of Palms is faster and more practical for irregular, patchy burns you’ll actually encounter from campfire sparks, splashes, or stove flare-ups. The Rule of Nines works better for larger-area burns where you’re dealing with whole limbs or torso sections.
For children, the proportions are different — a child’s head is a larger percentage of TBSA (about 18% in infants). When in doubt with pediatric burns, err toward evacuation. Always.
Pain Management in the Field
Burns hurt. A lot. And burn pain management isn’t just about comfort — uncontrolled pain causes stress responses that impair healing and can lead to shock in severe cases.
Here’s a recommended pain management stack for field burns:
Ibuprofen (400-600mg) — anti-inflammatory that directly addresses burn swelling. Take with food if possible.
Acetaminophen (500-1000mg) — works through a different pathway, so you can safely take both. Together, they’re significantly more effective than either drug alone — multiple studies confirm this combination rivals low-dose opioids for acute pain.
These can be stacked and alternated every 3-4 hours. Someone with a significant partial-thickness burn should be on this protocol around the clock, not just “when it hurts.” Stay ahead of the pain.
If the person can’t take oral medication due to nausea, crush the ibuprofen tablets and mix them with a small amount of water to make them easier to get down. Don’t crush acetaminophen extended-release tablets though — standard ones only.
Keep the burned area elevated above the heart if possible. This reduces swelling pressure and makes a noticeable difference in pain levels, especially with hand and forearm burns.
Inhalation Injuries: The Hidden Danger in Field Burns
This is the one that kills people — and it’s the one most outdoor first aid articles barely mention. Inhalation injuries from breathing superheated air, steam, or smoke are the leading cause of death in burn patients, and they’re highly relevant to anyone around campfires or in wildfire-prone areas.
The danger is that airway tissues swell progressively over hours. Someone who’s breathing fine immediately after smoke exposure can develop life-threatening airway obstruction two to six hours later — well after you’ve stopped thinking about the initial incident.
Warning Signs to Watch For
- Singed nasal hair or eyebrows
- Soot or carbon deposits around the nostrils or inside the mouth
- Hoarse, raspy, or changing voice quality
- Coughing, especially producing dark sputum
- Difficulty swallowing
- Burns to the face, lips, or inside the mouth
- History of being in an enclosed space with fire or smoke (inside a tent, near a contained burn)
What to Do
If you identify any of these signs, this is an immediate evacuation scenario — no exceptions. Even if the person insists they feel fine.
Position the patient sitting upright to maximize airway opening. Monitor their breathing closely, tracking respiratory rate every 15 minutes. If you have the ability to call for help via satellite communicator or cell phone, do it now. Airway swelling doesn’t reverse in the field, and once it progresses past a certain point, it requires intubation that you cannot perform in the backcountry.
Your group is sitting around a campfire when the wind shifts suddenly, sending a thick plume of smoke directly into someone’s face for several seconds. They cough hard, their eyes water, and then they seem fine. Twenty minutes later, their voice sounds scratchy. An hour later, they’re clearing their throat constantly. This is not “just some smoke.” These are progressive signs of airway involvement. Start your evacuation plan immediately — don’t wait to see if it gets worse, because by the time it’s obviously worse, you may not have time.
Preventing Infection — Your Biggest Field Threat
Once you’ve gotten past the acute phase, your main enemy in wilderness burn care becomes infection. Every dressing change is both a treatment opportunity and an infection risk.
- Wash your hands thoroughly before touching the dressing
- Remove old dressing carefully — wet it first if it’s sticking
- Irrigate the wound with clean water
- Look for infection signs: increased redness, swelling, pus, red streaks, fever
- Apply fresh antibiotic ointment (bacitracin preferred)
- Cover with new non-adherent dressing and secure loosely
- Document the wound appearance — take a photo if you can
Change dressings at least once daily. Twice is better if you have enough supplies. Each time you do it, you’re looking for burn infection signs: spreading redness beyond the burn margin, cloudy or foul-smelling discharge, red streaks radiating outward, or systemic fever.
If you see any of those signs — especially red streaking or fever — your timeline just changed. That’s no longer a “continue with self-care” situation. That’s an evacuation.
Don’t forget to check tetanus immunization status when you can. Any burn that breaks the skin is a potential tetanus risk, and most adults haven’t had a booster within the recommended 10-year window. Make a note to address this once you reach medical care.
Climate Considerations
Where you are matters. If you’re in a humid Gulf Coast or Southeast environment, infection risk is significantly higher. Bacteria thrive in warm, moist conditions, and sweat under dressings creates a perfect breeding ground. Change dressings more frequently and consider using a lighter wrap that allows some airflow.
High desert is a different problem. Dry air desiccates the wound, which slows healing and can crack fragile new tissue. Keep the burn moist under its dressing with a slightly thicker layer of ointment.
The Pacific Northwest is somewhere in between, but the constant dampness from rain means keeping dressings dry on the outside while moist on the wound side. Wrapping a small section of plastic bag over the outer dressing layer during rain can help maintain that balance.
Common Burn Treatment Myths That Make Things Worse
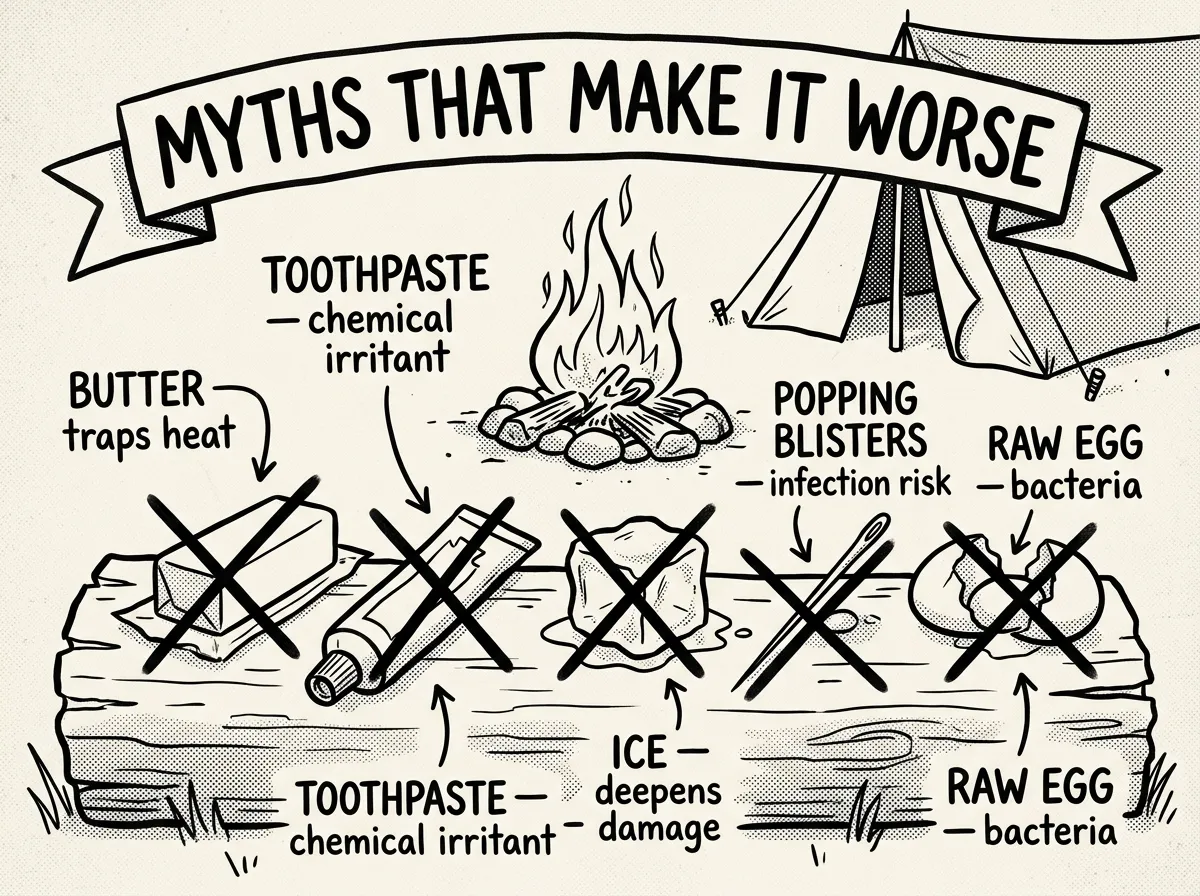 Debunking dangerous burn treatment myths in the field
Every one of these has been attempted in the field at some point. Every single one makes the situation worse.
Butter or Oil on Burns
This is the myth that refuses to die. Butter, cooking oil, coconut oil — any grease traps heat in the tissue and creates a warm, moist environment that breeds bacteria. You’re essentially slow-cooking the burn while setting up an infection. What to do instead: Cool running water, then a thin layer of antibiotic ointment.
Toothpaste on Burns
Toothpaste is occasionally used as an improvised burn remedy in the backcountry. Toothpaste contains menthol and other chemicals that cause irritation and can introduce bacteria into the wound. The “cooling” sensation is chemical irritation, not healing. What to do instead: Aloe-based burn gel if you want topical relief, or just cool water.
Ice or Snow Directly on Burns
This is covered earlier because it’s one of the most common mistakes in mountain environments. Ice causes vasoconstriction that deepens tissue damage and can cause frostbite on already compromised skin. The temperature differential is too extreme. What to do instead: Cool water at comfortable temperature for 10-20 minutes.
Popping Blisters Immediately
People instinctively want to pop blisters because they look alarming. But that blister fluid is sterile, and the blister roof is a natural biological dressing. Popping it in a dirty field environment converts a protected wound into an open one. What to do instead: Leave blisters intact. Drain only if rupture is inevitable due to size and location.
Raw Egg Whites
Raw eggs carry Salmonella risk, and applying them to broken skin is essentially introducing bacteria directly into a wound. There is zero evidence they help healing and significant evidence they cause infection. What to do instead: Bacitracin ointment and a sterile non-adherent dressing.
Every “home remedy” for burns has one thing in common: it makes things worse. Stick to cool water, clean dressings, and antibiotic ointment. That’s it.
Knowing When to Evacuate
Not every burn requires evacuation. But the ones that do require it urgently. Here’s your burn evacuation criteria framework:
Evacuate immediately for:
- Full-thickness (white, waxy, or charred) burns of any size
- Burns covering more than 10% of body surface area (use the Rule of Palms)
- Burns to the face, neck, hands, feet, genitals, or major joints
- Circumferential burns (wrapping all the way around a limb or finger)
- Any signs of inhalation injury: singed nasal hair, soot in the mouth, hoarse voice, difficulty breathing
- Burns from chemicals or electricity
- Burns in patients with significant medical conditions (diabetes, immunocompromised)
Manage in the field if:
- Superficial burns of any size (they’re uncomfortable but not dangerous)
- Small partial-thickness burns (smaller than the patient’s palm) on non-critical areas
- No signs of infection after 48-72 hours
If you carry a satellite communicator like a Garmin inReach, consider initiating a remote medical consultation for any burn you’re unsure about. Sending a photo with a text description to your emergency contact — who can relay to a physician — is increasingly practical and can help you make better triage decisions miles from the trailhead.
You’re on day two of a four-day backpacking trip. Your hiking partner trips over a log and puts both hands out to catch themselves — directly into the fire ring coals. Both palms are blistered, red, and weeping. Even though these are partial-thickness and not full-thickness, burns on both hands require evacuation. Your partner can’t grip trekking poles, manage zippers, or perform basic self-care. You need to cool, dress, and begin moving toward evacuation.
How to Treat Burns in the Field: Special Situations
Burns from Boiling Water
These are among the most common field burns — and a frequent question: how to treat a burn from boiling water in the field. Someone lifts a pot wrong, tips a stove, or opens a lid toward themselves. Scalds from boiling water typically produce partial-thickness burns over a wide area.
Strip soaked clothing immediately — fabric holds heat against skin and deepens the burn. Then begin cooling. Boiling water burns are sneaky because they often look superficial at first, then blister significantly over the next 4-8 hours. Check back frequently.
Burns from Hot Metal
Camp stove grates, pot handles, fire grates — how to treat a burn from hot metal while camping comes down to understanding that contact burns tend to be smaller but deeper than scald burns. The contact time is usually brief because you reflexively pull away, but metal transfers heat much more efficiently than water. These often produce partial-to-full-thickness damage in a small, well-defined area.
Chemical Burns
If someone spills stove fuel, battery acid, or another chemical on their skin, the protocol changes. Brush off any dry chemical first, then flush with massive amounts of water — 20 minutes minimum. Don’t try to neutralize the chemical with another chemical. Just water. Lots of it.
Electrical Burns
Lightning strikes and downed power lines near campsites are rare but present unique dangers. Electrical burns often cause deep internal tissue damage that isn’t visible on the skin surface — what you see may be a small entry and exit wound, but the current path between them can destroy muscle, nerve, and vascular tissue. Any electrical burn requires evacuation, and you should also assess for cardiac irregularities and spinal injury from the associated muscle contraction or fall.
Keeping a dedicated water container for wound irrigation, separate from drinking water, avoids the problem of fumbling with a shared, half-empty bottle when someone needs immediate burn care. The Platypus SoftBottle — about $10 — collapses flat when empty and weighs next to nothing, making it a low-cost addition to a field med kit.
Building Your Field Burn Kit
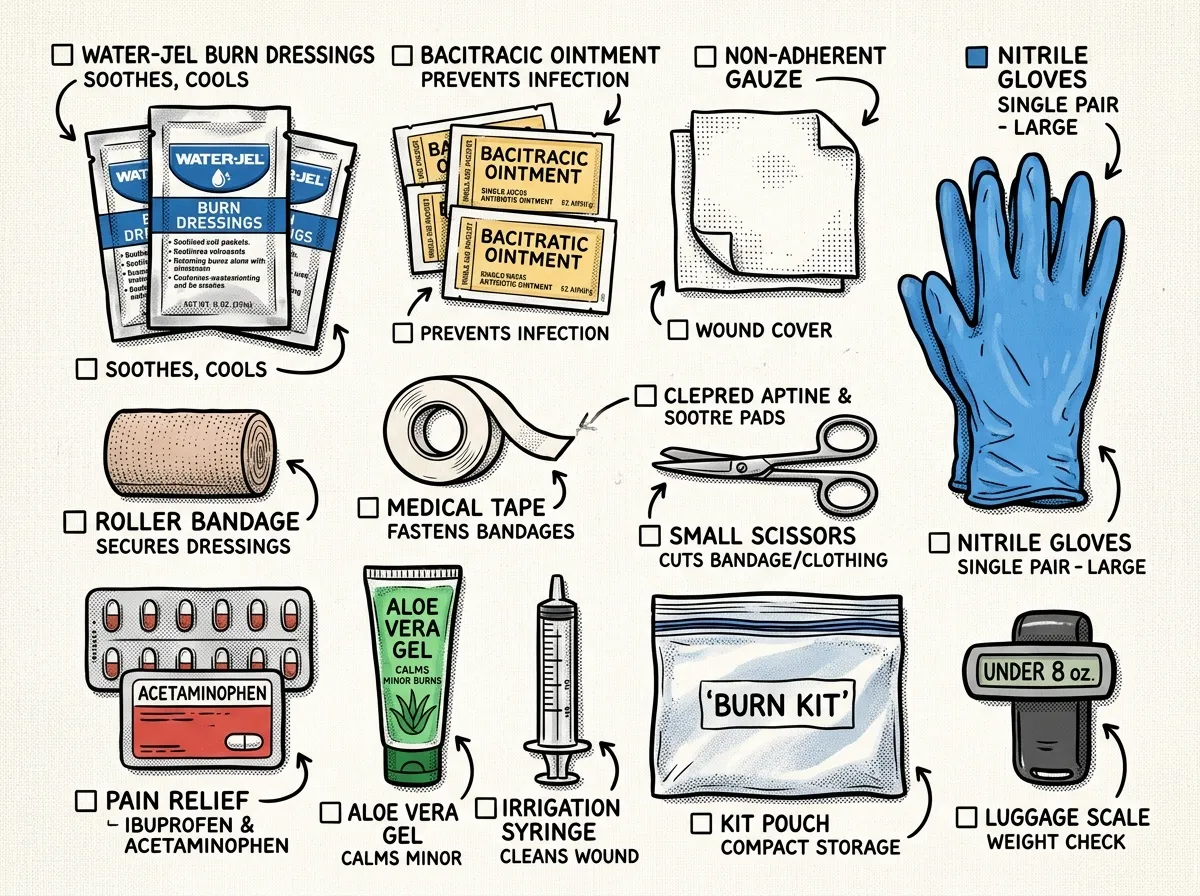 Complete lightweight field burn kit laid out for packing
You don’t need a lot of gear to handle backcountry burn treatment. But you need the right gear. This fits inside any first aid kit build.
- Water-Jel burn dressings (2-3 in 4x4 size)
- Non-adherent gauze pads (Telfa or similar)
- Rolled gauze for securing dressings
- Medical tape (paper tape is gentler on burned skin)
- Bacitracin antibiotic ointment — single-use packets
- Ibuprofen and acetaminophen
- Small irrigation syringe or squeeze bottle
- Nitrile gloves (at least 4 pairs)
- Plastic wrap — a small roll or pre-cut sheets
- Trauma shears for cutting away clothing
This whole kit weighs under 8 ounces and packs into a quart-sized zip bag. There’s no excuse not to carry it. These items are chosen based on their published specifications and suitability for wet, cold, and dusty trail conditions.
Healing Burns Faster and Minimizing Scarring
Once you’re past the immediate emergency and either evacuating or managing in the field, a few things speed healing and help you heal a burn fast without scarring:
Keep the wound moist. Dry wounds scar worse. Your ointment layer isn’t just for infection prevention — it creates the moist environment that skin cells need to regenerate.
Don’t let it see the sun. New burn skin is extremely photosensitive. Cover healed burns with clothing or SPF 30+ for at least six months. Sun exposure on new scar tissue causes permanent darkening.
Stay hydrated and eat. Burns increase metabolic demand. Your body is rebuilding tissue and needs extra calories and fluids. This matters more than most people realize in a field setting where you’re also hiking and working.
Don’t peel dead skin. When superficial burns start healing, the damaged skin peels naturally. Let it. Pulling it off exposes tissue that isn’t ready.
Monitoring Healing on Multi-Day Trips
If you’re managing a partial-thickness burn during a multi-day backcountry trip, you need to know what healing looks like — and what it doesn’t.
Good signs: Pink granulation tissue forming in the wound bed, decreasing pain levels, blisters reabsorbing, new skin growing inward from the edges. A partial-thickness burn should show clear progress by days 7-10.
Bad signs: Wound bed darkening or turning gray, increasing pain after initial improvement, wound edges not closing, any signs of infection. Burns that haven’t shown significant healing progress by day 10-14 in the field need professional evaluation — the burn may be deeper than initially assessed or may require grafting.
For burns near joints — hands, wrists, elbows, knees — perform gentle range-of-motion exercises several times daily during healing. Burns contract as they scar, and without movement, you can develop contractures that severely limit joint function. This is especially relevant for hand and wrist burns sustained while camping, which are among the most commonly reported in field settings. Just 2-3 minutes of careful flexion and extension at each dressing change makes a meaningful difference.
The Complete
Prepper's Reference.
149 articles synthesized into one comprehensive PDF — twelve chapters covering water, food, shelter, first aid, comms, and scenario-specific preparedness. Free with your email.
Unsubscribe anytime · We never share your email
You're in. Check your inbox.
Keep Reading
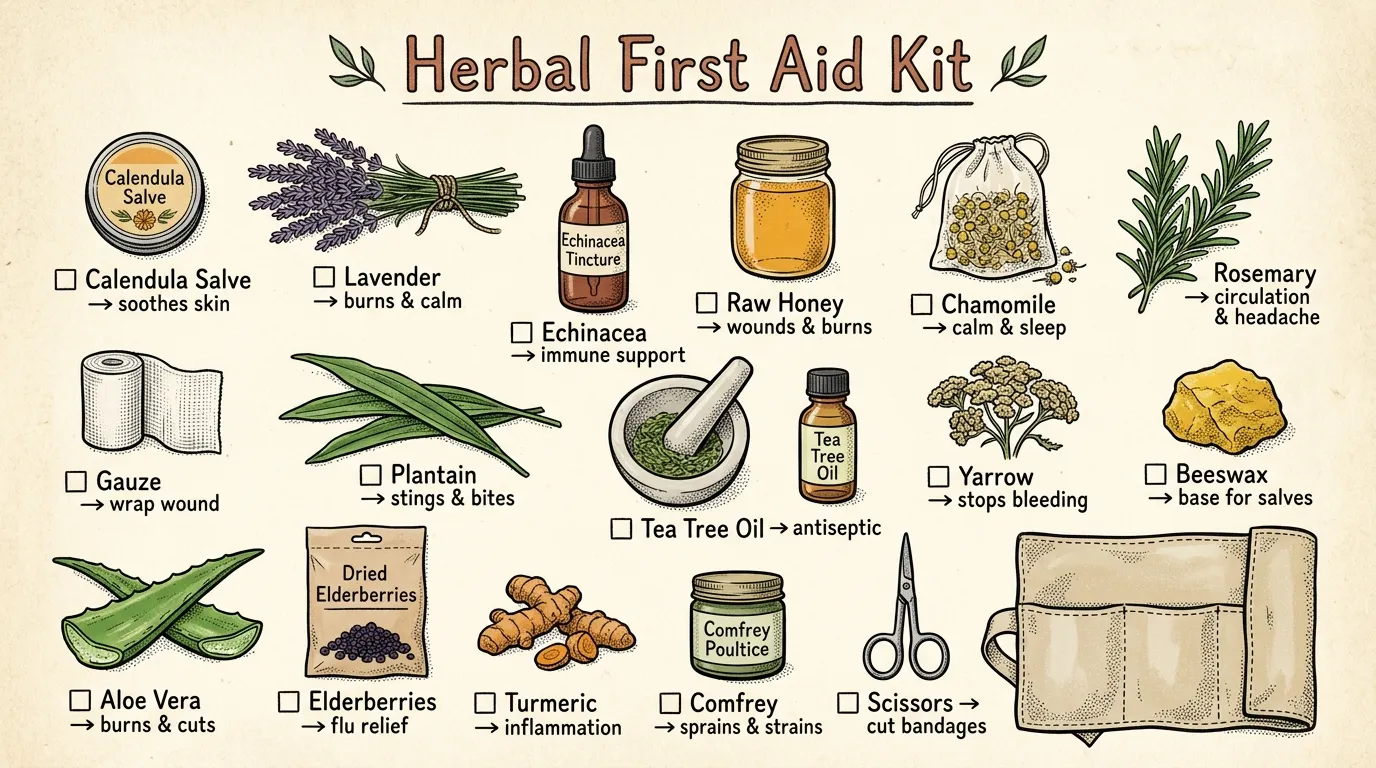
Herbal Medicine for Preppers: Build a Natural First Aid Kit
Herbal medicine for preppers covers the best herbs to stock, safe use guidelines, and how to build a natural first aid kit for emergencies. Start here.
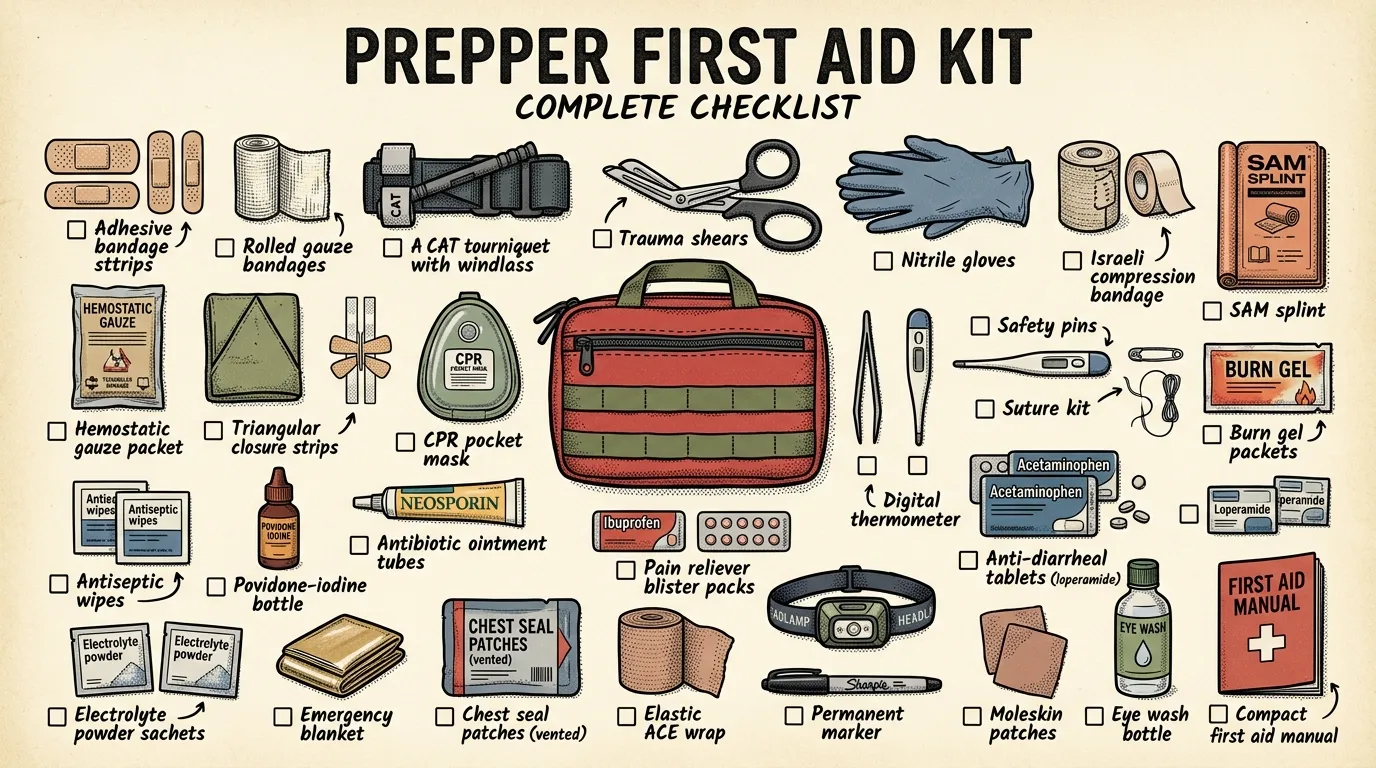
Prepper First Aid Kit: Complete Checklist & Guide
Build the ultimate prepper first aid kit with our complete checklist, budget tiers, and maintenance plan.
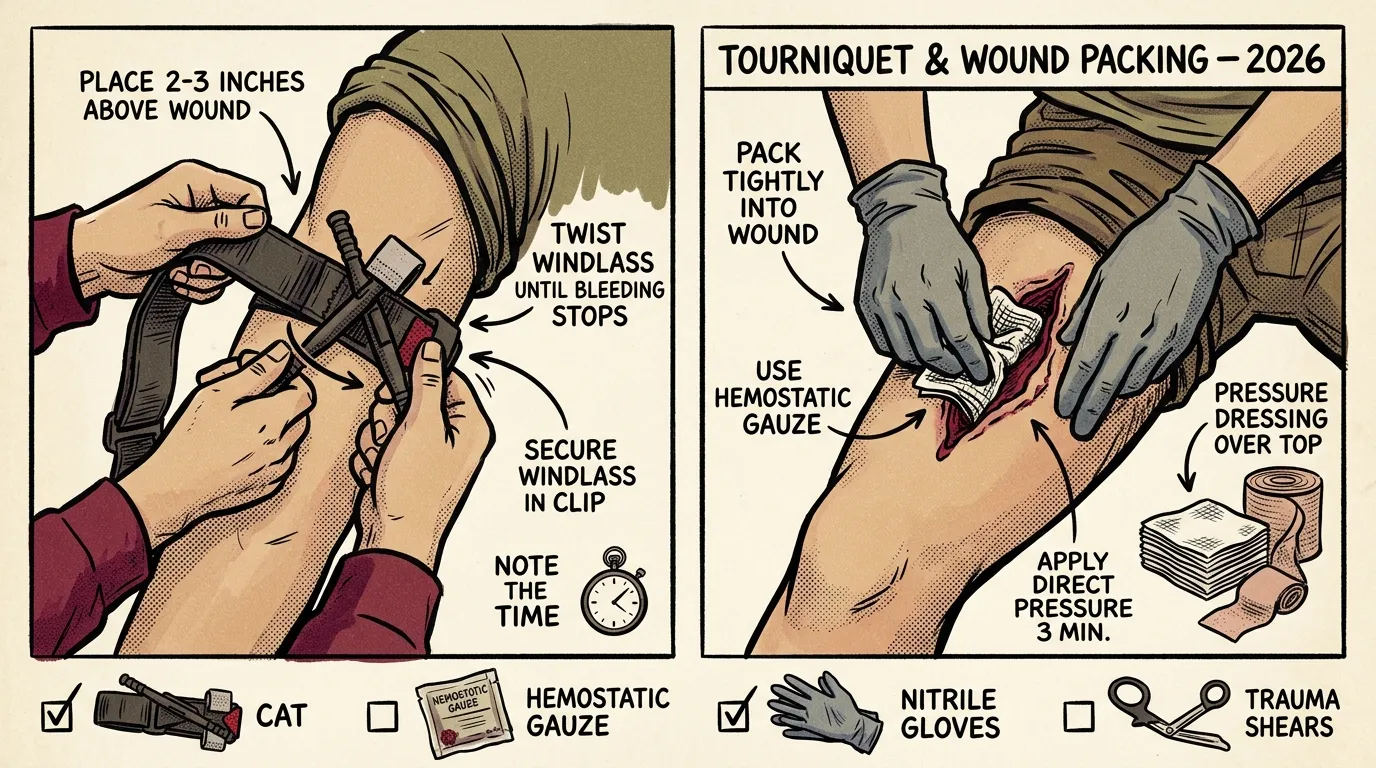
How to Use a Tourniquet and Pack a Wound (2026)
Learn how to use a tourniquet and pack a wound step by step.