
A prepper's emergency binder is a centralized binder containing copies of essential documents, emergency contacts, medical information, financial summaries, and disaster plans for quick access during emergencies. Beginners should start with core documents, organize them into labeled sections, and maintain both physical and digital backups with regular updates.
Key Takeaways
- Store only copies in your binder — originals belong in a fireproof safe or safe-deposit box, never in a grab-and-go kit.
- Build and laminate a front-page quick reference so any household member can act in under 60 seconds during an evacuation.
- Create an encrypted digital twin using VeraCrypt on both cloud storage and an offline USB drive — paper alone isn't enough.
- Review medications and emergency contacts quarterly, run a full binder audit annually, and update immediately after major life events.
- Share both your binder's physical location and digital backup access with a trusted out-of-state contact.
Prepper Emergency Binder: Build, Organize, and Maintain Your Grab-and-Go Kit
During the 2020 Oregon wildfire evacuations, I watched families tearing through filing cabinets and junk drawers hunting for insurance papers and medication lists while ash rained outside. Some had five minutes to leave. Most couldn’t find what they needed. That experience confirmed what I’d been teaching in community preparedness workshops for years: a prepper emergency binder isn’t a nice-to-have — it’s the foundation of every solid emergency plan.
If you’re working through a beginner prepper checklist, this binder should be one of your first projects. It takes a single weekend to build, costs under $30, and gives your entire household the ability to act decisively when seconds matter.
Quick Summary
- A prepper emergency binder is a portable, tabbed binder holding copies of essential documents, emergency contacts, medical info, and action plans — designed so anyone in your household can grab it and go in under 60 seconds.
- Store originals in a fireproof safe or bank safe-deposit box. Never put them in a grab-and-go kit.
- Build and laminate a front-page quick reference — it’s the single most important sheet in the binder.
- Create encrypted digital backups on both cloud storage (like Proton Drive or a VeraCrypt container) and an offline USB drive stored at a separate location.
- Review contacts and medications every 3 months. Do a full binder audit once a year.
- Share the binder’s location and digital access instructions with a trusted out-of-state contact.
What Is a Prepper Emergency Binder?
A prepper emergency binder is a portable, organized 3-ring binder containing copies of critical documents, emergency contacts, medical information, financial summaries, and action plans. The whole point? Any household member can grab it and act within 60 seconds during an evacuation or crisis.
Here’s what a well-built emergency document binder typically includes:
- Front-page quick reference with names, contacts, medications, and meeting spots
- Copies of government-issued IDs — driver’s licenses, passports, birth certificates
- Medical records including medication lists, allergies, and physician contacts
- Emergency contact list for family, neighbors, doctors, schools, and veterinarians
- Insurance and financial summaries with last-four-digit account references
- Legal document summaries pointing to where originals are stored
- Household inventory with photos and serial numbers of valuables
- Evacuation and communication plans with maps and rally points
- Pet and livestock records including vaccination and microchip information
- Digital backup access instructions for your encrypted cloud and offline copies
The key rule: this binder holds copies only. Your originals stay in a fireproof, waterproof safe or a bank safe-deposit box.
The best emergency binder is the one that actually exists when you need it.
Emergency Binder vs. Death Binder: What’s the Difference?
I get this question at nearly every preparedness workshop I teach. Short answer: they serve different emergencies.
An emergency preparedness binder is built for active crises — evacuations, shelter-in-place events, power outages, and natural disasters. It prioritizes speed. You need your IDs, medical info, and emergency contacts accessible in seconds, not minutes.
A death binder (sometimes called an “in case of death” binder) is designed for estate settlement after someone passes. It focuses on bank account access, beneficiary details, funeral wishes, digital legacy instructions, and where to find the will.
What do I recommend? Combine both into a single system with clearly labeled tabs, or maintain two separate binders stored together. If you go the combined route, seal the death binder sections in an opaque envelope labeled “Open only in case of death or incapacitation.” That gives privacy while keeping everything in one grab-and-go location. The overlap’s real — both need insurance information, legal documents, and contact lists. Building them together saves you from duplicating work.
What Size Binder and Supplies Do You Need?
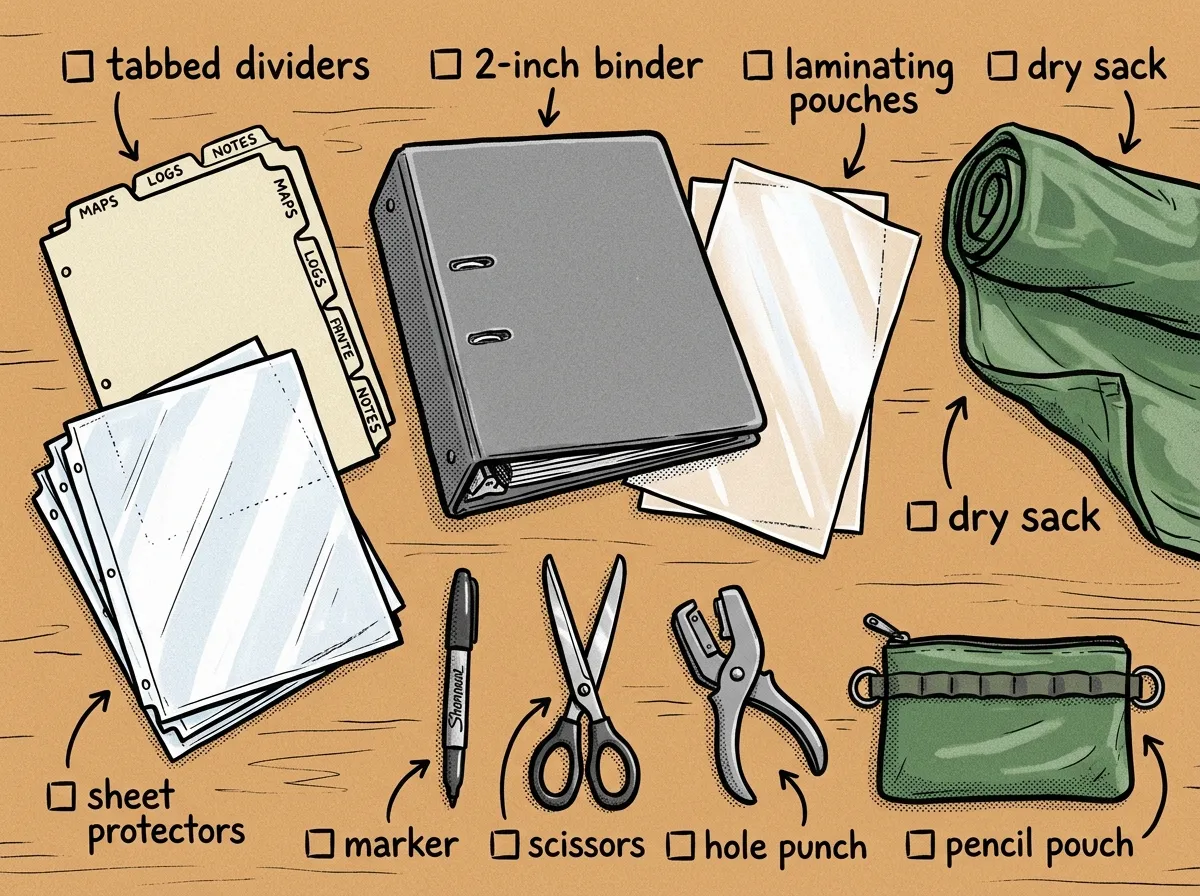 Binder supplies you need to get started
After helping dozens of families build their survival binders at community events, I’ve landed on clear recommendations.
Binder Size
- 2-inch binder: Works for most families of 2–4 people. It’s what I use personally.
- 3-inch binder: Better for larger households, multi-generational families, or anyone including business records, livestock documentation, or extensive medical histories.
Binder Type
A standard heavy-duty 3-ring binder with a clear-view cover is the most practical option. Slide your front-page quick reference right into the cover pocket. A zippered portfolio-style binder adds water resistance and keeps loose items from falling out during a rushed evacuation. If you’re in a flood or hurricane zone — say, Gulf Coast or coastal Southeast — wrap whatever binder you choose in a waterproof dry sack as an outer layer.
The Avery Heavy-Duty View Binder — around $10–$15 — is what I’ve been using for years and recommending at workshops. The rings don’t pop open when you yank it off a shelf in a hurry, which is more than I can say for most cheap binders. I’ve watched people at community events grab their thin, bargain-bin binders by the spine and lose half the pages on the ground. Spend the extra few bucks on something that’ll hold together under stress.
- Heavy-duty sheet protectors (not the thin, flimsy kind)
- Tabbed dividers — 11 tabs covers everything
- Zipper pouch for USB drives or spare keys
- Waterproof document sleeves for front-page reference and ID copies
- Laminating pouches for the front page (about $0.25 each)
Total cost: $15–30 depending on what you already have. This is one of the cheapest and highest-impact preparedness projects you’ll ever tackle.
At-a-Glance Binder Checklist
 Everything that goes inside your emergency binder
Use this to build your binder from scratch or audit one you’ve already got.
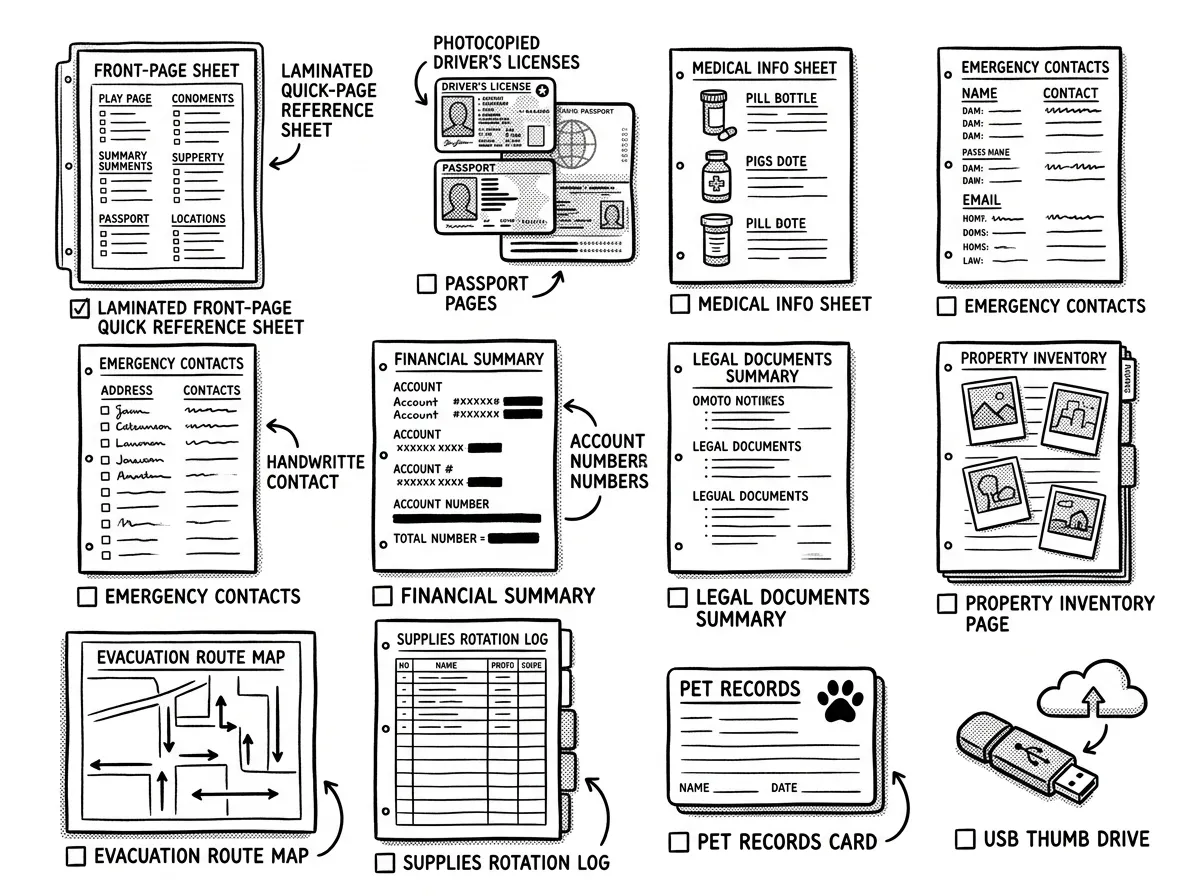
1. Front-Page Quick Reference
Names, dates of birth, primary and out-of-state contacts, critical medication highlights, known allergies, two meeting spots (neighborhood and out-of-area), and where originals and digital backups are stored. Laminate this page. It’s the single most important sheet in your binder.
2. Identification (Copies)
Driver’s licenses, passports, birth certificates, Social Security cards, marriage certificates, and a recent color photo of each household member for reunification purposes. Include photos of children taken within the last 6 months — kids change fast.
3. Medical
Insurance card copies (front and back), a medication list in table format — drug name, dosage, frequency, prescribing doctor, pharmacy name and phone — plus allergies, chronic conditions, blood types, and physician contact details. If anyone in your household has a complex medical history, include a one-page plain-language summary that an ER doctor could scan in 30 seconds.
4. Emergency Contacts
Family members, neighbors, primary care doctors, specialists, employer HR numbers, children’s schools and daycares, veterinarian, insurance agents, attorney, and your out-of-state emergency contact. List at least two ways to reach each person.
5. Financial and Insurance Summaries
Homeowner’s or renter’s insurance declarations page (policy number and agent contact), auto insurance declarations page, health insurance summary, and a list of bank names with account type and last four digits only. Include your insurance agent’s direct phone number — during a disaster, the general 1-800 line will be jammed.
6. Legal and Estate
Will or trust summary (not the full document), power of attorney, healthcare proxy, and the exact location of originals. If you’ve got minor children, include guardianship designations.
7. Household and Property
A room-by-room photo inventory with serial numbers for electronics, firearms, and high-value items. Include your home’s utility shutoff locations with brief instructions — gas valve, water main, electrical panel. Add spare key information using hints. Never write the full location or code.
8. Emergency Plans and Checklists
Your family communication plan for emergencies, evacuation escape routes with local maps, shelter-in-place instructions, and a pet evacuation plan. Include your county’s evacuation zone designation if you’ve got one.
9. Supplies and Rotation
Track food, water, medication expiration dates, battery replacement schedules, and fuel storage notes. Cross-reference with guidance on understanding food expiration dates for your supplies.
10. Pets and Livestock
Vaccination records, microchip numbers, feeding schedules, medication instructions, and your veterinarian’s emergency contact. Include a clear photo of each animal.
11. Digital Access and Recovery
Password manager access instructions (app name and master hint — never the full master password), recovery email addresses, 2FA backup codes stored in a sealed envelope, and the location of your encrypted USB backup.
How to Create Your Prepper Emergency Binder, Step by Step
So where do you actually start? In my experience, the biggest barrier isn’t complexity — it’s just getting the ball rolling. Here’s the exact workflow I use when I help families build their emergency grab-and-go binders. The whole project takes 3–4 focused hours over a single weekend.
- Gather supplies — binder, dividers, sheet protectors, zipper pouch — and label your 11 tabs before filling anything. Having the structure ready first prevents “pile of papers” paralysis. (15 minutes)
- Photocopy everything in your wallet. Lay out every card — driver’s license, insurance cards, credit cards (front only, for customer service numbers) — and copy or scan them for every household member. (20 minutes)
- Pull documents from your filing cabinet. Gather insurance declarations pages, mortgage or lease front page, vehicle titles, birth certificates, passports, and legal documents. Copy what you need and return originals to secure storage immediately. (45 minutes)
- Build your medical section. Create a medication table for each household member. Call your pharmacy if you’re unsure about dosages. (30 minutes)
- Create and laminate your front-page quick reference using the template later in this article. Print two copies. (20 minutes)
- Do a room-by-room photo inventory with your phone. Open closets and cabinets, capture serial numbers on electronics and firearms, and use your phone’s built-in document scanner to create clean PDFs. (45 minutes)
- Create your digital twin. Scan all binder pages into one organized folder. Encrypt it using VeraCrypt (free, AES-256 encryption), then upload to a trusted cloud provider like Proton Drive or Tresorit. Copy it to an encrypted USB drive as well. (30 minutes)
- Share access and test. Show every household member where the binder lives. Share digital backup instructions with your out-of-state contact. Run a drill — can someone who didn’t build the binder find emergency contacts in under 30 seconds? (15 minutes)
The first time I tried building a binder for my own household, I made the classic mistake of dumping every document I owned onto the dining table and trying to organize it all at once. Don’t do that. Label your tabs first, then fill them one category at a time. The structure makes everything click into place.
Where to Store Your Emergency Binder (and Your Backups)
 Strategic storage locations for your binder and backups
There’s a real tension between security and accessibility. Your family emergency binder needs to be reachable in under 60 seconds during an evacuation, but it’s also got to be protected from theft and water damage.
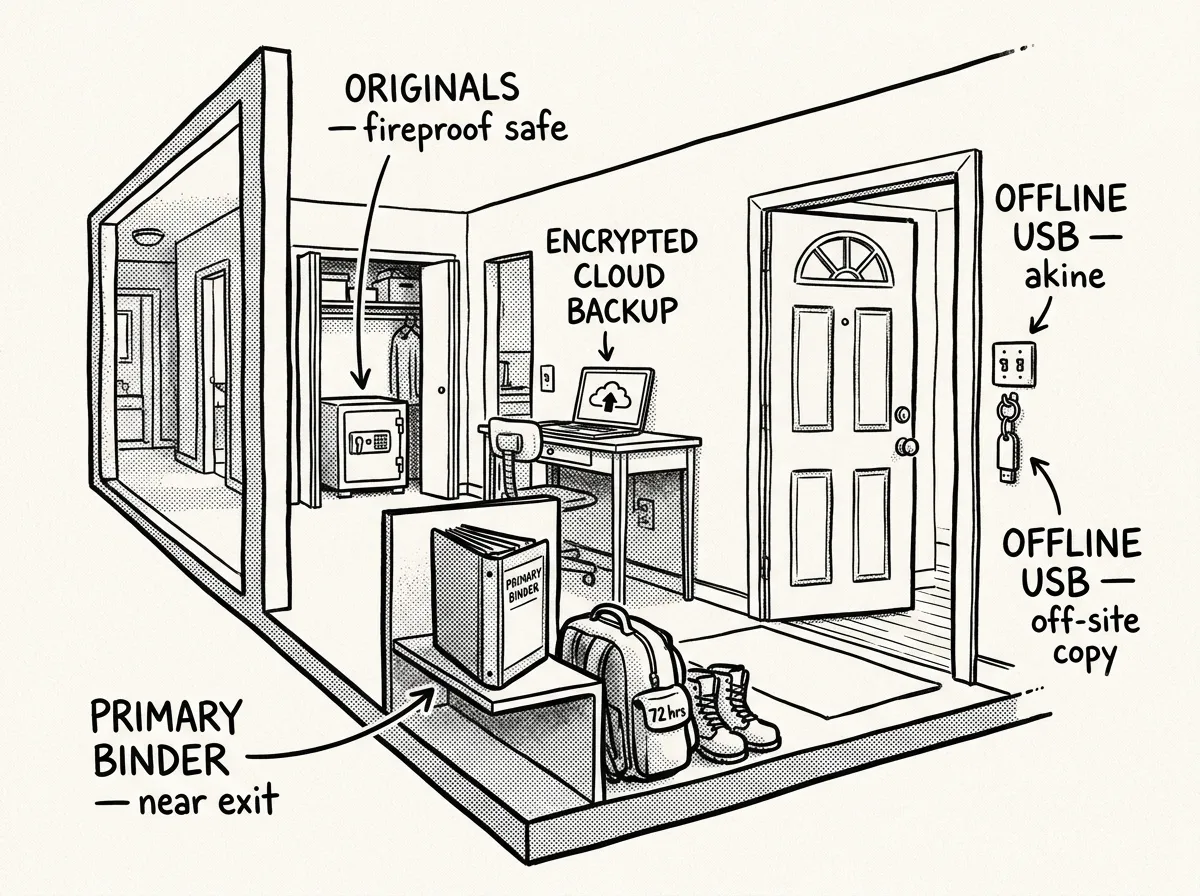
Physical Binder Storage
Store it near your primary exit door or alongside your 72-hour emergency kit. I keep mine on a shelf in the coat closet by my front door, inside a waterproof dry bag. If you’ve got children, make sure at least two adults know exactly where it is. Never store the only copy in a basement, a back bedroom, or anywhere that requires navigating stairs or long hallways during an evacuation.
Digital Backup Storage
Maintain at least two digital copies:
- Encrypted cloud storage: Proton Drive, Tresorit, or a VeraCrypt container uploaded to Google Drive or Dropbox. The encryption means even if the cloud account’s compromised, the files are unreadable without your key.
- Encrypted USB drive: Store this in a separate physical location from the binder — your workplace, a vehicle safe, or with your out-of-state contact. This ensures you’ve got access even if your home is destroyed and the internet’s down.
Don’t store the binder and USB backup in the same room. Don’t rely on unencrypted cloud storage for sensitive documents. And don’t assume your spouse or partner knows where everything is — tell them, show them, and practice.
Common Mistakes That Make Emergency Binders Useless
After reviewing hundreds of binders at community preparedness fairs and CERT training events over my 12+ years in emergency management, I see the same failures on repeat. Here’s what to avoid.
Storing originals instead of copies. I’ve watched people lose irreplaceable birth certificates and passports during evacuations because they put originals in their grab-and-go binder and the binder got soaked or left behind. Originals go in a fireproof safe. Period.
Building it once and forgetting it. A binder with a medication list from three years ago and a disconnected phone number for your emergency contact is worse than useless — it gives you false confidence. Set calendar reminders for quarterly reviews.
Making it too complex. If your family can’t navigate the binder under stress, it fails. I’ve seen 4-inch binders stuffed with 200 pages of printed legal documents. Your spouse, your teenager, or your elderly parent needs to find critical information in 30 seconds while panicking. Simplicity saves lives.
One thing I see constantly at CERT training events: people include full bank account numbers and even passwords written on sticky notes inside their binder. Don’t do this. You’ve just turned your evacuation kit into a theft liability. Use last-four-digit references for accounts, point to your password manager by name, and include only a master hint — never the actual master password. If someone steals or finds your binder, they shouldn’t be able to drain your checking account.
Forgetting to tell anyone where it is. In FEMA’s Community Emergency Response Team curriculum, one of the first exercises is documenting what you’d grab in a 5-minute evacuation notice. Most people fail — and even those with binders often discover that nobody else in the household knows it exists.
Skipping water protection. A standard binder with thin sheet protectors won’t survive rain, flooding, or a broken pipe. Use heavy-duty protectors, laminate your front page, and add a waterproof outer layer. If you’re in the Pacific Northwest like me, or anywhere with heavy seasonal rain, this isn’t optional.
Maintaining Your Prepper Emergency Binder
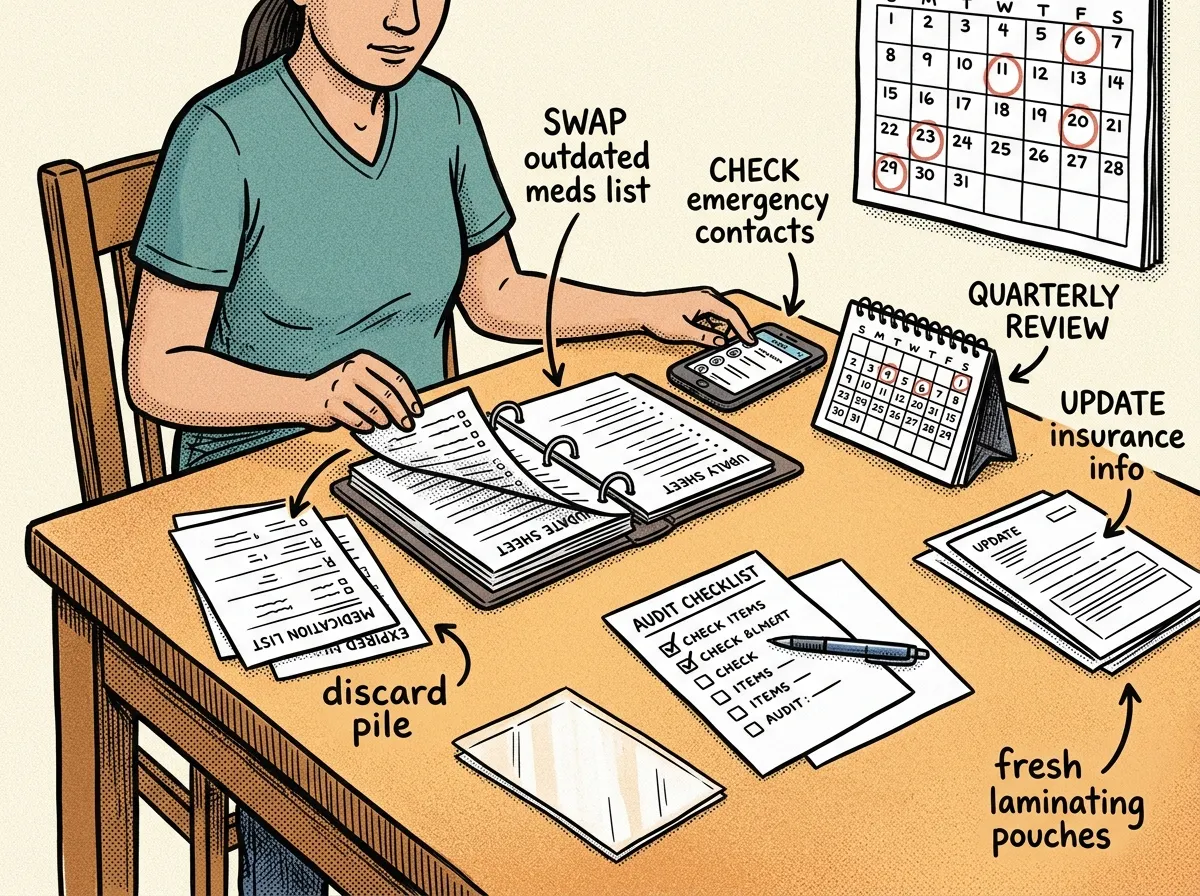 Quarterly review keeps your binder ready when it counts
Every 3 Months
- Verify phone numbers and emergency contacts still work
- Confirm medication lists match current prescriptions
- Check that meeting locations are still accessible
Every 3–6 Months
- Refresh supply expiration tracking for food, water, and medications
- Update any changed insurance policy numbers or financial accounts
Every 6–12 Months
- Test digital backups — can you actually decrypt and open the files?
- Verify both cloud and USB backup locations are accessible
- Update children’s reunification photos
After Major Life Events
Update affected sections immediately after moving, marriage, divorce, a new child, insurance changes, or starting a new medication. Don’t wait for your next scheduled review.
Annual Full Audit
- Confirm every copy matches its current original
- Verify your out-of-state contact can locate both the physical binder and digital backups
- Replace any damaged sheet protectors or faded printouts
Set recurring calendar reminders right now — one quarterly, one annual. Future you will forget otherwise. I use my phone’s calendar with alerts that won’t let me snooze past them.
Safety and Privacy Best Practices
- Never print full passwords or full account numbers. List only the last four digits and reference your password manager.
- Treat the binder as sensitive. Store it in a grab-and-go spot that’s accessible but not visible to visitors.
- Use a password manager for all logins — include only the manager’s name and a hint in the binder.
- Limit full binder access to trusted household members and one out-of-state contact.
- Encrypt all digital copies with unique, strong passwords for each backup location.
Free Emergency Binder Checklist (Printable Template)
Use this prioritized checklist to build your important documents binder without getting overwhelmed. Print this page directly or grab the downloadable PDF version.
Tier 1 — Complete This Weekend
- Laminated front-page quick reference (names, contacts, meds, meeting spots)
- Copies of all government-issued IDs (licenses, passports, birth certificates)
- Medication list in table format for every household member
- Emergency contacts list (family, doctors, schools, vet, out-of-state contact)
- Recent photo of each household member and pet
Tier 2 — Complete Within 30 Days
- Insurance declarations pages (home, auto, health, life)
- Financial summary with bank names, account types, and last four digits
- Legal document summaries (will, POA, healthcare proxy) with location of originals
- Household inventory with room-by-room photos and serial numbers
- Evacuation routes and family communication plan
Tier 3 — Complete Within 90 Days
- Encrypted digital backup in cloud storage (Proton Drive, Tresorit, or VeraCrypt container)
- Encrypted USB backup stored in a separate location
- Pet vaccination records and microchip numbers
- Supply rotation tracking sheet with expiration dates
- Digital access instructions (password manager name, recovery methods, 2FA backup)
- Calendar reminders set for quarterly and annual reviews
Front-Page Quick Reference Template
Copy this into your binder and laminate it:
- Household head(s): [Name — DOB]
- Primary contact: [Name — Relation — Phone — Alt phone]
- Out-of-state contact: [Name — Phone — Email]
- Medical summary: [Allergies — Major conditions — Critical medications with dosages]
- Meeting location 1 (neighborhood): [Address or landmark]
- Meeting location 2 (out-of-area): [Address — Contact phone]
- Originals stored at: [Safe location or bank — branch address — contact info]
- Digital backups: [Cloud provider — encrypted drive label/serial — recovery contact name]
- Insurance agent: [Name — Direct phone — Policy number]
Useful Agencies and Resources
- FEMA: Ready.gov/plan — free family emergency plan templates and downloadable wallet communication cards
- American Red Cross: Emergency preparedness app with real-time alerts and checklists
- NOAA / National Weather Service: Weather alerts signup for local hazard notifications
- 211.org: Dial 2-1-1 or visit 211.org for local disaster services, shelters, and assistance programs
- Your county emergency management office: Contact them for local evacuation zone maps, shelter locations, and community alert signups. Add those maps directly to your binder.
Frequently Asked Questions
What should be in a prepper emergency binder?
A prepper emergency binder should include a laminated front-page quick reference, copies of IDs and passports, a detailed medication list with dosages, emergency contacts, insurance and financial summaries using last-four-digit references, legal document summaries, a household inventory with photos, evacuation and communication plans, pet records, and digital backup access instructions. Never store originals or full passwords in the binder.
What is the difference between an emergency binder and a death binder?
An emergency binder is built for active crises — evacuations, power outages, and shelter-in-place events — prioritizing speed of access to IDs, medical info, and emergency contacts. A death binder focuses on estate settlement: full account access, funeral wishes, beneficiary details, and digital legacy instructions. I’d recommend combining both into one system with clearly labeled tabs, keeping the death binder sections sealed for privacy.
How do you organize an emergency grab-and-go binder?
Use tabbed dividers matching clear categories: front-page quick reference, IDs, medical, emergency contacts, financial and insurance, legal, household inventory, emergency plans, supplies tracking, pets, and digital access. Place the most critical tabs first so anyone can find essential information in under 30 seconds. Use heavy-duty sheet protectors throughout and laminate the front page.
Where should you store an emergency binder?
Store the physical binder near your primary exit or alongside your go-bag — somewhere reachable in under 60 seconds. Keep encrypted digital backups in two separate locations: cloud storage and an offline USB drive stored at your workplace, vehicle, or trusted contact’s home. Never store the only copy in a room far from exits.
Should you keep originals or copies in an emergency binder?
Always copies. Keep originals in a fireproof, waterproof safe or a bank safe-deposit box. If your evacuation binder is lost, stolen, or destroyed during a crisis, you’ll still have the irreplaceable originals secured elsewhere. I’ve seen too many people lose original passports and birth certificates during evacuations because they kept them in a grab-and-go bag.
What is the best binder for emergency documents?
A heavy-duty 2-inch 3-ring binder works for most families. Larger households should consider a 3-inch binder. Zippered portfolio-style binders add water resistance. In flood or hurricane zones, add a waterproof dry sack as an outer layer. Avoid cheap, thin binders — the rings bend open under rough handling and you’ll lose pages at the worst possible moment.
Go Build It
Here’s the truth I’ve learned across 12+ years of emergency management work and Wilderness First Responder deployments in the Pacific Northwest: the families who recover fastest from disasters aren’t the ones with the most gear. They’re the ones who can put their hands on the right information in under a minute.
Your prepper emergency binder is that information. It’s the bridge between chaos and clear-headed action. It costs less than $30, takes one weekend, and protects your family’s ability to evacuate safely, access medical care, file insurance claims, and rebuild.
Don’t overthink it. Start with Tier 1 this Saturday. Photocopy your wallet, build your front-page reference, and write down your emergency contacts. You’ll have the core of a functional emergency grab-and-go binder before dinner. Then fill in Tier 2 and Tier 3 over the next few months, set your quarterly review reminders, and share the location with someone you trust.
The Complete
Prepper's Reference.
149 articles synthesized into one comprehensive PDF — twelve chapters covering water, food, shelter, first aid, comms, and scenario-specific preparedness. Free with your email.
Unsubscribe anytime · We never share your email
You're in. Check your inbox.
Keep Reading
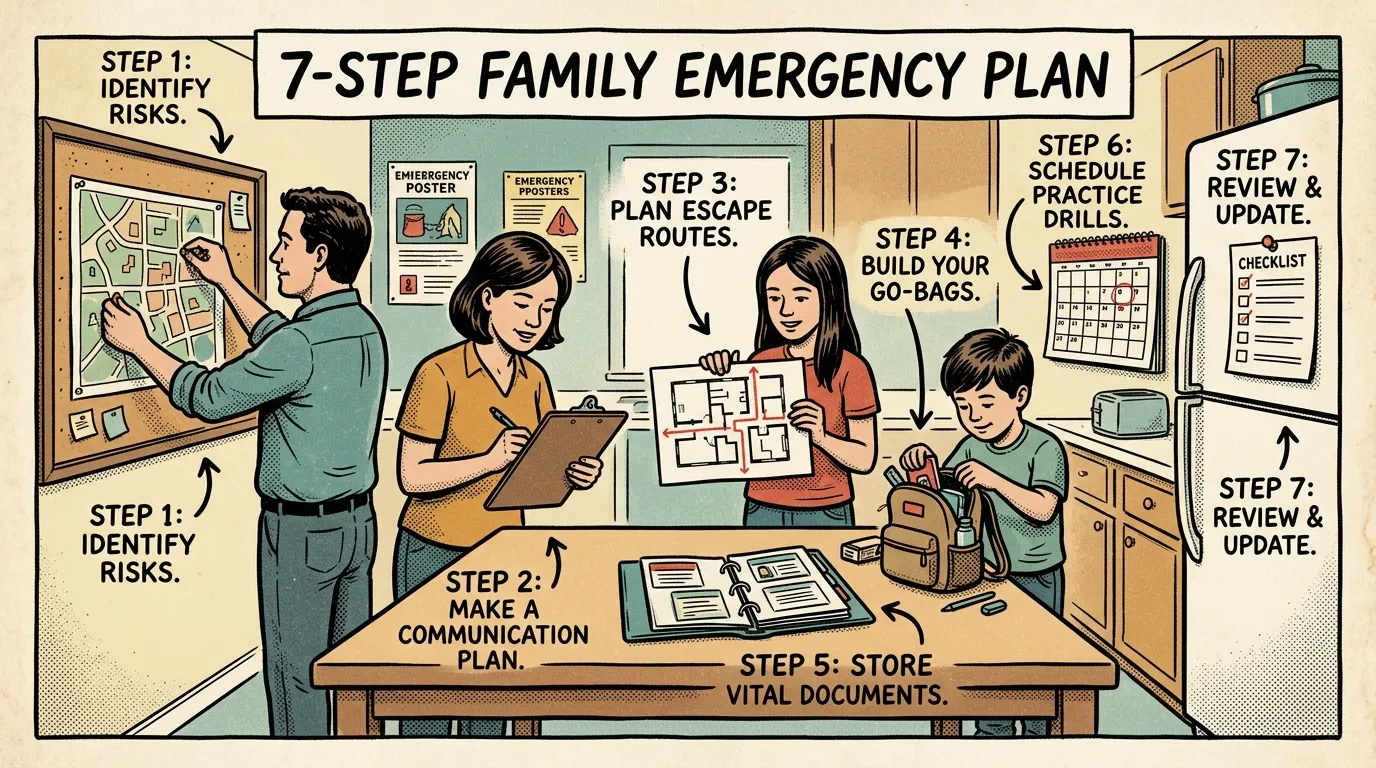
Emergency Preparedness Plan: 7-Step Family Guide
Build a complete emergency preparedness plan with evacuation routes, role assignments, and supply checklists. Step-by-step guide from a FEMA-trained responder.
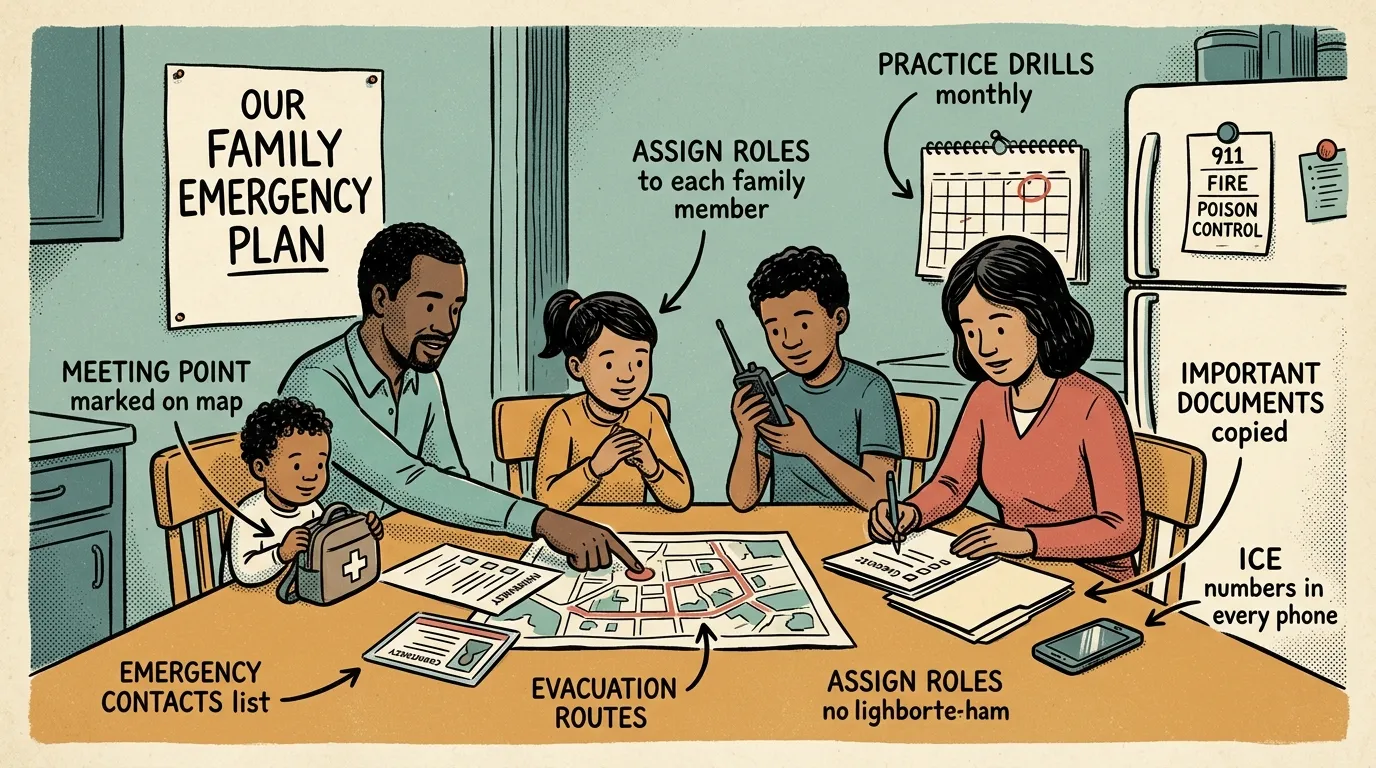
Family Emergency Plan: A Practical Step-by-Step Guide
Build a practical family emergency plan with step-by-step communication, supply kit, and drill guidance from a FEMA-trained responder. Start today.
Emergency Preparedness Merit Badge: A Parent's Guide
Use the Emergency Preparedness merit badge framework to teach your kids real survival skills at home. Step-by-step activities for each requirement.