Beginners should start stockpiling food by building a 3-day to 2-week supply of shelf-stable items they already eat, with canned goods as a core foundation. The best emergency food stockpile combines canned proteins and meals, dry staples, ready-to-eat foods, and a simple rotation system to avoid waste and overspending.
Key Takeaways
- Start with a 3-day supply of canned proteins and dry staples per person, then build toward 2 weeks by adding 2-5 items each shopping trip — budget $20 per paycheck and you'll be there in 3 months.
- Only stockpile foods your household already eats — unfamiliar items don't get rotated, they get wasted.
- Store canned goods between 50-70°F in a cool, dry, dark location and rotate using FIFO (first in, first out) to prevent expiration and waste.
- Prioritize water first (1 gallon per person per day), then calories, protein, and a manual can opener before buying anything fancy.
- Test your stockpile by cooking a full meal from it — this reveals missing tools, fuel gaps, and taste issues before an actual emergency forces you to discover them.
How to Start Stockpiling Food: Canned Goods & Beginner Guide
Quick Answer: Calculate your household’s two-week food needs, then add 2–5 canned goods and dry staples to every shopping trip. Store everything in a cool, dry, dark place (50–70°F) and rotate stock using FIFO — first in, first out. Prioritize water, calories, and protein before anything else.
Quick Summary
- Start small and build consistently: Add 2–5 shelf-stable items per grocery trip, budget about $20 per paycheck, and you’ll have a solid two-week supply for two adults in roughly three months.
- Canned proteins come first: Tuna, chicken, and beans are affordable, shelf-stable, and provide the macronutrient that’s hardest to source during a disruption.
- Store between 50–70°F: Cool, dry, dark conditions maximize shelf life. Avoid garages and sheds — temperature swings kill canned goods faster than you’d think.
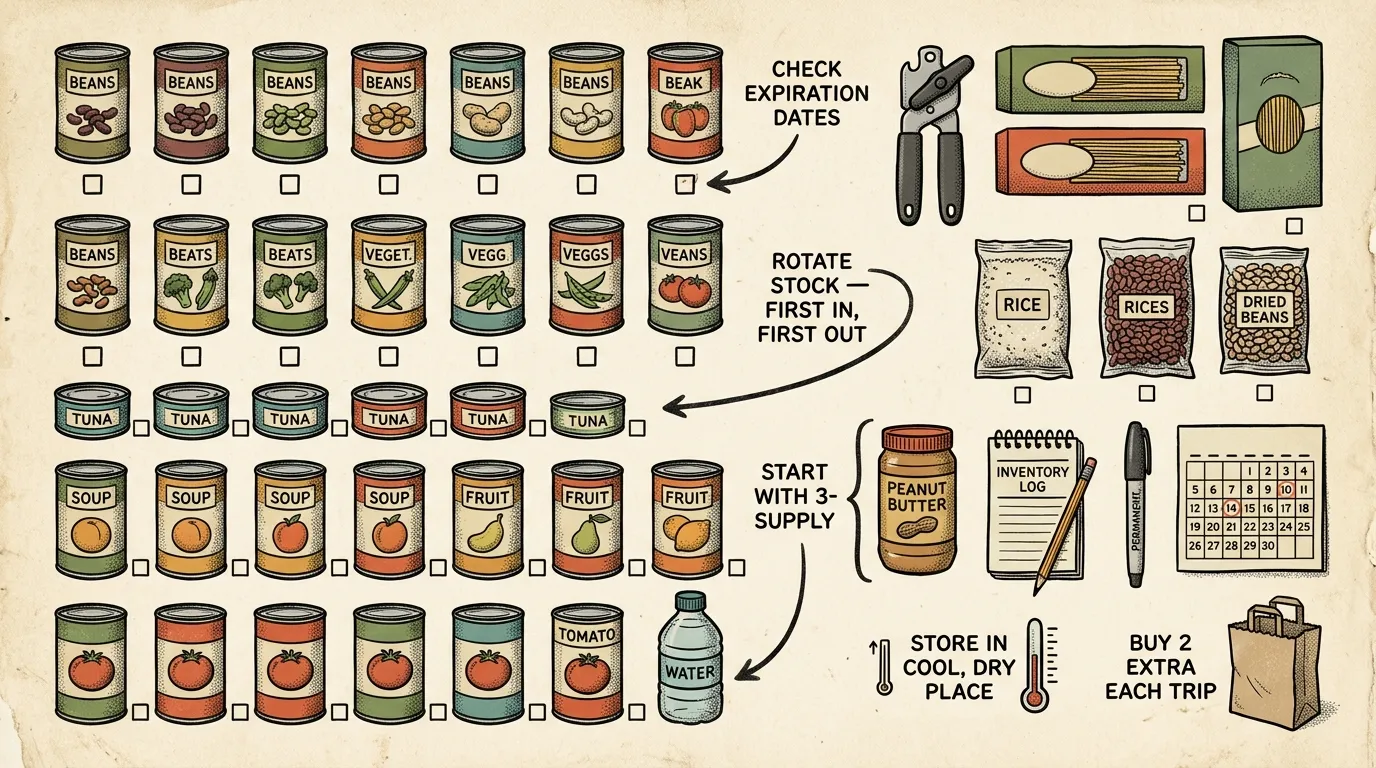
- Rotate with FIFO: Label everything with a purchase date, place new items behind old ones, and cook from the front of the shelf during normal life.
- Test your stockpile now, not later: Cook a full meal from stored food this weekend. You’ll find out what’s missing before it matters.
- Water is the real priority: One gallon per person per day, minimum. Food without water won’t keep anyone fed.
- Calculate your household’s 2-week food and water needs
- Buy 2–5 extra canned goods each shopping trip
- Focus on proteins first — canned tuna, chicken, and beans
- Store in a cool, dry, dark place between 50–70°F
- Label dates and rotate using first-in, first-out (FIFO)
In 12 years of emergency response work across the Pacific Northwest, I’ve walked into homes after ice storms and windstorms where families had nothing but condiments and frozen food they couldn’t cook. That’s exactly what this guide prevents. If you’re wondering how to start stockpiling food, the answer’s simpler and cheaper than most people think — and canned goods are the backbone of it all.
What Food Stockpiling Actually Means
Food stockpiling isn’t about filling a bunker. It’s about keeping an extra supply of shelf-stable food and water at home so you’re covered during short-term disruptions — power outages, severe weather, supply chain hiccups, or any situation where normal shopping isn’t possible for days or weeks.
Shelf-stable items don’t need refrigeration until opened. That includes canned foods, dry grains and beans, and plenty of packaged ready-to-eat items.
During my FEMA coursework and Wilderness First Responder certification, the 72-hour minimum was drilled into every module. But real-world events taught me that two weeks is the practical floor. After the 2020 Labor Day windstorm that hit Oregon, some rural families in the Cascade foothills went without power and road access for 10–14 days. The ones who had rotated canned stockpiles ate well. The ones who didn’t relied on neighbors and eventually National Guard distribution points.
The goal isn’t to fill a bunker — it’s to build a practical buffer that buys your family time and options when things go sideways.
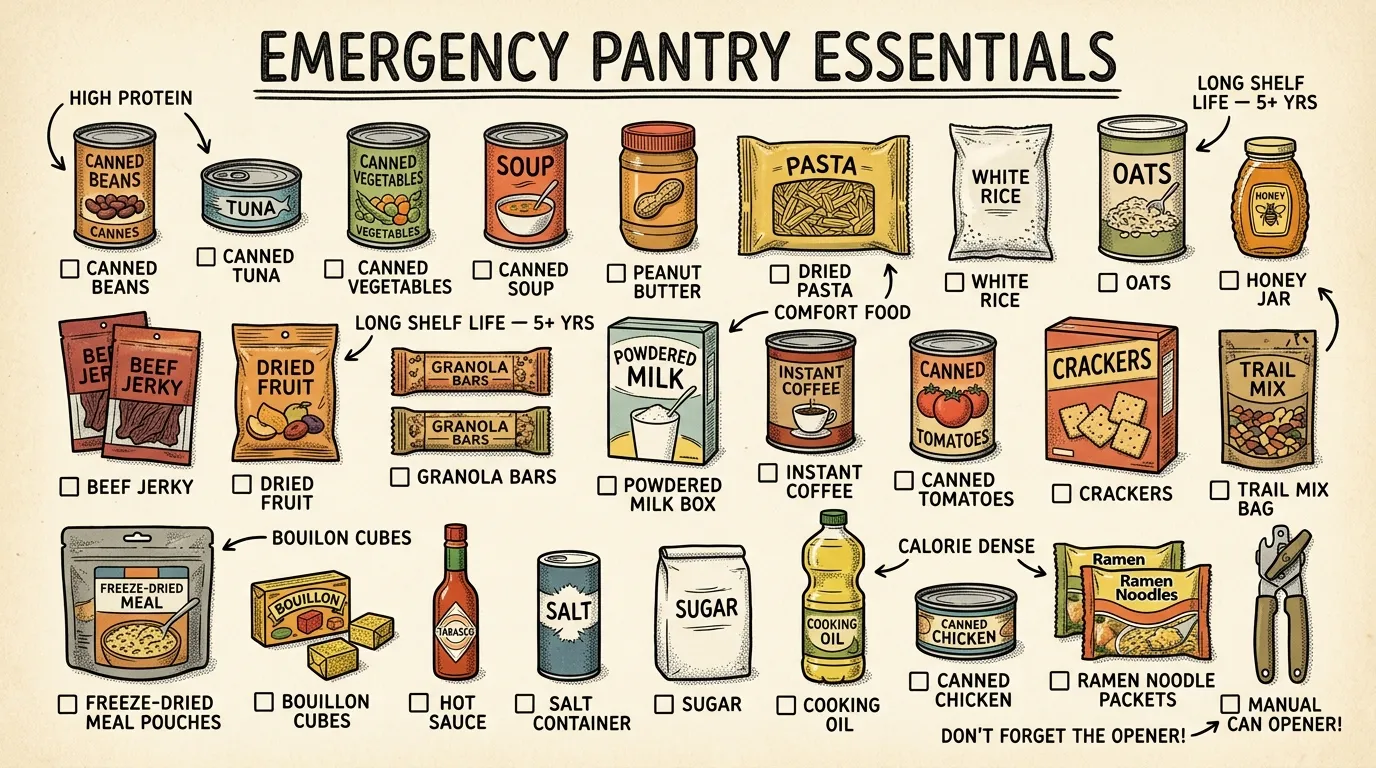
Why Canned Goods Are the Best Starting Point
So what should you actually buy first? Canned goods. They’re affordable, widely available at every grocery store, require zero refrigeration, and many are ready to eat straight from the can. Combined with dry staples, they form the foundation of a reliable emergency food supply.
Here’s what to prioritize:
Proteins (Stock These First)
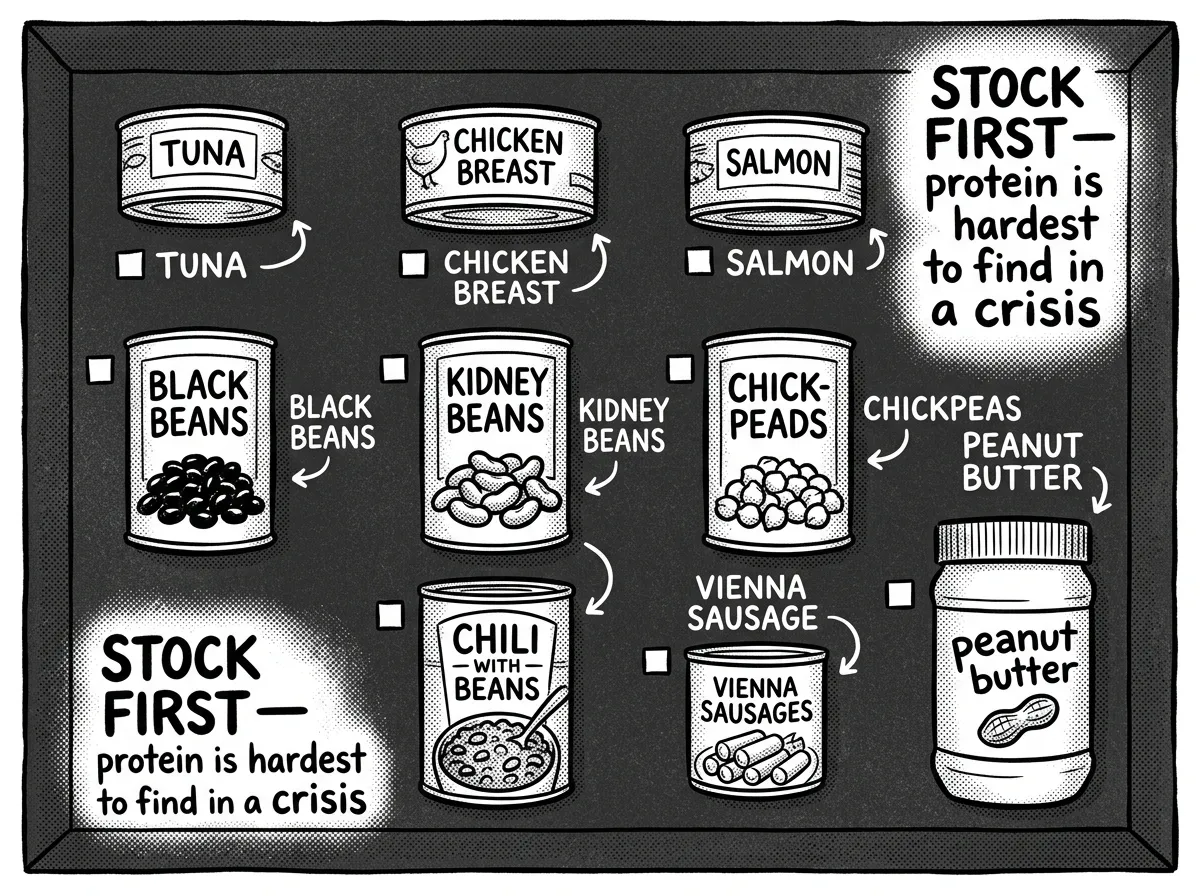 Priority canned proteins to stockpile before anything else
- Canned tuna (in water or oil) — versatile, affordable, roughly $1.20–$2.00 per can
- Canned chicken breast — Great Value and Kirkland brands run about $2.50 per 12.5oz can
- Canned beans (black, pinto, kidney, chickpeas) — protein and fiber for under $1 per can
- Canned salmon and sardines — omega-3 rich, long shelf life
Vegetables
- Canned tomatoes (diced, whole, paste, sauce) — the base for dozens of meals
- Corn, green beans, peas, carrots — aim for low-sodium versions when available
- Canned potatoes or sweet potatoes — calorie-dense and filling
Fruits
- Peaches, pears, pineapple, mandarin oranges — choose cans packed in juice rather than heavy syrup for better nutrition
- Applesauce — no prep needed, great for kids
Ready-to-Eat Meals
- Soups and stews — choose chunky varieties with protein for more substance
- Canned chili — a complete meal from one can
- Canned pasta meals (ravioli, spaghetti) — zero cooking required
A note on choosing wisely: Low-sodium options let you control salt levels — you can always add, but you can’t remove. Store brands from Walmart (Great Value), Aldi, and Costco (Kirkland) are significantly cheaper than name brands with nearly identical nutrition. Many major brands now use BPA-free can linings too. For a deeper dive into specific products, see best non-perishable foods for your emergency pantry.
How Much Canned Food Should You Stockpile?
This is the most common question I hear at the emergency preparedness workshops I teach in Portland. The answer depends on your household size, dietary needs, and available storage — but here’s a concrete framework.
FEMA recommends a minimum 3-day supply per person. I recommend building to two weeks as fast as your budget allows, then expanding toward a month.
Canned food quantities per person by timeframe:
| Category | 3-Day Supply | 2-Week Supply | 1-Month Supply |
|---|---|---|---|
| Canned proteins (tuna, chicken, beans) | 6 cans | 24–30 cans | 50–60 cans |
| Canned vegetables | 4 cans | 16–20 cans | 35–40 cans |
| Canned fruits | 3 cans | 10–12 cans | 20–24 cans |
| Ready-to-eat meals (soup, chili, stew) | 3 cans | 12–15 cans | 25–30 cans |
| Total cans per person | ~16–18 | ~62–77 | ~130–154 |
These numbers assume you’re supplementing with dry staples (rice, pasta, oats) and other shelf-stable items (peanut butter, cooking oil, granola bars). Canned goods alone won’t get you through a month — they’re the protein and produce layer of a broader emergency pantry.
A family of four at the two-week level needs roughly 250–310 cans total. That sounds like a lot. But stacked on a single shelving unit, it takes up about 8–10 square feet of floor space. Start with three days and build from there.
How Long Does Canned Food Actually Last?
Understanding shelf life is critical for anyone building a long-term food storage plan. Here’s what you need to know, based on USDA canned food safety guidance and my own experience rotating stockpiles for over a decade.
| Food Type | Optimal Quality | Notes |
|---|---|---|
| Low-acid canned goods (meats, beans, vegetables, soups) | 2–5 years | Longest-lasting canned items in your stockpile |
| High-acid canned goods (tomatoes, fruits, pickled items) | 12–18 months | Acid interaction with can lining degrades quality faster |
| Commercially sealed freeze-dried foods | 25–30 years | Requires proper storage; see canned vs. freeze-dried food for preppers |
| Home-canned foods | 12–18 months | More variable; follow USDA home canning guidelines strictly |
Here’s a distinction that trips people up: “best by” dates aren’t safety dates. The USDA states that commercially canned foods stored in good condition are safe indefinitely — the date on the can is about quality. That said, quality absolutely degrades. After five years, canned vegetables may taste flat and lose nutritional value.
My field-tested rule: if the can’s undamaged, stored properly, and within five years of the date code, it’s fine. Beyond that, inspect carefully.
When to discard — no exceptions:
- Cans that are bulging, leaking, or deeply rusted at seams
- Deep dents along seams or on lids (small dents on the body are usually fine)
- Contents that spray, foam, or smell off when opened
- Any sign of corrosion inside the can
A single can of food is never worth a trip to the hospital.
Storage Conditions, Gear, and Safety
 A well-organized food stockpile in proper cool, dry, dark storage
Where and how you store your emergency food matters as much as what you buy. Poor storage cuts shelf life in half and can make food unsafe.
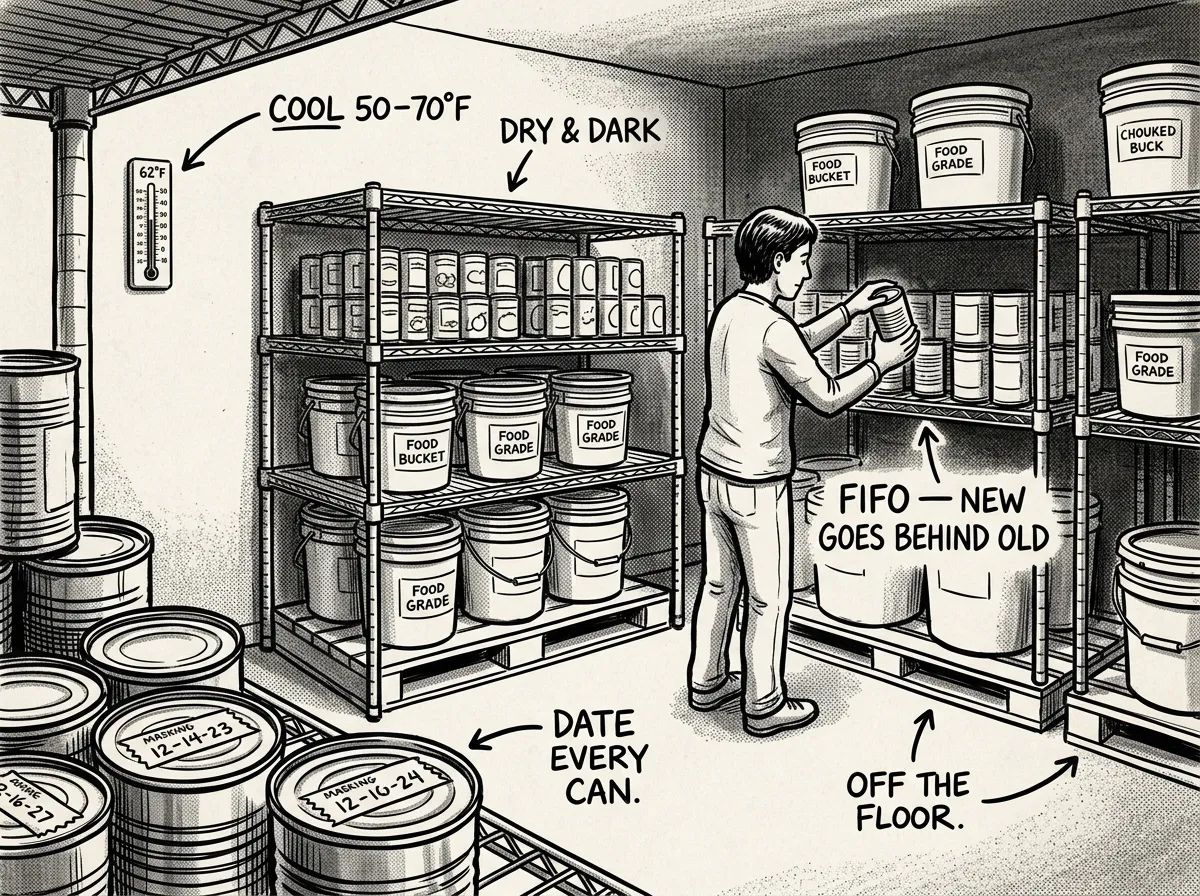
Ideal Conditions
- Temperature: 50–70°F. That’s the sweet spot for long-term food storage.
- Environment: Cool, dry, dark, with humidity below 60%. A cheap hygrometer — around $8–$12 at any hardware store — lets you monitor this.
- Elevation: Keep food off the floor on shelves or pallets to prevent moisture wicking and make pest inspection easier.
The Garage Mistake
I see this constantly. Uninsulated garages and sheds experience massive temperature swings — freezing in winter, 100°F+ in summer. If you’re in the high desert Southwest or a humid Gulf Coast climate, those extremes are even worse. Those swings accelerate can degradation, break down seal integrity, and can cause lids to fail. If your only option is a garage, insulate a section or use it only for items you’ll rotate within six months.
I’ve cracked open cans that spent two summers in an uninsulated Oregon garage, and the contents were discolored, mushy, and tasted metallic. Nothing was technically “unsafe” per the USDA guidelines, but nobody in my house wanted to eat it. The same brand stored in our hall closet? Perfectly fine. That closet is now our dedicated pantry, and I’ll never store canned goods in the garage again.
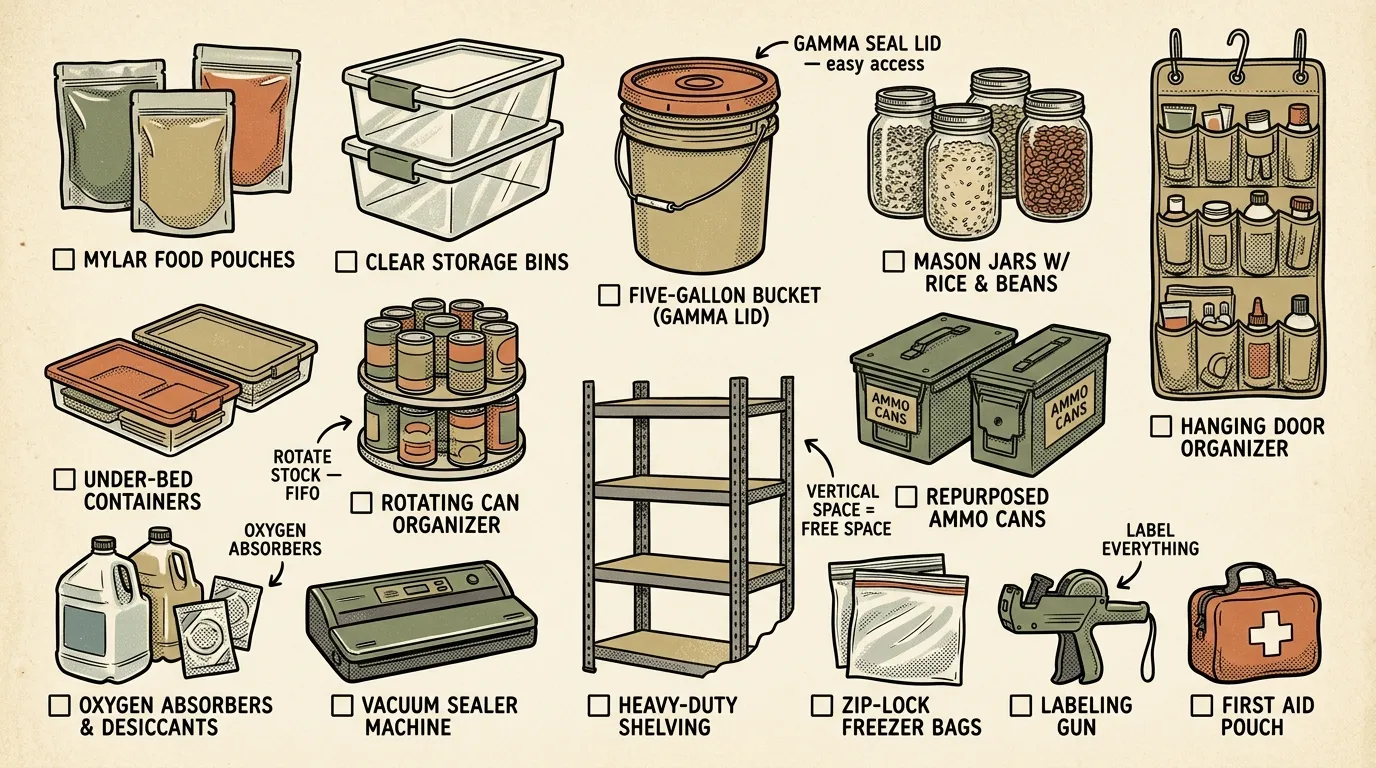
Pest Prevention
- Store dry goods in airtight containers, Mylar bags with oxygen absorbers, or food-grade buckets with gamma seal lids
- Tuck bay leaves inside grain and flour containers — they’re a natural insect deterrent
- Sprinkle food-grade diatomaceous earth around the perimeter of storage shelving
- Inspect cans monthly for rodent gnaw marks, especially at ground level
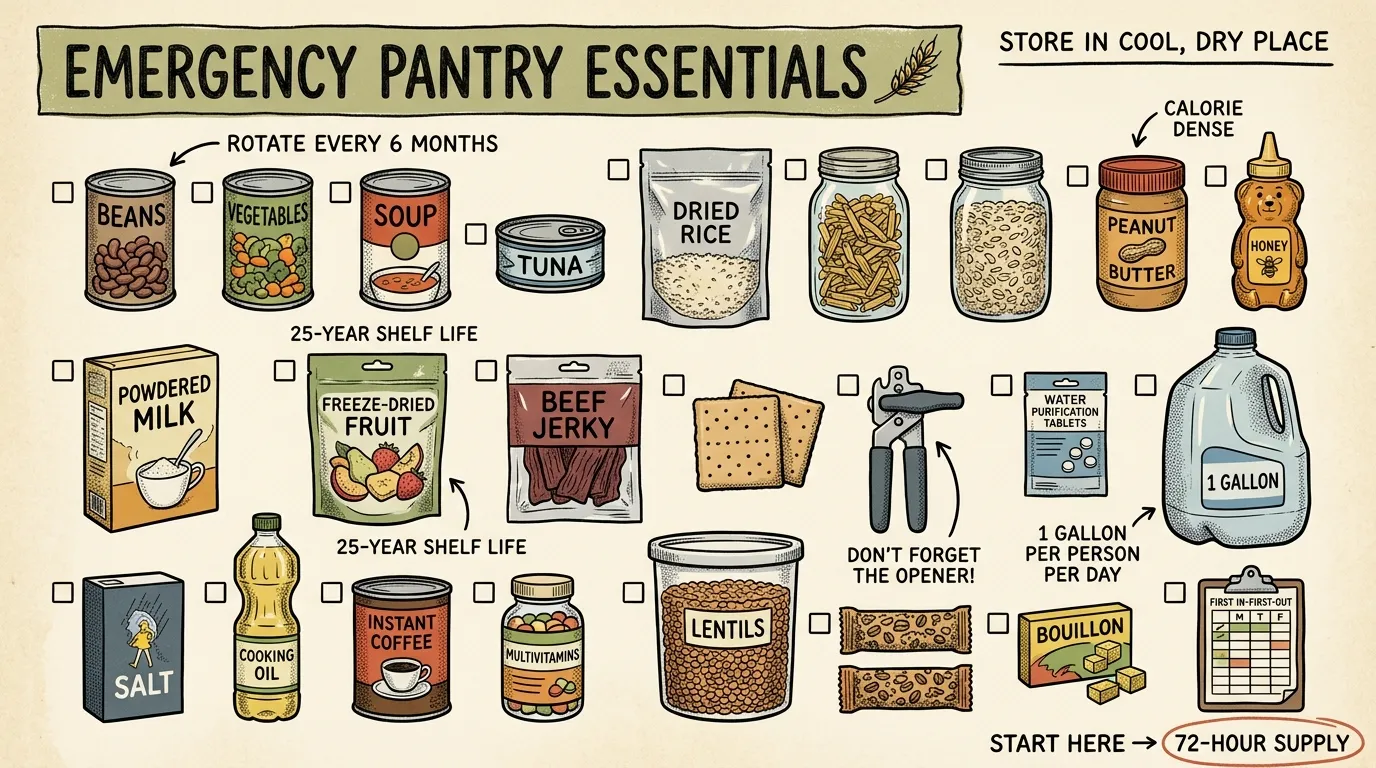
Essential Gear
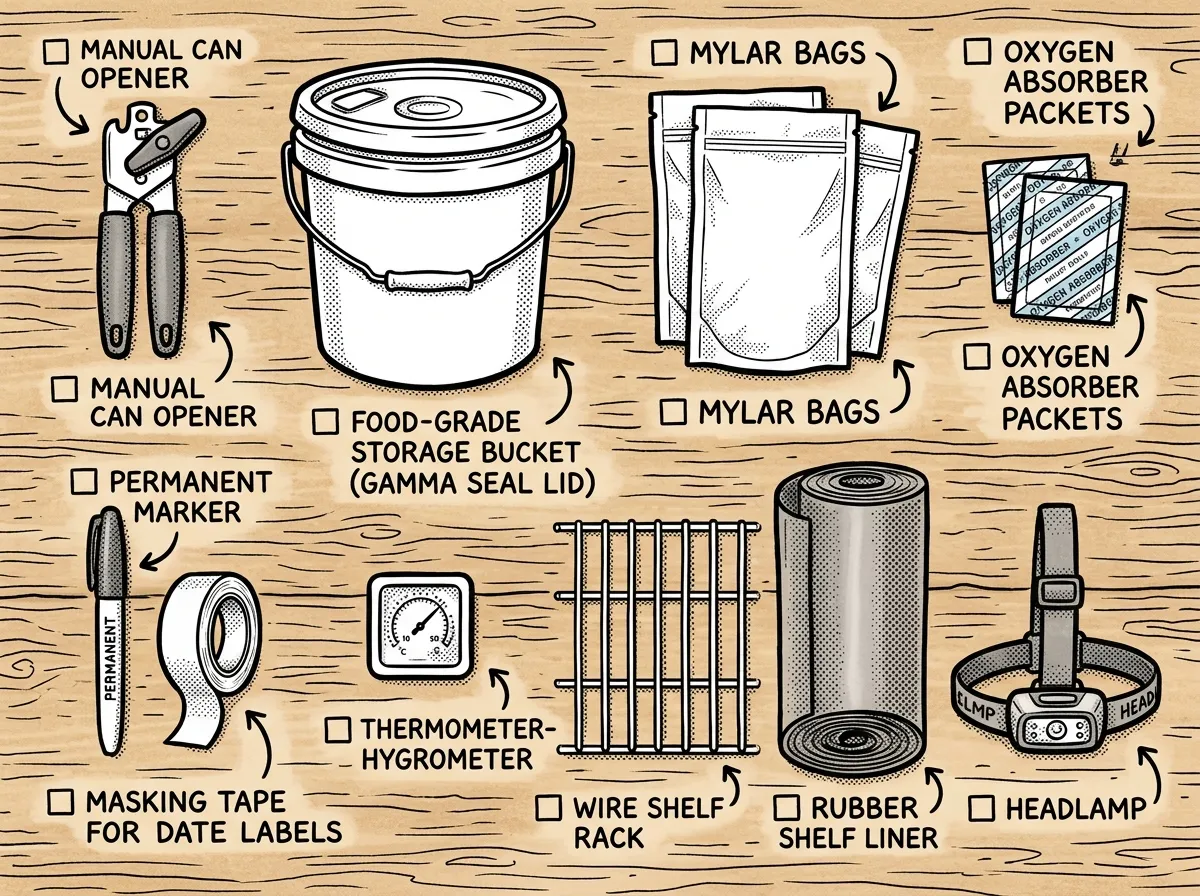 Must-have gear for storing and accessing your food stockpile
- Manual can opener — the EZ-DUZ-IT (around $12) is the one I’ve used on dozens of field exercises and it hasn’t failed yet. Cheap P-38 military openers work as backups, but don’t rely on them as your primary.
- Permanent marker or date labels for FIFO rotation
- Basic cookware and a backup cooking method like a camp stove or butane burner — see alternative off-grid cooking methods
- Airtight containers for opened dry goods
Post-Disaster Can Safety
If your stored cans were exposed to floodwater, don’t throw them all out. Remove labels (they can harbor bacteria), then wash sealed, undamaged cans with hot soapy water followed by a sanitizing rinse — one tablespoon unscented bleach per gallon of water. Re-label with a permanent marker. Discard any cans with damage to seams, dents on lids, or signs of leaking. This protocol comes from USDA guidance, and I’ve used it during real flood response work.
Building a Food Stockpile on a Budget
Budget is the number one barrier I hear from beginners. I get it. But here’s the truth: a solid emergency pantry doesn’t require a massive one-time investment. It requires consistency.
The $20-Per-Paycheck Method
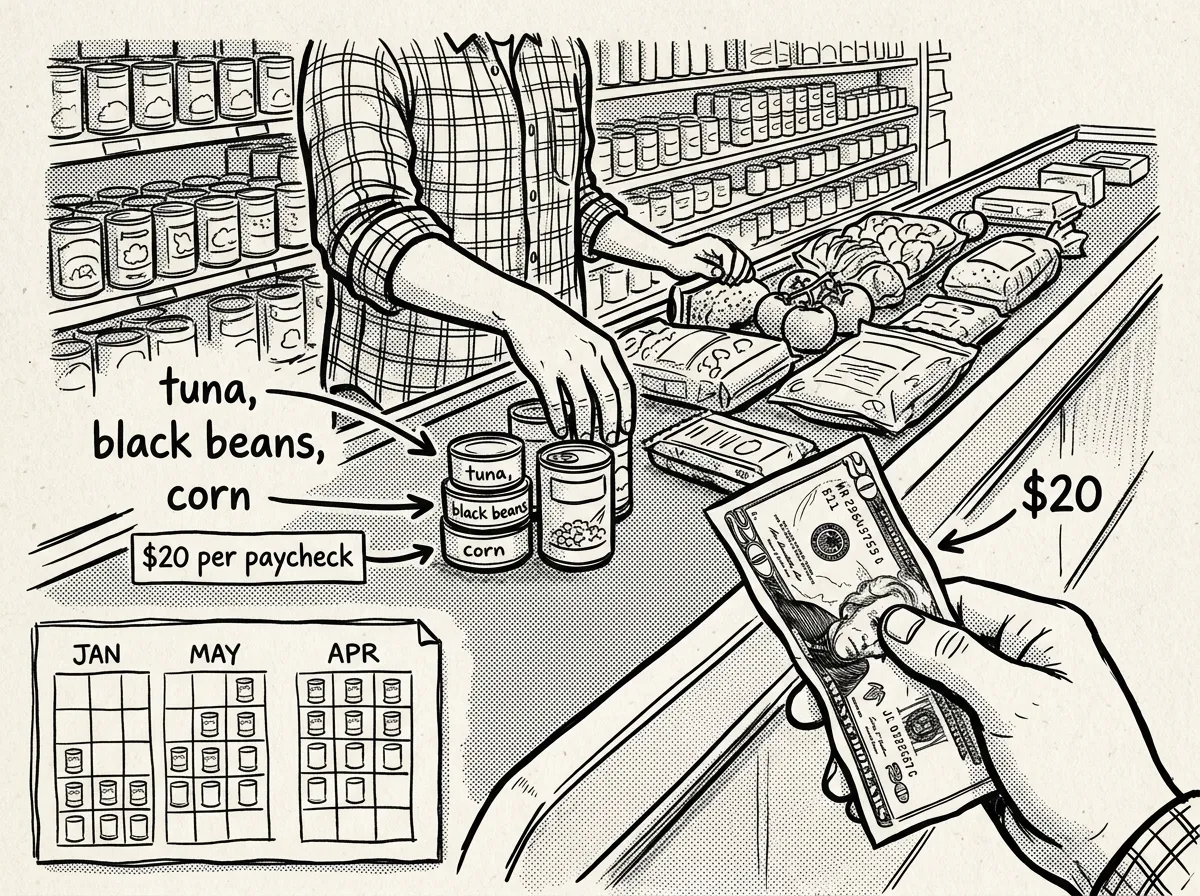 Building a two-week stockpile gradually — $20 at a time
Every time you shop, buy 2–5 extra shelf-stable items on top of your normal groceries. Budget $20 per paycheck — roughly $10 per week. In three months, you’ll have a solid two-week supply for two adults, roughly $120–$160 invested. Nothing gets wasted because you’re rotating everything into regular meals.
Where to Get the Best Deals
- Walmart: Great Value canned chicken, beans, and vegetables are consistently the cheapest per-unit option
- Aldi: Excellent prices on canned goods, pasta, rice, and cooking oil
- Costco: Best for bulk dry staples if you have the storage space
- Dollar stores: Surprisingly good for canned vegetables, beans, and basic spices — just check expiration dates
- WinCo and similar stores: Case-lot sales (usually spring and fall) offer 20–40% off canned goods by the case
Priority Tiers When Money Is Tight
Tier 1 — The Non-Negotiable Foundation ($30–$60):
- Water: 7 gallons per person (one week) at $1–$1.50 per gallon
- White rice: 10–20 lbs ($5–$12)
- Dried beans or lentils: 5–10 lbs ($5–$10)
- Salt and cooking oil ($3–$5)
- Manual can opener ($5–$12)
Tier 2 — Building Real Meals ($50–$100):
- Canned proteins (tuna, chicken, beans): 12–24 cans ($15–$30)
- Canned vegetables and fruits: 12–18 cans ($10–$20)
- Pasta, oats, flour ($8–$15)
- Peanut butter, 2–3 jars ($6–$12)
- Honey ($5–$10) — indefinite shelf life
- Comfort items: coffee, tea, hard candy ($5–$10)
Tier 3 — Extending and Hardening ($100–$200+):
- Mylar bags and oxygen absorbers ($15–$25)
- Food-grade 5-gallon buckets with gamma seal lids ($8–$15 each)
- Freeze-dried meals or #10 cans ($30–$80)
- Backup cooking fuel ($15–$30)
- Multivitamins ($8–$12)
A 20-pound bag of white rice runs $10–$15 and delivers over 30,000 calories. Dollar-for-dollar, it’s one of the best emergency foods you can buy.
2-Week Emergency Food Supply List for a Family of 4
This is the list I hand out at workshops. It covers 14 days for two adults and two children (roughly 7,000–8,000 calories per day for the household). Adjust portions for your family’s actual needs.
Water: 56 gallons minimum (1 gallon per person per day × 4 people × 14 days). Supplement with a reliable filtration system.
- Canned tuna: 12 cans
- Canned chicken: 12 cans
- Canned beans (mixed varieties): 16 cans
- Canned chili: 8 cans
- Canned salmon or sardines: 4–6 cans
- Canned tomatoes (diced and sauce): 12 cans
- Corn: 8 cans
- Green beans: 8 cans
- Peas or carrots: 6 cans
- Canned potatoes: 6–8 cans
- Mixed fruit in juice: 8 cans
- Peaches or pears: 6 cans
- Applesauce: 6–8 cups or cans
Dry staples (40–50 lbs total):
- White rice: 15–20 lbs
- Pasta (variety): 10–12 lbs
- Oats: 5–8 lbs
- Flour: 5 lbs
- Sugar: 3–5 lbs
Fats and calorie boosters:
- Peanut butter: 4–6 jars (16 oz each)
- Cooking oil: 2 bottles (48 oz each)
- Honey: 1–2 jars
Ready-to-eat items:
- Granola bars or protein bars: 48+ bars
- Trail mix: 3–4 lbs
- Crackers: 4–6 boxes
- Shelf-stable milk or powdered milk: 4–6 quarts
Essential non-food items:
- Manual can opener (plus a backup)
- Backup cooking fuel: 6–8 butane canisters or equivalent propane
- Multivitamins: 1 bottle per adult, 1 bottle children’s
- Trash bags, dish soap, paper plates
- Spices, hot sauce, bouillon cubes, soy sauce
Estimated total cost: $200–$350 depending on brands and sales. Build this over 6–8 weeks using the $20-per-paycheck method and you’ll barely feel it.
Beyond 72 Hours: Extending to Two Weeks
The standard 72-hour kit advice assumes help arrives quickly. Sometimes it doesn’t. Hurricane Katrina, the 2021 Texas ice storm, and the extended supply chain disruptions of 2020 all proved that a three-day buffer can run out while the problem’s still very much ongoing.
What Changes at the Two-Week Mark
Water becomes your biggest challenge. At one gallon per person per day, a family of four needs 56 gallons for two weeks. That’s a lot of water. Consider a combination of stored water (28+ gallons minimum) and a reliable filtration system.
Cooking fuel matters more. You can eat cold canned goods for three days. By day six, hot meals become a mental health issue as much as a nutritional one. A standard 8-oz butane canister powers roughly 1.5–2 hours of cooking on a portable stove. Plan on one canister per 2–3 days — that’s 5–7 canisters for two weeks. Learn about cooking without power during emergencies so you have options when fuel runs low.
Menu fatigue is real. Three days of canned soup and crackers is tolerable. Fourteen days of the same three meals will erode morale fast, especially with kids. Build variety intentionally.
The Power-Outage Transition Plan
Before you touch your stockpile, eat perishables first. Your refrigerator keeps food safe for about four hours if you keep the door closed. A full freezer holds temperature for roughly 48 hours (24 hours if half full). Eat fresh food first, then fridge items, then freezer items as they thaw, and finally your shelf-stable stockpile. This sequence maximizes every calorie you have.
Sample 3-Day Rotating Menu (One Adult, ~2,000 cal/day)
| Breakfast (~500 cal) | Lunch (~600 cal) | Dinner (~700 cal) | Snacks (~200 cal) | |
|---|---|---|---|---|
| Day 1 | Oats + peanut butter + honey | Canned chicken + rice + canned vegetables | Canned chili + crackers | Granola bar + trail mix |
| Day 2 | Granola bars + shelf-stable milk | Tuna + pasta + canned tomato sauce | Canned soup + crackers + canned fruit | Peanut butter + crackers |
| Day 3 | Pancake mix (just-add-water) + applesauce | Beans + rice + hot sauce | Canned stew + canned potatoes | Dried fruit + hard candy |
Water usage for cooking: roughly 1–2 quarts per day beyond drinking water. Factor that into your calculations. Urban preppers with balcony access should also consider a solar oven for emergencies — no fuel required, and it’s apartment-safe.
How to Choose What Goes on the Shelf
Staring at a grocery aisle with a hundred canned options and a finite budget can freeze anyone. You need a repeatable filter. Run every potential purchase through these five criteria, in order:
- Will your household actually eat it? This is the gatekeeper. That #10 can of dehydrated beets is a great deal until it sits untouched for four years.
- Caloric density per dollar. Dry rice, peanut butter, oats, pasta, and canned meats consistently win.
- Preparation complexity. During a power outage, you want things you can eat straight from the container.
- Shelf life relative to your rotation speed. Match quantity to consumption rate. A single person who eats canned tuna once a month needs 6–8 cans, not 40.
- Nutritional gap-filling. Once calories and protein are covered, add vitamins, fiber, and healthy fats.
The one-sentence version: if your family eats it, it’s calorie-dense, easy to prepare, stores well at your rotation pace, and fills a nutritional gap — buy it. If it fails two or more of those tests, skip it.
The first time I built a stockpile, I bought a case of canned beets and two dozen cans of Vienna sausages because they were cheap. Nobody in my house touches beets, and the Vienna sausages tasted like salted regret. I donated all of it six months later and replaced everything with canned chicken, black beans, and diced tomatoes — stuff we actually cook with every week. Stock what you eat. Eat what you stock. It’s that simple.
Urban vs. Rural: Same Goal, Different Strategy
Your environment should shape your stockpiling strategy as much as your budget does.
Urban Realities
Space is the bottleneck. Prioritize calorie-dense, compact foods in stackable bins and under-bed storage. Cooking options are limited — a butane single-burner with proper ventilation or a solar oven on a balcony beats an open-flame camp stove indoors. Water storage is harder, so stackable water bricks (3.5 gallons each, shelf-friendly) plus a quality filter work as backup.
Rural Advantages and Challenges
Storage space is abundant, but the nearest grocery store may be 30+ miles away — build deep stocks of bulk staples in food-grade buckets. You can supplement with gardens, livestock, and fishing for survival as a food supplement — but seeds don’t help in January and a freezer full of venison is worthless without power. If you’re in the Pacific Northwest, uninsulated barns are terrible for canned goods. Use a climate-controlled interior room or root cellar.
Bottom line: Urban preppers optimize for density and portability. Rural preppers optimize for depth and self-sufficiency. Both need rotation discipline.
Maintaining and Rotating Your Stockpile
A stockpile you don’t maintain is just a shelf of expiring food.
Monthly: Quick visual inspection for damage, pests, humidity, or temperature issues. Check that hygrometer.
Quarterly: Move older items to the front. Use or donate anything approaching its best-by date. Restock what you’ve consumed.
Annually: Complete inventory, replace expired items, update quantities for any changes in household size or dietary needs.
- Label every item with a purchase date using a permanent marker
- Place new purchases behind older stock on the shelf
- Cook from the front of the shelf during normal daily life
- Replenish what you use on your next shopping trip
This rotation system is what separates a functional emergency food supply from a forgotten shelf of expired cans. Treat your stockpile like a slow-moving extension of your regular pantry, not a time capsule.
Frequently Asked Questions
How much canned food should I stockpile?
Start with roughly 16–18 cans per person for a 3-day supply, then build toward 62–77 cans per person for two weeks. These numbers assume you’re also stocking dry staples and other shelf-stable items. FEMA’s 3-day baseline is the minimum — I recommend two weeks based on what I’ve seen in real-world disasters across the Pacific Northwest.
How long will canned food last preppers?
Low-acid canned goods (meats, beans, vegetables) maintain optimal quality for 2–5 years. High-acid items (tomatoes, fruits, pickled foods) are best within 12–18 months. The USDA states that commercially canned foods stored in good condition are safe indefinitely — dates on cans indicate quality, not safety. However, nutritional value and taste degrade over time. Always discard cans that are bulging, leaking, deeply dented at seams, or smell off when opened. For much longer storage windows, explore canned vs. freeze-dried food for preppers.
How do you start stockpiling food for beginners?
Build a 3-day to 2-week emergency food supply per person, then expand to one month as budget and space allow. Add 2–5 shelf-stable items to each regular shopping trip, focus on foods you already eat, and label everything with purchase dates so you can rotate using FIFO. The $20-per-paycheck approach gets most families to a solid two-week supply within three months.
What canned goods should I stockpile first?
Prioritize canned proteins — tuna, chicken, and beans — because protein is the hardest macronutrient to source during a disruption. Then add canned vegetables (tomatoes, corn, green beans), canned fruits packed in juice, and ready-to-eat options like soups, chili, and stews that require zero preparation.
Is freeze-dried food necessary for beginners?
Not at all. Freeze-dried foods and MREs are useful for long-term storage, but they’re expensive. You can build a completely effective emergency food supply with canned goods, dry staples, and shelf-stable items for a fraction of the cost. Add freeze-dried foods later as a Tier 3 upgrade once your basics are solid.
How should you store stockpiled food at home?
Store food in a cool, dry, dark area — 50–70°F with humidity below 60%. Keep items off the floor on shelves or pallets. Use airtight containers, Mylar bags with oxygen absorbers, or food-grade buckets for bulk dry staples. Avoid garages and sheds unless they’re insulated — temperature swings destroy shelf life and can compromise can seals.
Your Move: Start This Week
Learning how to start stockpiling food isn’t about panic. It’s about giving your family a buffer that turns a potential crisis into a manageable inconvenience. Every emergency I’ve responded to in 12 years of field work has reinforced the same lesson: families who prepared — even modestly — handled disruptions with remarkably less stress.
Three actions to take right now:
- Clear a shelf in a cool, dry closet or pantry and assemble a 3-day starter supply of canned goods, dry staples, water, and a manual can opener.
- Add 2–5 shelf-stable items to your next grocery trip, label them with today’s date, and place them behind your existing stock.
- Cook one full meal from your stockpile this weekend. This single test will reveal missing tools, fuel gaps, taste issues, and preparation problems before they matter.
Once your two-week supply is solid, expand into building a complete emergency preparedness plan that covers water, communication, first aid, and evacuation. Food is the foundation — but it’s not the whole house.
Start small. Stay consistent. Every can you put on that shelf is one less thing to worry about when the lights go out.
The Complete
Prepper's Reference.
149 articles synthesized into one comprehensive PDF — twelve chapters covering water, food, shelter, first aid, comms, and scenario-specific preparedness. Free with your email.
Unsubscribe anytime · We never share your email
You're in. Check your inbox.
Keep Reading
Non-Perishable Food Items: Best Emergency Pantry Guide
Discover the best non-perishable food items for your emergency pantry. Storage tips, nutrition planning, and beginner mistakes to avoid. Start building today.
Beginner Food Prepping Essentials: Emergency Pantry Guide
Master beginner food prepping essentials — from shelf-stable staples and storage methods to simple emergency meals. Start your prep today.
Prepper Storage Solutions: Save Space & Stay Ready
Proven prepper storage solutions to maximize space, protect supplies, and stay organized. Budget tiers, room-by-room plans, and rotation tips. Start today.