A bug out bag is a grab-and-go emergency kit designed to support you for about 72 hours during an evacuation. For beginners, it should include water, food, shelter, first aid, lighting, tools, documents, and personalized items for climate, health, and family needs.
Key Takeaways
- Start with the five non-negotiables — water, food, first aid, light, and shelter — for under $80 before adding anything else.
- Carry water treatment capability (filter + tablets) instead of hauling 3 gallons; your back will thank you and your options stay flexible.
- Keep your loaded pack under 20% of your body weight, ride the weight on your hips not your shoulders, and test-walk it before you need it.
- Review and rotate every six months tied to daylight saving changes: check expirations, test electronics, and walk with the loaded pack.
- Build for your actual environment — urban bags stay light and discreet, rural bags prioritize self-sufficiency and warmth.
Bug Out Bag Checklist: 72-Hour Essentials Guide
I’ve built and tested bug out bags across 12 years of wilderness response work in the Pacific Northwest — from the 2020 Oregon wildfire evacuations to annual FEMA training exercises. This bug out bag checklist reflects what actually works when you’ve got minutes to leave, not what looks impressive on a gear shelf.
Quick Summary
- Water first, always. Pack 1–2 liters on your person plus a filter and purification tablets — hauling 3 gallons is unrealistic on foot.
- Cover the five non-negotiables — water, food, first aid, light, and shelter — for under $80 before you add anything else.
- Choose a 30–50 L pack that rides on your hips, not your shoulders, and keep it within arm’s reach of your exit door.
- Build for your actual environment. Urban bags stay light and gray-man discreet. Rural bags lean toward self-sufficiency and warmth.
- Review and rotate every six months tied to daylight saving changes — check expirations, test electronics, walk with the loaded pack.
- Practice beats price. A $150 bag you’ve trained with outperforms a $1,500 bag sitting untested in a closet.
A bug out bag you’ve never worn is just an expensive backpack.
What Is a Bug Out Bag?
A bug out bag is a pre-packed, portable emergency kit designed to sustain you for roughly 72 hours during an evacuation. Simple concept. FEMA, the American Red Cross, and the CDC all recommend maintaining a ready-to-grab kit, and every solid bug out bag covers seven core supply categories:
- Water — Stored water plus filtration and purification for resupply along your route.
- Food — 72 hours of shelf-stable, calorie-dense items that don’t require cooking.
- First Aid — A compact medical kit, prescriptions, and personal health supplies.
- Shelter and Warmth — Protection from exposure: a bivvy, tarp, and layered clothing.
- Tools — A multi-tool, knife, fire-starting gear, and basic repair items.
- Documents and Cash — Waterproof copies of IDs, insurance, medical records, and small bills.
- Personal Items — Prescriptions, glasses, infant supplies, pet needs, and comfort items tailored to your household.
When infrastructure fails and services are overwhelmed, these seven categories keep you alive, mobile, and able to make clear decisions until conditions stabilize.
Why You Actually Need One
During the September 2020 Oregon wildfires, entire communities received Level 3 (“GO”) evacuation orders with as little as 15 minutes’ notice. Families with pre-packed bags grabbed them and left. Families without them spent those critical minutes scrambling for medications, chargers, and documents — or left without essentials entirely.
I responded to several of those PNW events. The gap between prepared and unprepared households was brutal. Prepared families arrived at shelters calm, hydrated, and with their critical medications in hand. Unprepared families arrived panicked, missing prescriptions, and without identification to access aid services.
Here’s what a disaster preparedness kit actually buys you:
- Saves crucial time when you’ve got minutes, not hours, to leave. No packing decisions, no frantic searching.
- Reduces decision fatigue under stress. Your thinking brain degrades fast when you’re threatened — having a pre-made plan eliminates dozens of choices at the worst possible moment.
- Provides known supplies if local services collapse. FEMA reports that only about 48% of Americans have any emergency supply kit at all. Don’t be in the other half.
- Pairs with your broader plan. A bag without a plan is just a backpack. Combine it with evacuation routes and escape planning, meeting points, and a family communication plan for emergencies.
Bug Out Bag vs. Get Home Bag vs. INCH Bag
Beginners often confuse three common emergency bag types. Understanding the differences helps you build the right kit first.
Bug Out Bag (BOB) — A 72-hour evacuation kit stored at home, designed to grab when you need to leave your residence quickly. Weight range: 20–35 lbs for most adults. This is the kit covered here and the one I recommend everyone build first.
Get Home Bag (GHB) — A lighter kit stored at your workplace or in your vehicle, designed to get you home safely during an emergency that strikes while you’re away. Weight range: 8–15 lbs. Think comfortable walking shoes, water, a snack, a flashlight, a basic first aid kit, a phone charger, and a paper map. If you commute more than 10 miles, this is your second priority.
INCH Bag (I’m Never Coming Home) — A heavier, long-term survival kit built on the assumption that you won’t return to your residence. Weight range: 40–60+ lbs. These include extended food supplies, heavy-duty shelter systems, tools for resource procurement, and barter items. INCH bags are for advanced preppers with specific threat models.
Build your bug out bag first. Add a vehicle get-home bag second. Consider an INCH bag only after you’ve practiced with your BOB extensively and have a clear reason for one. Most emergencies resolve within days, not months.
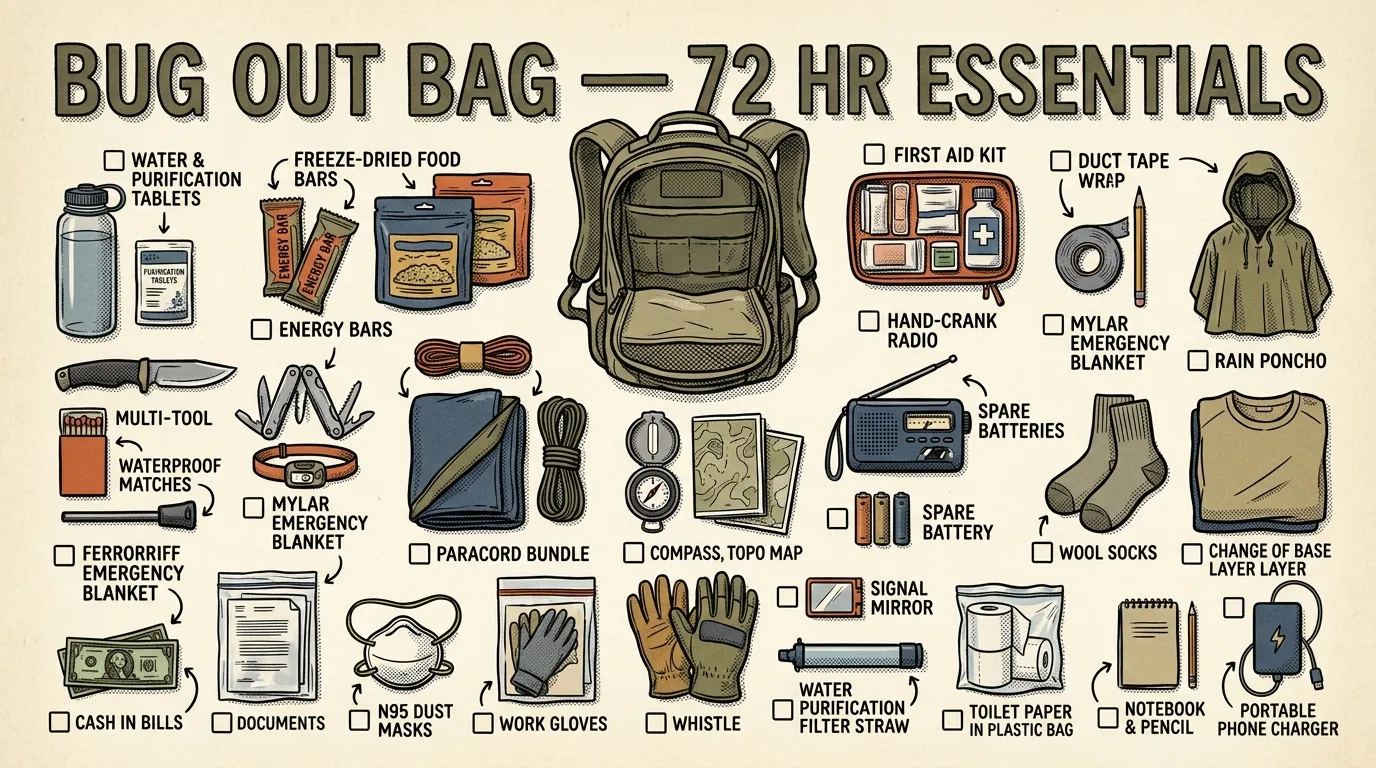
72-Hour Bug Out Bag Checklist — Quick Reference
- Water: 1 gal/day/person, durable bottles, collapsible container, filter, purification tablets
- Food: 72 hrs of nonperishable, ready-to-eat items — energy bars, jerky, nut butter, freeze-dried meals
- Shelter and warmth: emergency bivvy or compact sleeping bag, mylar blanket, tarp/poncho, paracord, seasonal layers
- First aid and hygiene: compact first aid kit, prescriptions, spare glasses, toothbrush, wet wipes
- Light and power: headlamp with spare batteries, NOAA hand-crank radio, power bank with cables
- Documents and cash: waterproof pouch with IDs, insurance, medical info, contacts, maps, small bills
- Clothing: extra socks and underwear, moisture-wicking shirt, durable pants, jacket, sturdy broken-in shoes
- Navigation and tools: paper map, compass, multi-tool or knife, duct tape, work gloves, whistle, pen and notebook
- Optional: fire starter, compact stove, signal mirror, solar charger, satellite messenger
- Personal: infant or pet supplies, mobility aids, extra medications, N95 masks for smoke
Expanded Essentials and Gear Notes
Water and Water Treatment
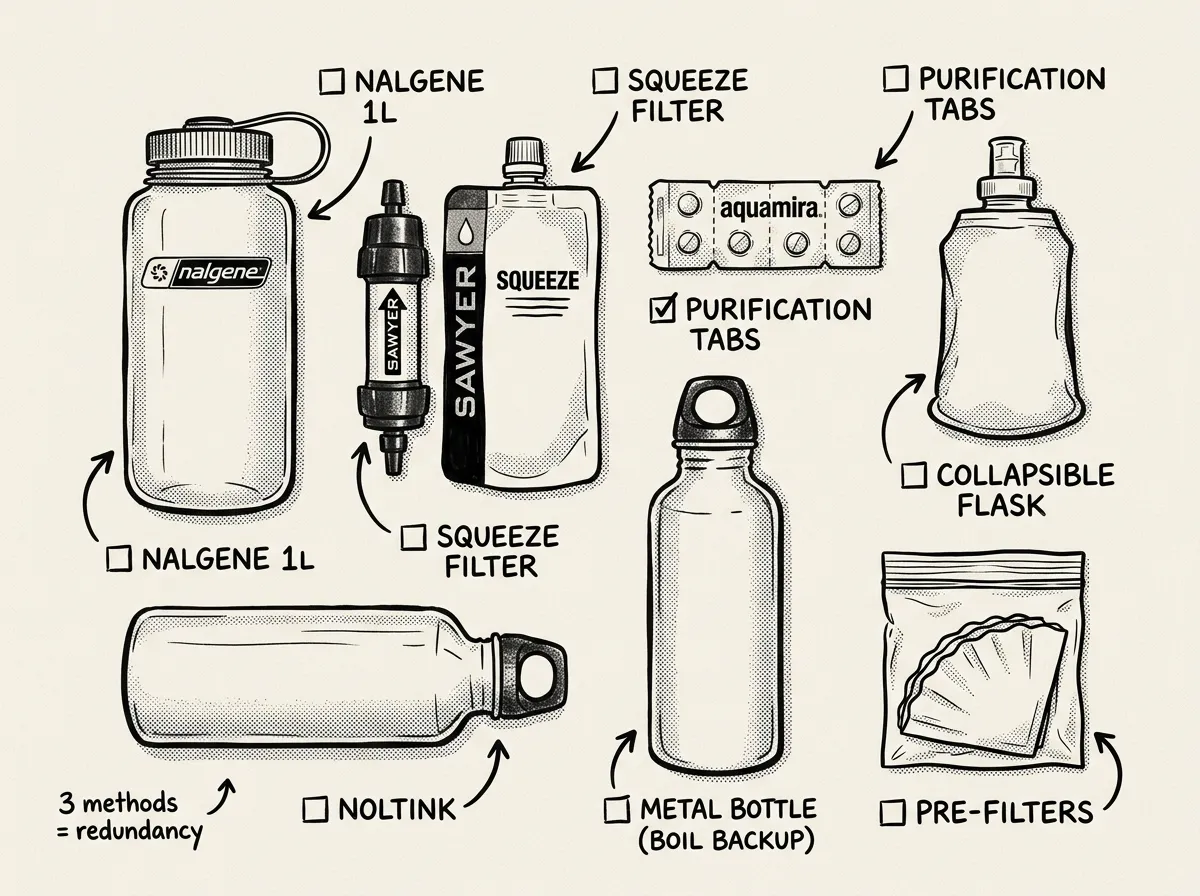 Water storage and treatment essentials for 72 hours on the move
In my Wilderness First Responder training, we learn that dehydration degrades decision-making before you even feel thirsty — which is why water is item number one, not an afterthought.
FEMA recommends 1 gallon (roughly 3.8 L) per person per day for 3 days. That’s about 25 lbs of water alone. Way too heavy for most people to carry on foot.
Here’s the practical approach: carry 1–2 liters on your person, plus a reliable filter, purification tablets, and a collapsible container for resupply. Heat, heavy exertion, pregnancy, or illness all increase water needs significantly — if you’re evacuating in summer heat with kids, plan for 1.5x the baseline.
The Sawyer Squeeze — around $30 — is what I reach for every time I build or recommend a bug out bag. It filters 100,000 gallons, weighs next to nothing, and threads onto standard water bottles. The LifeStraw is fine for a single use, but the Squeeze filters more volume, works inline with a hydration bladder, and gives you real versatility. Back it up with Aquatabs or Katadyn Micropur tablets for redundancy. Two methods of purification, always.
Food
Pack 72 hours of shelf-stable, ready-to-eat items that your stomach actually tolerates. This isn’t the time to discover you hate freeze-dried chili mac. For a complete breakdown of what to stock and rotate, check out building a 72-hour emergency food supply.
Best options include energy bars, trail mix, jerky, nut butter packets, freeze-dried meals, and instant oatmeal. Calories matter more than variety — target 1,500–2,000 per day minimum. Under stress and physical exertion, you’ll burn more than normal. Rotate every 6–12 months for freshness and write the pack date on everything with a Sharpie.
Shelter and Warmth
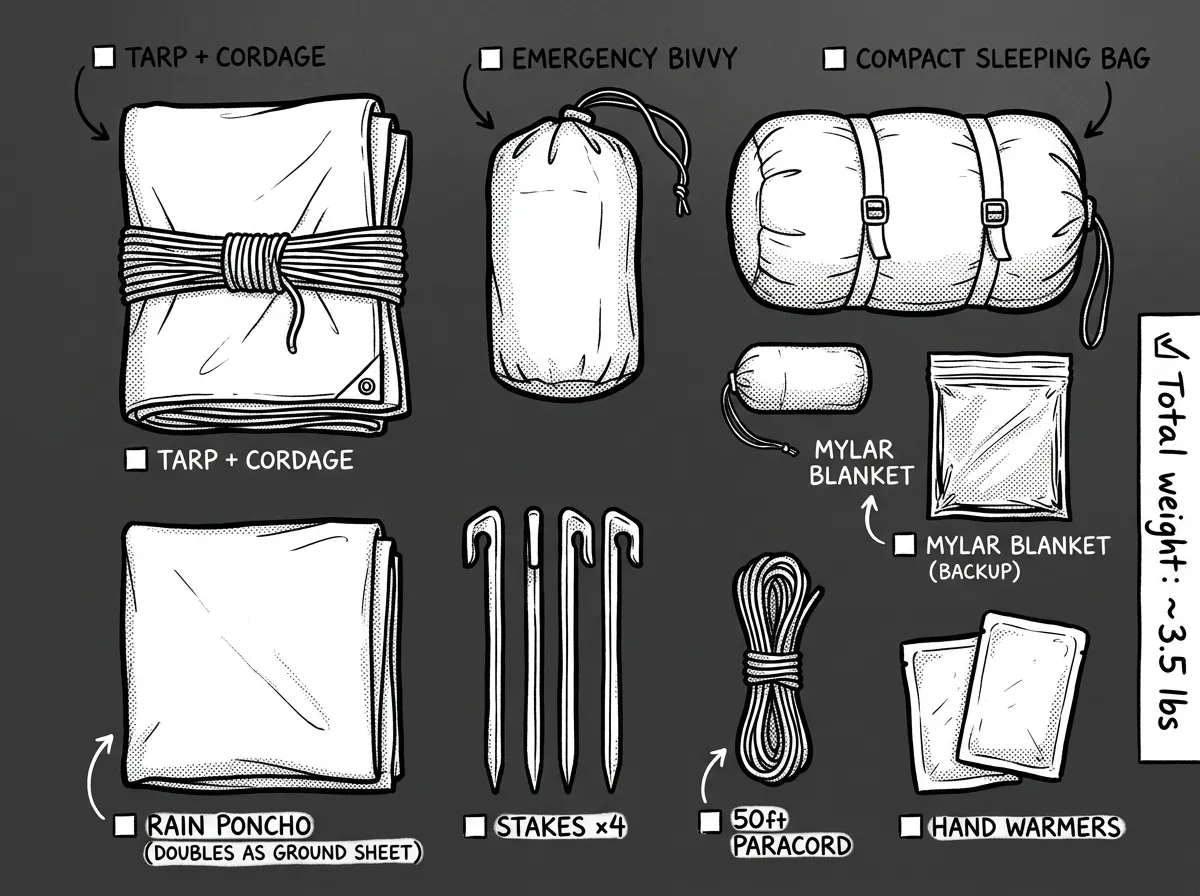 Compact shelter and warmth gear that fits in the bottom of your pack
Your essentials here are an emergency bivvy or compact sleeping bag, a mylar blanket, tarp or poncho, 50 feet of paracord, extra socks, a hat and gloves, and rain gear. Cold conditions? Add insulated layers and chemical hand warmers. If you’re in a high desert environment or up in the northern Rockies, a sleeping bag rated to your region’s seasonal lows is worth the extra weight.
Hot climates present a different problem entirely. A lightweight tarp for shade and a wide-brimmed hat can prevent heat exhaustion as effectively as heavy gear prevents hypothermia. If you’re in a humid Gulf Coast climate, electrolyte packets become non-negotiable.
First Aid and Hygiene
Your core kit should include adhesive bandages, gauze pads, medical tape, antiseptic wipes, antibiotic ointment, ibuprofen, acetaminophen, blister care (moleskin), tweezers, elastic bandage, and nitrile gloves. Add several days of prescriptions, printed medical information, spare glasses or contacts, and allergy medications like an EpiPen or Benadryl.
Don’t forget hygiene. A toothbrush, wet wipes, hand sanitizer, and a small roll of toilet paper in a zip-lock bag weigh almost nothing and matter enormously by day two.
Light, Communication, and Power
Carry a headlamp or reliable flashlight with spare lithium batteries — they store far longer than alkaline. A hand-crank or battery NOAA radio is non-negotiable for weather alerts and emergency broadcasts. See our guide to the best emergency radios for staying informed for specific picks.
You’ll also want at least one fully charged power bank (10,000 mAh minimum) with cables for your devices. A car charger supplements nicely if you’re evacuating by vehicle.
Documents, Cash, and Identification
Use a waterproof pouch for photo IDs, insurance cards, prescription lists, emergency contacts, paper maps, and $200–$500 in small bills (fives and tens). Keep digital copies on a USB drive or encrypted cloud storage as backup. For a thorough approach, follow the process in creating a prepper’s emergency binder — it covers exactly what documents to duplicate and how to store them.
Clothing and Footwear
Pack extra underwear, two pairs of socks (wool or synthetic — never cotton), a moisture-wicking shirt, durable pants, and a weather-appropriate jacket. Keep sturdy, broken-in footwear near your exit. New boots during an evacuation means blisters within miles.
I’ve watched people make this mistake more times than I can count. They grab brand-new hiking boots off a shelf during a drill and they’re limping by the second mile. Break your shoes in now.
Navigation and Basic Tools
Paper map of your region, a baseplate compass, multi-tool or fixed-blade knife, duct tape wrapped around a pencil (saves space), leather work gloves, whistle, and a small notebook with a pen. Low-tech navigation tools work when power and cell signals fail. I’ve seen this confirmed during every major PNW storm event I’ve responded to.
Fire, Cooking, and Signaling
Carry waterproof matches, a Bic lighter, and a ferro rod. Three methods, because redundancy matters when you’re cold and wet. For tested picks, see best fire starters for emergencies. A compact stove and metal cup help if you plan to boil water or heat food. Add a signal mirror, whistle, and high-visibility bandana for signaling.
Keep a Bic lighter in your pocket, not buried in your pack. It’s the fastest fire method you own, and you want it accessible when your hands are numb and you can’t operate zippers well.
Morale and Comfort Items
Small comforts maintain focus and reduce the psychological toll of displacement. Favorite snacks, instant coffee or tea packets, lip balm, earplugs, a paperback book. For children: a small toy, coloring supplies, or a comfort item. A stressed child with a familiar stuffed animal is significantly easier to manage than a stressed child without one.
How to Pack Your Bug Out Bag by Weight Zone
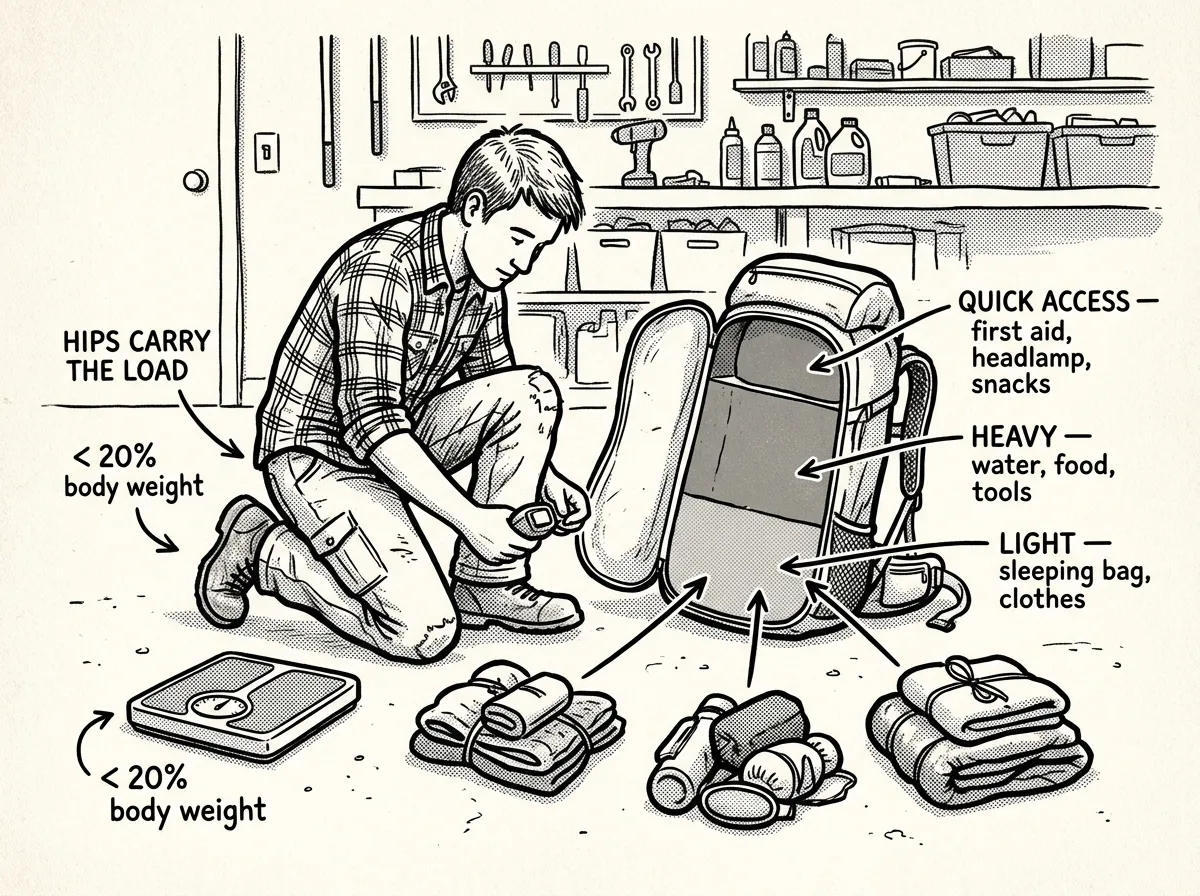 Packing by weight zone keeps heavy items close to your back and center of gravity
So you’ve got all the gear — now what? Having the right items means nothing if your pack is organized so poorly that your back gives out in the first mile or you can’t find your first aid kit in the dark.
- Zone 1 (Bottom): Place your sleeping bag or bivvy in a compression sack at the bottom, along with extra clothing layers you won’t need until you stop for the night — light, compressible, needed least urgently
- Zone 2 (Center-Back): Pack your heaviest items — water containers, food, cooking gear — centered against the back panel between your shoulder blades and hip tops, transferring load to the hip belt
- Zone 3 (Top and Outer Pockets): First aid kit, headlamp, knife, rain gear, snacks, map, compass, documents pouch, and medications go in lid pockets, hip-belt pockets, and side pockets for instant access without removing the pack
A few additional packing notes. Use compression straps to cinch the load tight against the frame — a shifting load wastes energy and strains your back. Keep rain gear in the top of the main compartment or an external pocket, because weather doesn’t wait for you to unpack.
The 20% rule: your fully loaded pack shouldn’t exceed 20% of your body weight for sustained carry. A 180 lb person should aim for 36 lbs max. Over that? Cut comfort items first, then re-evaluate food weight.
And test the loaded pack. Put it on and walk your neighborhood for 20–30 minutes. Adjust the hip belt, sternum strap, and shoulder straps until the weight rides on your hips. If it hurts in your driveway, it’ll be agony at mile three during an actual evacuation.
Personalize for Your Household and Region
Adjust the bug out bag checklist for your household, health needs, and environment:
- Wildfire zones: NIOSH-certified N95 masks, safety goggles, extra water, bandanas.
- Flood-prone areas: Waterproof dry bags for all contents, extra socks, elevated home storage for medications.
- Cold climates: Insulated sleeping bag, chemical hand warmers, heavier base layers, a balaclava.
- Hot climates: Extra water capacity, sun hat, SPF lip balm, electrolyte packets.
- Infants: Diapers (5-day supply), formula, bottles, extra clothing, pacifier.
- Pets: Leash, 72 hours of food, collapsible bowl, vaccination records, comfort toy.
- Seniors and medical needs: Mobility aids, backup batteries for medical devices, extra prescriptions, magnifying card for reading labels.
For the pack itself, a durable 30–50 L backpack with padded shoulder straps, a load-bearing hip belt, and a sternum strap fits most adults. Osprey, Deuter, REI Co-op, and Gregory all make solid options in the $80–$150 range. If budget is tight, a used hiking pack from a thrift store works — I’ve tested this myself during group drills with beginner preppers, and a $4 Goodwill Jansport performed just fine.
Maintain, Rotate, and Practice
A grab-and-go bag that sits untouched for two years is a bag full of expired food, dead batteries, and outdated documents. Here’s the maintenance protocol I follow:
- Lay out all contents on a table. Every item, every pocket. Missing something? You’ll find out now, not during an evacuation.
- Check every expiration date. Food, water, medications, batteries, purification tablets. Replace anything within 3 months of expiring.
- Test all electronics. Turn on your radio, headlamp, and power bank. Charge the power bank fully. Replace any batteries showing corrosion.
- Try on the pack and walk 15 minutes. Check fit, strap condition, and zipper function. Look for fraying, mildew, or rodent damage.
- Update documents. Review for changes to addresses, insurance policies, emergency contacts, or medical information.
- Log the check date. Write the date on an index card and tuck it inside the top of the bag.
Tie your review to daylight saving time changes — the first Sunday of November and the second Sunday of March. Twice a year, same trigger, easy to remember. I’ve used this system for a decade and it works.
Between checks, practice using your gear. Set up the tarp in your backyard. Filter water from a creek. Start a fire with your ferro rod. Familiarity eliminates fumbling when the stakes are real.
Urban vs. Rural: How Location Changes Everything
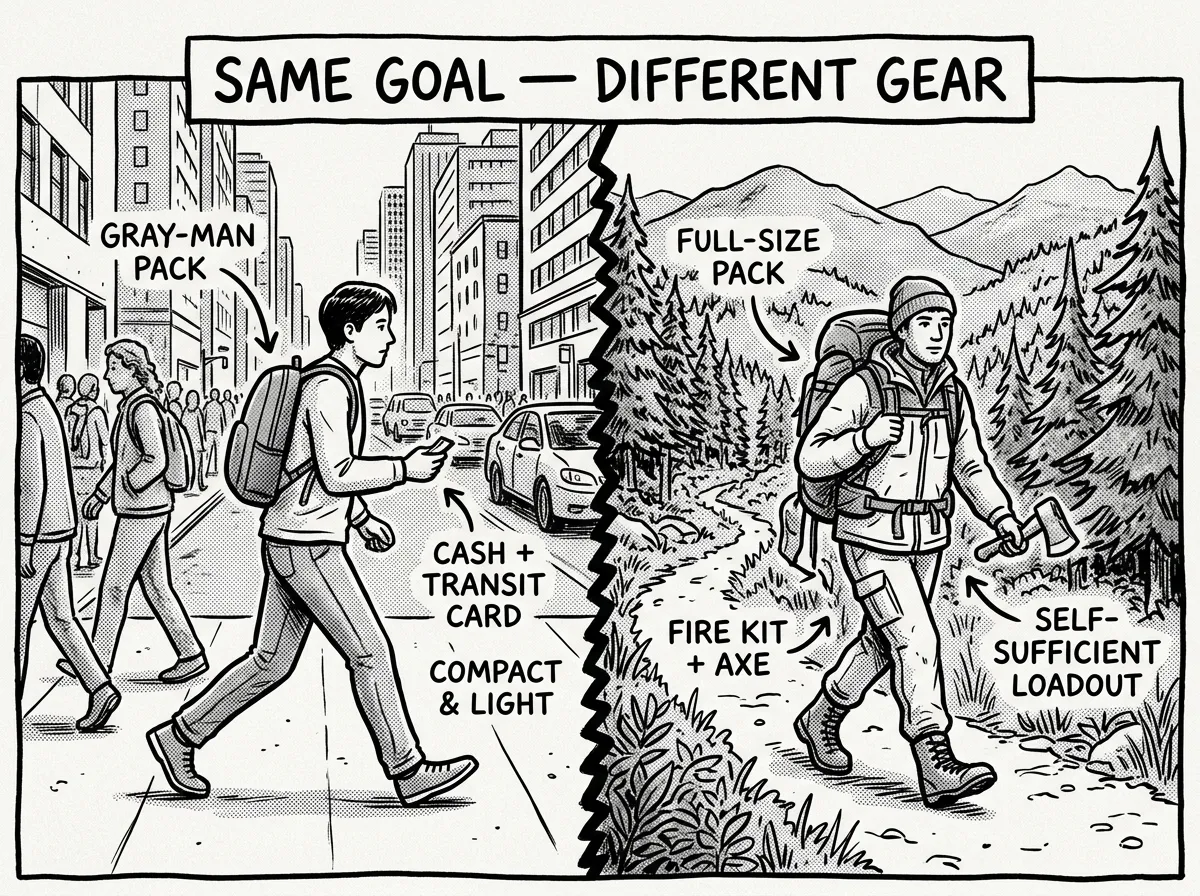 Your environment determines your loadout — urban bags stay gray-man, rural bags go heavy on self-sufficiency
Where you live fundamentally reshapes what belongs in your pack. A bug out bag built for a third-floor apartment in Houston looks nothing like one staged in a mudroom outside Bozeman.
Urban preppers should prioritize:
- Cash in small bills ($200–$500 in fives and tens). Vending machines, tolls, and transactions don’t make change during grid-down scenarios.
- N95 or P100 masks and eye protection. Structural fires, chemical releases, and dense particulate hazards are urban realities.
- Compact, gray-man gear. A tactical-looking pack screams “I have supplies” in a crowded evacuation corridor. Choose a plain daypack in black or navy.
- Public transit maps and alternate pedestrian routes. Highways gridlock fast. Know how to walk out of your city using rail corridors, bike paths, and service roads.
- A pry bar or window breaker. Collapsed structures, jammed fire doors, stuck elevators — urban egress problems require urban tools.
- Self-defense considerations. Non-lethal self-defense options for preppers covers this in detail.
Rural preppers should prioritize:
- More water treatment capacity and less stored water. Natural water sources are likely nearby, but resupply points are far apart.
- Heavier shelter and warmth components. You may be sleeping rough, not in a hotel lobby or evacuation shelter. A real sleeping bag replaces the mylar blanket as your primary.
- Fire-starting redundancy. Ferro rod, stormproof matches, and a Bic lighter. Two is one, one is none.
- Longer-range communication. Cell towers are sparse and fail first. A hand-crank NOAA radio is table stakes, but consider a Baofeng UV-5R or similar HAM handheld if you hold a Technician license.
- Vehicle-based staging. Rural BOBs often live in a truck, not a closet. Add a tow strap, jumper cables, and a full-size spare to your vehicle kit alongside the pack.
Urban bags stay lighter, more discreet, and optimized for moving through crowds. Rural bags run heavier, more self-sufficient, and assume you won’t see a convenience store for days. Build for your reality, not someone else’s YouTube scenario.
Budget Breakdown: Building a Bag When Money Is Tight
Most “ultimate bug out bag” articles casually recommend $1,500 worth of gear. That’s not helpful if you’re working with $150. I’ve run bug out drills with groups ranging from college students on tight budgets to retired couples — and the $60 kits perform nearly as well as the $600 kits when the person carrying them has practiced.
Tier 1 — The Non-Negotiables ($50–$80)
Buy these first. They address what’ll actually kill you fastest.
- Water container + purification tablets — $12–$20. A 32 oz Nalgene and a pack of Aquatabs.
- Basic first aid kit — $10–$15. Off-the-shelf from any pharmacy. Add your prescriptions from existing supplies.
- Headlamp — $10–$20. Energizer or Ozark Trail. Grab lithium batteries for longer storage life.
- Emergency bivvy or mylar blankets (pack of 4) — $8–$15. The SOL Emergency Bivvy at around $15 is a real upgrade over loose mylar sheets.
- Food — $10–$15. Peanut butter, granola bars, ramen packets. Raided from your pantry, this can cost nothing.
Tier 2 — Serious Capability Boost ($60–$120)
- Sawyer Squeeze or Mini water filter — $20–$35
- Fixed-blade knife or multi-tool — $15–$30. The Morakniv Companion — around $15 — is field-proven and nearly indestructible.
- Backpack — $20–$40. Skip the “tactical” markup.
- Lighter + ferro rod — $5–$10
- Printed documents in a zip-lock bag — $0–$2
Tier 3 — Comfort and Extended Capability ($80–$200)
- Hand-crank NOAA radio — $25–$40
- Portable power bank (10,000 mAh) — $15–$25
- Tarp and paracord — $15–$25
- Compact sleeping bag — $30–$60
- Freeze-dried meals (72-hour supply) — $30–$50
A genuinely functional emergency bug out bag can be assembled for $110–$200 if you shop smart and skip the tactical markup. Don’t let budget paralysis stop you from starting.
What to Skip: Gear That Sounds Good but Fails in the Field
Every bug out bag list eventually gets bloated with gear that looks impressive online and disappoints when it matters. I’ve carried all of these at some point. Learn from my mistakes.
Survival “credit card” multi-tools. Those flat, wallet-sized steel cards with a tiny saw edge and a “compass” — they do everything poorly and nothing well. A $15 Morakniv and a $3 Bic lighter replace the entire card and actually work.
Cheap solar phone chargers (foldable panels under $30). The first time I tested one of these during a 2019 training exercise near Mount Hood, a participant’s budget solar charger produced zero usable charge under overcast November skies. His $18 power bank saved his communication capability. A fully charged 10,000 mAh power bank gives you 2–3 full phone charges right now. Add solar later as a Tier 3 upgrade and spend $50+ for a panel that actually delivers.
Oversized “survival” knives (8”+ blades). Heavy, imprecise, and mostly comfort objects. A 4” fixed blade handles 95% of realistic bug-out cutting tasks better than a Rambo knife.
Full cases of MREs as your only food. Nine MREs for 72 hours adds 10–15 lbs. Energy bars, nut butter packets, and freeze-dried meals deliver similar calories at half the weight.
Gas masks. Unless you’ve got actual CBRN training and a properly fitted mask with current filter cartridges, a gas mask is dead weight and false confidence. An N95 respirator handles smoke, dust, and particulates — the realistic threats — and weighs almost nothing.
Here’s the test I use before adding anything to my pack: I ask two questions. Have I actually used this item in a field exercise or real situation? And does something lighter and cheaper do the same job? If the answer to the first is no and the second is yes, it stays on the shelf. This single filter has saved me probably 8–10 lbs of “cool but useless” gear over the years.
Extending Beyond 72 Hours
The standard bug out bag checklist targets 72 hours because that’s how long most evacuations last before infrastructure recovers. But Hurricanes Katrina and Maria, the 2021 Texas freeze, and the Maui wildfires all proved that 72 hours can stretch to 7–14 days.
The key shift is from carrying supplies to carrying capability. You can’t pack 14 days of water. You can pack a filter system and the knowledge to find sources.
What to add for a 7–14 day scenario:
- Upgraded water treatment. Add a metal container (32 oz stainless steel bottle) so you can boil water as a backup if your filter clogs or freezes.
- Calorie-dense food additions (2–3 lbs extra). Peanut butter in plastic jars, honey packets, olive oil packets. Fat is 9 calories per gram — the most weight-efficient fuel for your body.
- A compact stove and fuel. An Esbit pocket stove (around $12) with fuel tabs, or a BRS ultralight canister stove (around $20). Hot food and purified water become critical for morale beyond day three.
- Shelter upgrade. Swap the mylar bivvy for a primary tarp shelter (8x10 silnylon, roughly 12 oz) and a lightweight sleeping bag rated 20°F below your region’s seasonal low.
- Hygiene expansion. Biodegradable camp soap, a packable microfiber towel, and additional toilet paper. Infection risk climbs sharply after the first few days without basic sanitation.
Free Printable Bug Out Bag Checklist PDF
Multiple readers have asked for a single-page printable version of this bug out bag checklist. We’ve created one that reflects current FEMA 72-hour recommendations and the field-tested gear priorities covered in this guide.
What the PDF includes:
- Categorized gear list with checkboxes for packing and verification
- Target weight per category to help you stay under the 20% body weight guideline
- A biannual maintenance schedule with specific check steps
- Blank lines in each category for personalizing with your household’s unique needs
- A quick-reference emergency contact block on the back
Print two copies. Keep one taped inside your bug out bag’s lid pocket as a contents verification sheet. Keep the second with your emergency binder or planning documents. During each biannual review, walk through every checkbox.
Download the free bug out bag checklist PDF here
The checklist is updated every six months alongside this article to reflect current best practices and gear recommendations.
Common Mistakes and How to Avoid Them
- Packing too much. Prioritize essentials and multi-use items. If your pack exceeds 20% of your body weight, start cutting.
- Underplanning water. Follow FEMA’s 1 gallon per person per day minimum, then supplement with filtration and purification capability.
- Ignoring personal needs. Prescriptions, glasses, baby supplies, and mobility items come first — before any tactical gadgets.
- Buying gear without learning it. Test new equipment before you rely on it. A fire starter you’ve never struck is just a metal stick.
- Not updating the bag. Set biannual reminders tied to daylight saving changes.
- No evacuation plan. Pair your bug out bag supplies with planned routes, meeting points, and a communication plan.
The first time I built a bug out bag, I packed it, zipped it up, and didn’t open it for eight months. When I finally did a proper inventory, two food items were expired, my batteries had corroded, and I’d completely forgotten what was in the bottom third. Don’t be me in 2013. Check your bag twice a year and actually use the gear between checks.
The Complete
Prepper's Reference.
149 articles synthesized into one comprehensive PDF — twelve chapters covering water, food, shelter, first aid, comms, and scenario-specific preparedness. Free with your email.
Unsubscribe anytime · We never share your email
You're in. Check your inbox.
Keep Reading
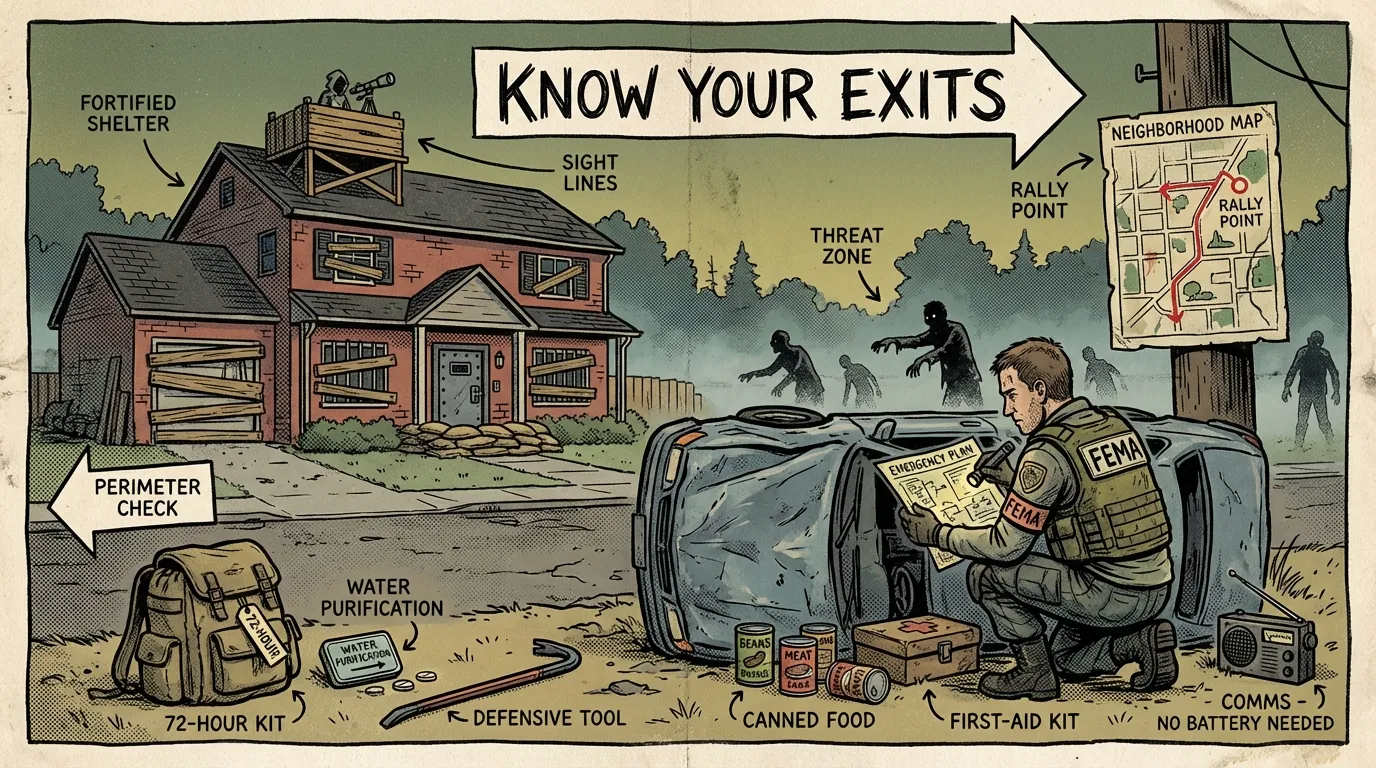
Zombie Apocalypse Survival Preparedness: FEMA Pro's Guide
Zombie apocalypse survival preparedness teaches real disaster skills. A FEMA-trained Wilderness First Responder breaks down the exact steps. Start today.
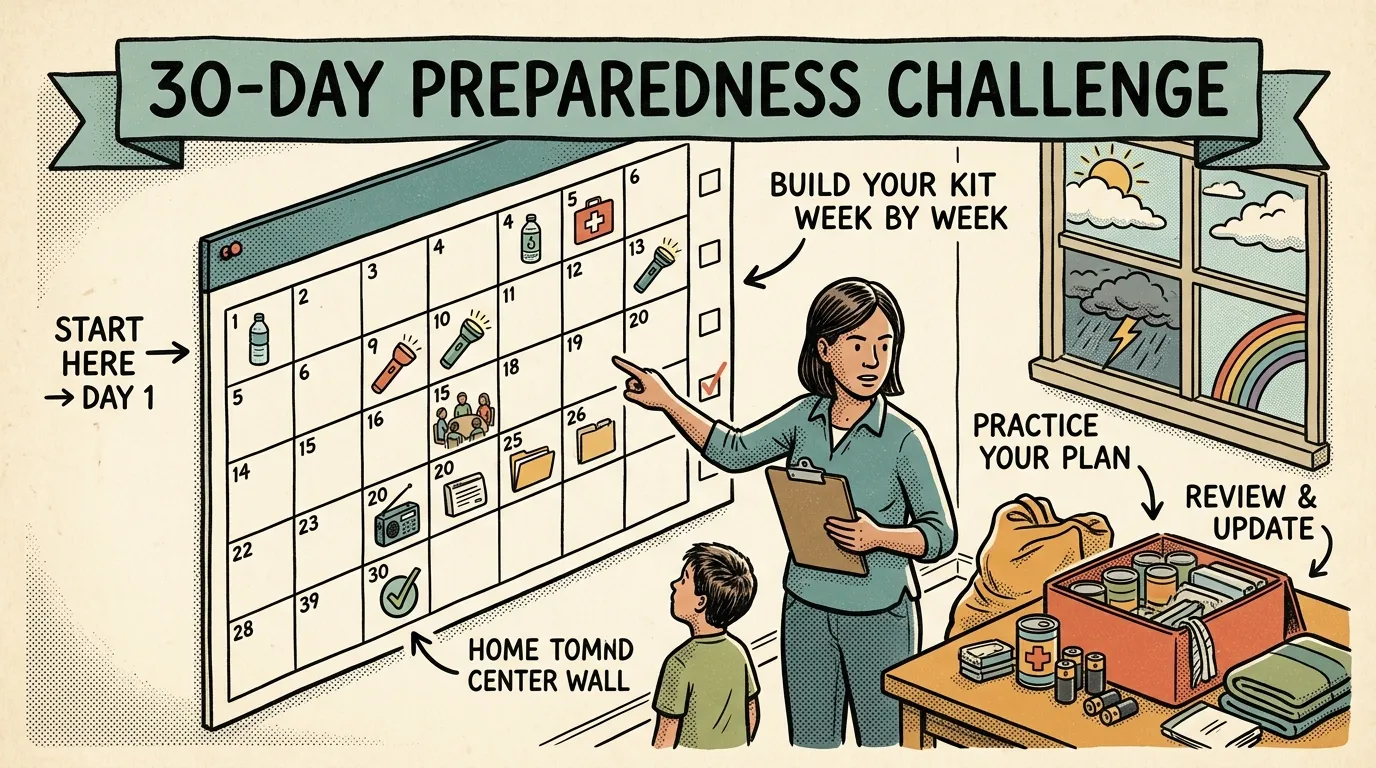
National Emergency Preparedness Month: 30-Day Plan
Use this 30-day National Emergency Preparedness Month challenge to go from unprepared to fully ready. One simple 15-minute task per day. Start now.
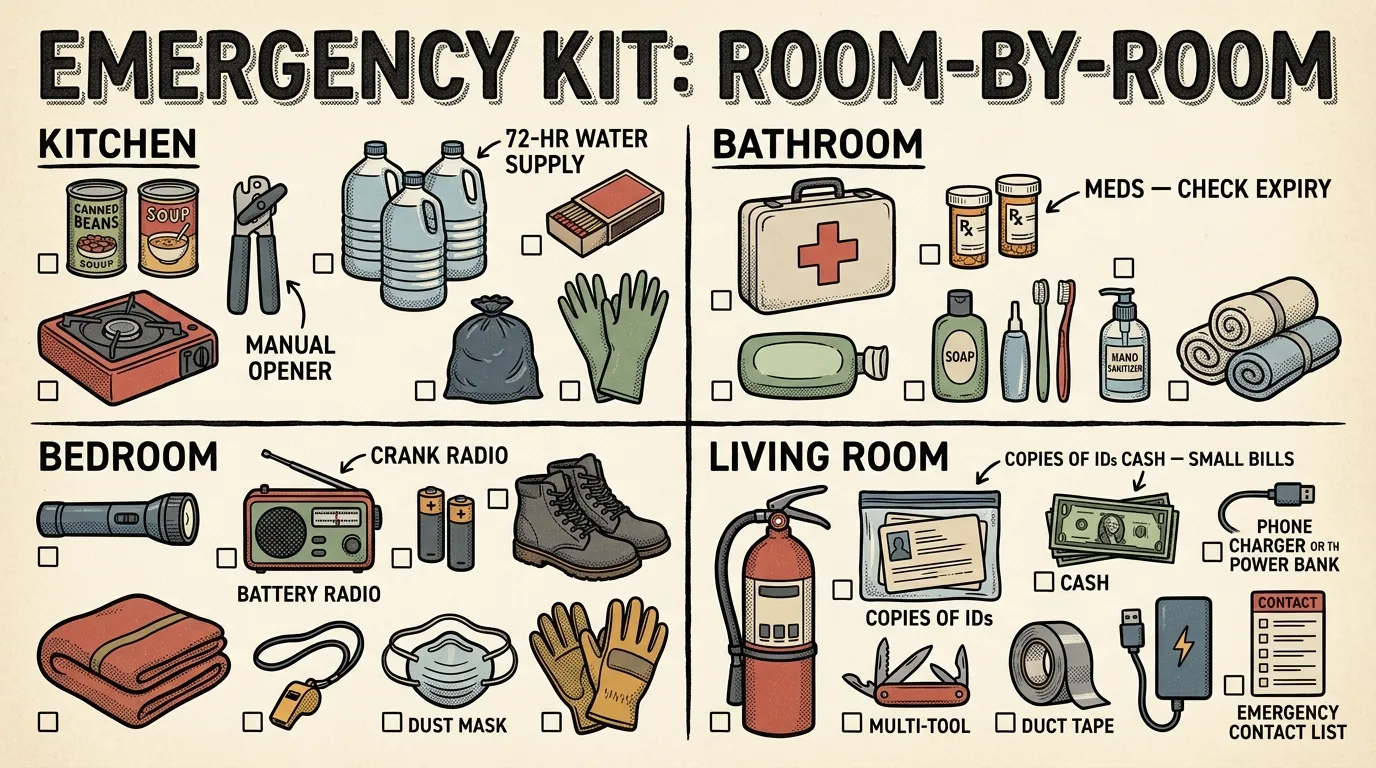
Emergency Preparedness Kit: Room-by-Room Home Guide
Build your emergency preparedness kit room by room for 14-day shelter-in-place readiness. Budget-friendly system from a FEMA-trained WFR. Start tonight.