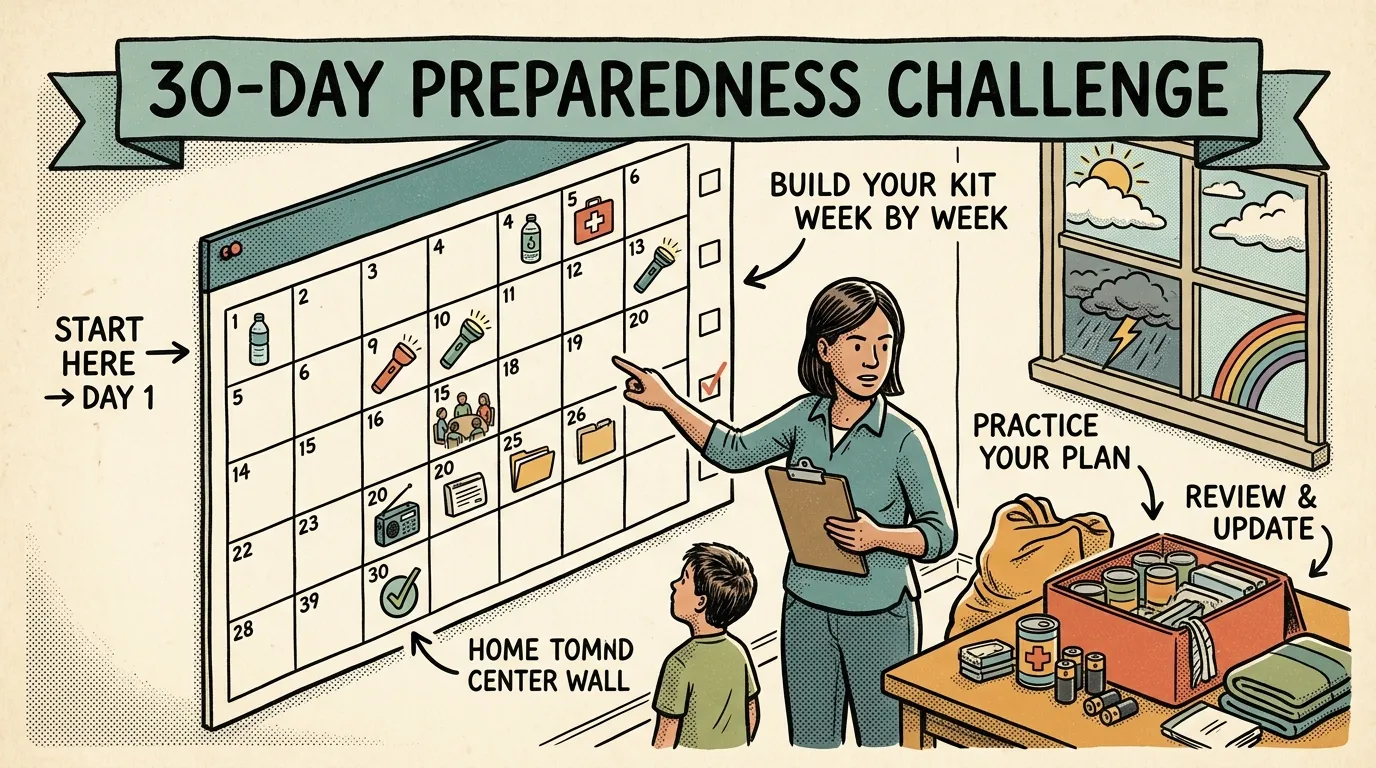
This article provides a structured 30-day daily action plan for National Emergency Preparedness Month (September), giving beginners one concrete task per day to build a complete emergency preparedness foundation from scratch.
Key Takeaways
- National Emergency Preparedness Month is every September — use this 30-day challenge to build real readiness with one 15-minute task per day
- Week 1 costs nothing: identify your regional hazards, set up alerts, and create a family communication plan before spending a dime
- A complete baseline emergency kit costs $200–$400 spread across the month — many critical tasks are entirely free
- Run a full family evacuation drill by Day 29 so your plan is tested, not theoretical
- Set quarterly maintenance reminders so your preparedness doesn't degrade after September ends
- Connect with neighbors during the challenge — community resilience consistently outperforms individual stockpiling in real disasters
September 2019, a wildfire evacuation order hit a community in central Oregon. Families had roughly 45 minutes. Some grabbed their go-bags, loaded the car, and drove to their predetermined rally point in under twenty minutes. Others scrambled through closets looking for passports, argued about what to take, and left without medications. The difference wasn’t luck or money — it was whether they’d spent any time preparing before the sirens went off. This is exactly why national emergency preparedness month matters, and why this 30-day preparedness challenge exists. One task per day. Fifteen to thirty minutes each. No overwhelm. By October 1st, you’ll be more prepared than the vast majority of your neighbors — and according to FEMA’s own surveys, nearly 60% of Americans have never practiced what to do in a disaster.
Quick Summary
- National Emergency Preparedness Month happens every September — this plan gives you one focused task per day so you don’t have to figure it out alone
- Week 1 builds your knowledge foundation: risk assessment, emergency contacts, and your family emergency plan
- Week 2 tackles physical supplies: water, food, first aid, and your core emergency kit checklist
- Week 3 focuses on skills and documents: first aid basics, fire safety, and securing critical paperwork
- Week 4 covers advanced readiness: evacuation planning, financial prep, community connections, and full drills
- Total estimated cost: $200–$400 spread across 30 days, with many tasks costing nothing
What Is National Emergency Preparedness Month?
National Emergency Preparedness Month is an annual observance held every September that encourages Americans to take concrete steps to prepare for disasters and emergencies in their homes, businesses, schools, and communities. Sponsored by FEMA and the Ready.gov campaign since 2004, it provides a structured framework with weekly themes and free resources to help people at every experience level build real readiness.
The observance was born out of the post-9/11 era of preparedness reform. After the September 11th attacks exposed critical gaps in civilian readiness — and Hurricane Katrina in 2005 reinforced those lessons at devastating scale — FEMA formalized September as a dedicated month for disaster preparedness education and action. Each year, FEMA releases a specific theme and four weekly focus areas, culminating on September 30th with National Preparedness Day.
At its core, National Preparedness Month is built around FEMA’s four-step framework: Make a Plan, Build a Kit, Know Your Risk, and Get Involved. This 30-day challenge takes those four pillars and breaks them into daily tasks that anyone can accomplish — whether you’re a complete beginner or you’ve been meaning to update that dusty emergency kit in your closet for three years.
National Preparedness Month Themes and Weekly Focus Areas
The most recent theme was “Preparedness Starts at Home” — a fitting theme, since your household is the foundation of all disaster resilience. If your home isn’t squared away, nothing else matters. FEMA announces each year’s theme as September approaches, but the weekly structure stays consistent.
FEMA has organized the month into four weekly focus areas:
- Week 1 (September 1–7): Make a Plan — Develop a family emergency plan that accounts for communication, meeting points, and special needs
- Week 2 (September 8–14): Build a Kit — Assemble supplies to sustain your household for at least 72 hours without outside help
- Week 3 (September 15–21): Low-Cost, No-Cost Preparedness — Focus on skills, knowledge, and actions that cost little or nothing
- Week 4 (September 22–30): Teach Youth About Preparedness — Engage children and teens in age-appropriate preparedness activities
This 30-day challenge maps onto these weekly themes but goes significantly deeper with daily actionable tasks. Where FEMA provides the “what,” this plan gives you the specific “how” — right down to what to buy, what to practice, and what to check off each evening.
Note: This article is updated annually with each new FEMA theme. The daily challenge structure remains consistent because the fundamentals of emergency preparedness for beginners don’t change year to year.
Why National Emergency Preparedness Month Deserves More Than a Social Media Post
Every September, FEMA and Ready.gov promote national preparedness month to remind Americans to prepare for disasters. You’ll see infographics, hashtags, and maybe a tweet from the White House. That’s fine. But awareness without action doesn’t keep your family safe when the power’s been out for three days and the grocery store shelves are empty.
The gap between “I should prepare” and “I’m actually prepared” is almost never about money or motivation. It’s about knowing what to do next. Only 39% of Americans have developed a household emergency plan. That means most people know they should prepare — they just haven’t started. That’s what this plan solves. Each day has one concrete task that takes 15 to 30 minutes. Some days you’ll spend a few bucks. Most days you won’t spend anything.
Preparedness isn’t a purchase — it’s a sequence of small decisions that compound into real safety.
Week 1: Know Your Risks and Build Your Plan (Days 1–7)
This first week costs almost nothing. You’re building the informational backbone that everything else sits on. This aligns directly with FEMA’s Week 1 focus: Make a Plan.
Day 1: Identify Your Regional Hazards
Go to Ready.gov and your county emergency management website. Write down the top three to five disasters most likely to affect where you live. For a more data-driven approach, use FEMA’s National Risk Index tool at hazards.fema.gov/nri — it maps specific hazard risks down to the county and census tract level. If you’re on the Gulf Coast, that’s hurricanes and flooding. Pacific Northwest? Earthquakes, wildfires, and winter storms. High desert? Extreme heat and flash floods. Tornado Alley is obvious. Don’t guess — actually look it up. Your local emergency management agency publishes Hazard Mitigation Plans that spell this out in detail.
Most families can only name one or two of their top five regional hazards without looking it up. The risks you don’t know about are the ones that hurt you.
Day 2: Set Up Emergency Alerts
Enable Wireless Emergency Alerts (WEA) on your phone — most phones have this on by default, but check your settings. Download the FEMA app (free). Sign up for your county’s emergency notification system. Every county has one, and they’re almost always free. This takes ten minutes and could save your life.
Day 3: Create Your Emergency Contact List
Write down phone numbers for every family member, your doctor, your insurance agent, your vet if you have pets, your kids’ school, and two out-of-area contacts. That last one matters — during a regional disaster, local cell towers get overwhelmed, but you can often reach someone in another state. Print this list. Put one copy on your fridge and another in your wallet.
Make sure every member of your family knows all critical phone numbers. Keep both digital and hard copies in all your emergency kits and on your person.
Day 4: Write Your Family Communication Plan
Sit down with everyone in your household. Answer three questions: Where do we meet if we can’t get home? Who’s our out-of-area contact? How do we communicate if cell service is down? Write it all on one page. FEMA has a free fillable template at Ready.gov — download and print it. You can also check out our deeper guide on developing a family communication plan for emergencies. A handwritten sheet taped inside your kitchen cabinet works just as well as a laminated card. What matters is that the plan exists and everyone knows where to find it.
Day 5: Learn Your Evacuation Routes
Pull up a map of your area. Identify two ways out of your neighborhood, two routes out of your city, and at least one destination 50+ miles away (a friend’s house, a relative, a specific town). Drive one of these routes this weekend so it’s muscle memory, not theory.
Day 6: Assess Your Home’s Vulnerabilities
Walk through your house with fresh eyes. Is your water heater strapped to the wall? Do you have working smoke detectors on every level? Do you know where your gas shutoff valve is? Make a list of anything that needs fixing. You don’t have to fix it all today — just know what’s there.
Day 7: Review Your Insurance Coverage
Call your insurance agent or log into your account. Do you have flood insurance? (Standard homeowner’s policies don’t cover floods, a gap many homeowners only discover after rivers jump their banks.) What’s your deductible? Take a photo of your declarations page and store it in a cloud folder you can access from anywhere.
Week 2: Build Your Core Supplies (Days 8–14)
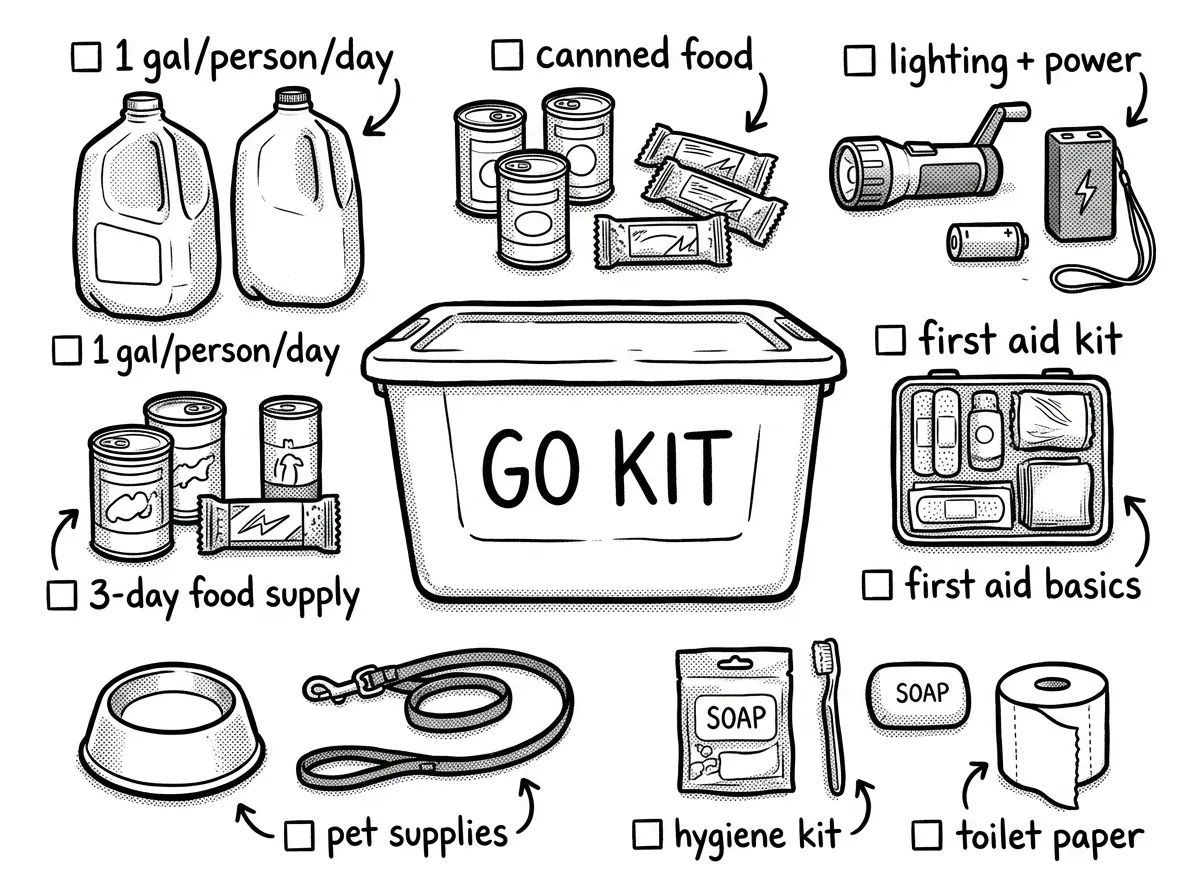 Core emergency kit supplies to gather during Week 2
Now you’re spending a little money, but we’re spreading it out so it doesn’t sting. This maps to FEMA’s Week 2 focus: Build a Kit.
Day 8: Start Your Water Supply
Buy or fill containers for at least one gallon of water per person per day for three days. That’s three gallons per person. A family of four needs twelve gallons minimum. Store-bought cases of water bottles work perfectly. Don’t overthink it. For long-term storage strategies beyond the basics, our guide on how to store water for emergencies goes deeper. Just get water secured today.
Day 9: Buy a Three-Day Food Supply
Grab shelf-stable foods your family actually eats. Peanut butter, canned soup, crackers, dried fruit, granola bars, canned tuna. You don’t need freeze-dried mountain meals — you need calories that don’t require refrigeration. Aim for 2,000 calories per person per day for three days.
- Peanut butter and crackers
- Canned soups or stews (with pull-tab lids)
- Granola bars or energy bars
- Dried fruit and nuts
- Canned tuna or chicken
- Bottled juice or powdered drink mixes
- A manual can opener if your cans need one
Day 10: Assemble Basic Lighting and Power
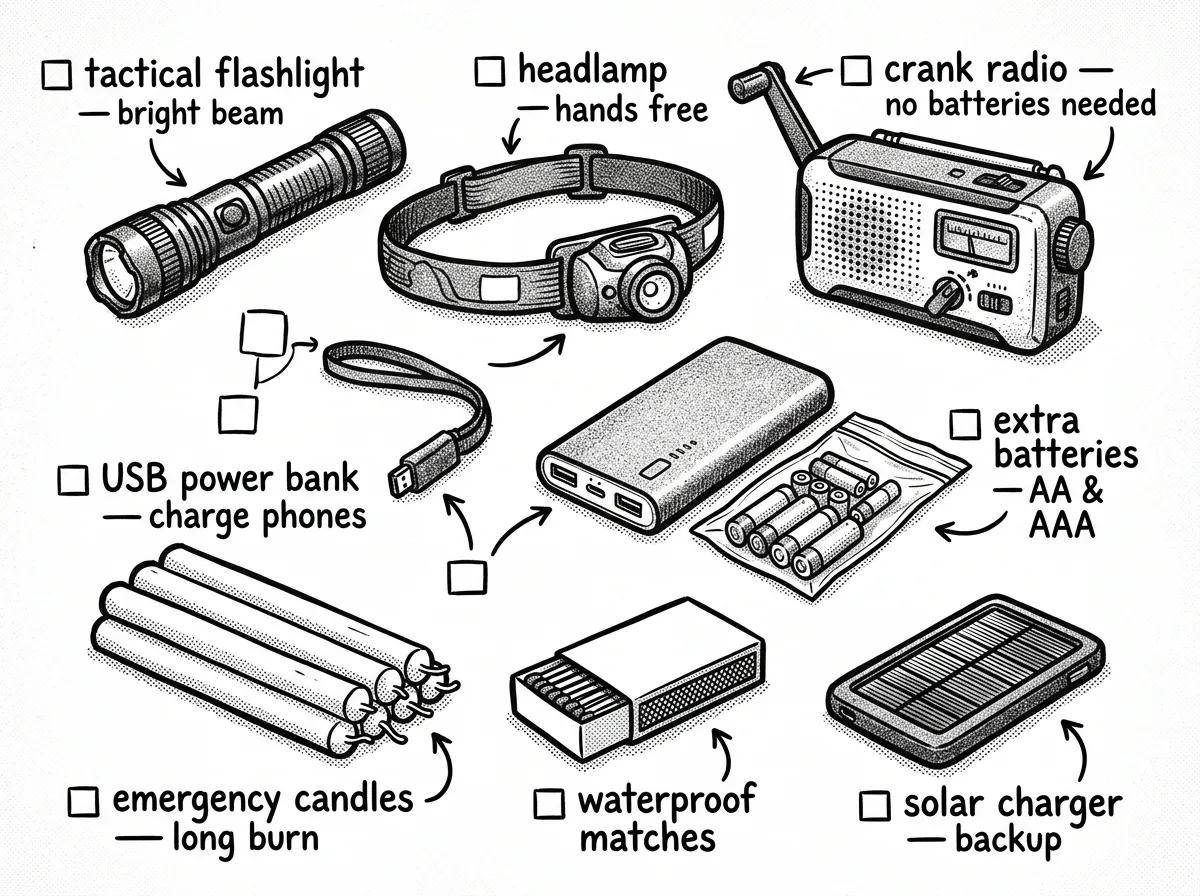 Lighting and backup power essentials for your emergency kit
Get a reliable flashlight with extra batteries and a battery-powered or hand-crank radio. The Midland ER310 — around $35–$40 — includes a hand crank, solar panel, NOAA weather radio, and a USB charging port, according to the manufacturer’s specifications.
Day 11: Build a Basic First Aid Kit
You can buy a pre-made kit or build your own. Either way, make sure it includes adhesive bandages, gauze pads, medical tape, antibiotic ointment, ibuprofen, any prescription medications (a 7-day backup supply minimum), tweezers, and nitrile gloves. Spend an extra two bucks on a SAM splint — it takes up almost no space and handles a shocking number of injuries. Our prepper first aid kit guide has a complete packing list if you want to go beyond the basics.
Day 12: Gather Hygiene and Sanitation Supplies
Toilet paper, hand sanitizer, garbage bags, moist towelettes, a small bottle of bleach (unscented — for water purification if needed), and feminine hygiene products. If you’ve got a baby, add diapers and formula. This is the category most often overlooked in emergency kits.
Day 13: Prepare for Your Pets
Your dog or cat can’t prepare for themselves. Set aside three days of pet food, water, medications, copies of vaccination records, a photo of your pet (in case you get separated), a leash or carrier, and a small comfort item. Some families refuse to evacuate when they can’t bring their animals along. Don’t put yourself in that position.
Day 14: Organize Everything in One Location
Take everything from this week and put it in one spot. A large plastic tote in your garage or closet works. Label it. Make sure every household member knows where it is. This is your home emergency kit. It doesn’t need to be fancy — it needs to be findable.
Expensive tactical bags and custom kits stored in an attic that’s hard to reach do little good in an emergency. A $7 Rubbermaid tote in a hallway closet beats a $200 bag you can’t reach. Accessibility matters more than aesthetics — every single time.
Week 3: Skills, Documents, and Depth (Days 15–21)
You’ve got your plan and your supplies. Now we’re adding skills and securing the information that’s hardest to replace. This aligns with FEMA’s Week 3 theme: Low-Cost, No-Cost Preparedness.
Day 15: Learn Basic First Aid
Watch a 30-minute first aid video from the Red Cross (free on their website). According to Red Cross guidance, the single most important step for severe bleeding is to apply direct pressure, maintain it, and avoid removing the dressing to check. Three skills cover the vast majority of emergencies: controlling bleeding with direct pressure, clearing an airway, and recognizing signs of shock. You don’t need a medical degree. You need to know these three things cold.
Day 16: Practice Fire Safety
Test every smoke detector and carbon monoxide alarm in your home. Replace batteries if they’re older than six months. Walk your family through two exit routes from each bedroom. If you don’t own a fire extinguisher, buy one — a 5-lb ABC dry chemical extinguisher runs about $25 at any hardware store. Put it in the kitchen.
- Pull the pin from the handle
- Aim the nozzle at the base of the fire — not the flames
- Squeeze the handle to release the extinguishing agent
- Sweep from side to side until the fire is out
Day 17: Back Up Critical Documents
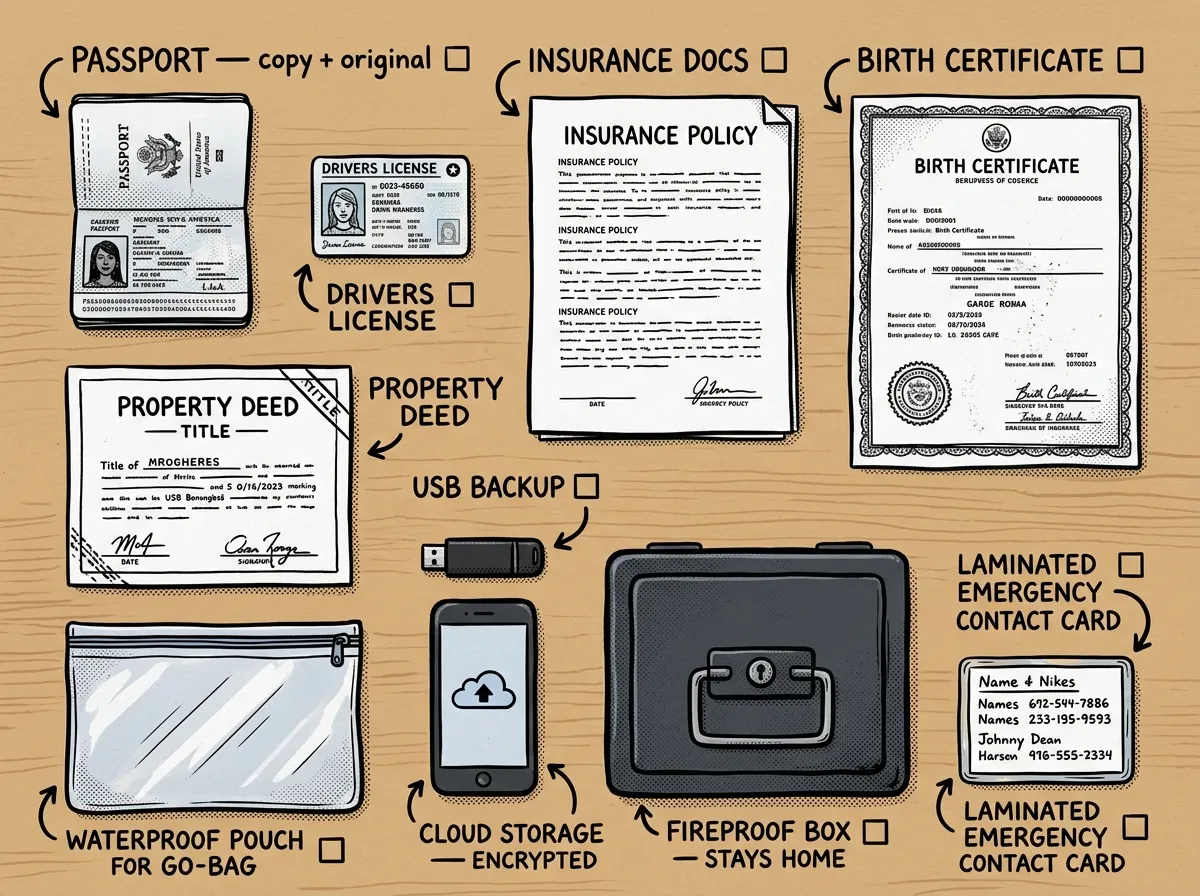 Critical documents and backup methods laid out for emergency readiness
Make digital copies of your driver’s license, passport, insurance policies, birth certificates, mortgage/lease agreement, and medical records. Store them in an encrypted cloud folder (Google Drive, iCloud, whatever you use) and on a USB drive you’ll keep in your emergency kit. Waiting until an actual evacuation to track down these documents often takes far longer than expected. Do it now when there’s no pressure. For a more thorough approach, consider building a complete emergency binder that keeps everything organized in one grab-and-go format.
Day 18: Build a Small Cash Reserve
ATMs don’t work when the power’s out. Set aside $100–$200 in small bills ($5s, $10s, $20s) and some quarters. Put it in a sealed envelope inside your emergency kit. Don’t touch it. This isn’t a rainy-day fund — it’s a disaster fund.
Day 19: Learn to Shut Off Your Utilities
Know where your gas meter shutoff valve is and keep a wrench nearby. Know where your main water shutoff is. Know where your electrical breaker box is. Practice turning them off and on. After an earthquake, a gas leak can turn a survivable event into a fatal one. This task takes fifteen minutes and costs nothing.
Day 20: Prepare Your Vehicle
Your car is a secondary emergency kit. Put a blanket, a bottle of water, a flashlight, a basic first aid kit, jumper cables, and a phone charger in your trunk. If you live somewhere that gets snow, add kitty litter or sand for traction, plus an ice scraper and warm layers.
Day 21: Check Your Food and Water Stores
Go back to your kit from Week 2. Check expiration dates. Rotate anything that’s close. Make sure your water containers are sealed properly. Set a calendar reminder to do this again in six months. Preparedness isn’t a one-time event — it’s a habit.
Week 4: Advanced Readiness and National Emergency Preparedness Month Drills (Days 22–30)
This is where you go from “I have stuff” to “I know what to do.” That distinction matters more than any piece of gear you’ll ever buy. FEMA’s Week 4 theme is Teach Youth About Preparedness — so if you have kids, involve them in every task this week.
Day 22: Build or Upgrade Your Go-Bag
If you had 15 minutes to leave your home, what would you grab? Pack a bag with 72 hours of essentials: change of clothes, toiletries, copies of your documents, medications, snacks, water, phone charger, cash, and your emergency contact list. One bag per adult, a smaller one per kid. Keep them near the door.
- Change of weather-appropriate clothes
- Toiletries (travel size)
- Copies of IDs and insurance documents
- 3-day supply of medications
- High-calorie snacks and water bottle
- Phone charger and battery bank
- Cash in small bills
- Emergency contact list (printed)
- Flashlight and spare batteries
- Small first aid kit
Day 23: Plan for Sheltering in Place
Not every emergency means evacuation. Think about what happens if you can’t leave for 72 hours. Do you have enough water, food, and medication? Can you seal windows and doors if there’s a chemical spill? Do you have plastic sheeting and duct tape? Add what’s missing.
Day 24: Connect with Your Neighbors
Knock on two or three doors. Introduce yourself if you haven’t already. Exchange phone numbers. Ask if they have any special skills (medical training, a generator, a chainsaw). Communities where neighbors already know each other’s names tend to be more resilient after disasters. Community resilience consistently outperforms individual stockpiling in real emergencies.
A winter ice storm knocks out power for four days. Roads are impassable. Emergency services are overwhelmed and focused on medical emergencies. The family three doors down has an elderly parent on oxygen, and their backup battery is dying. Because you exchanged numbers on Day 24, they text you. You connect them with a neighbor who has a generator. That connection — made during a calm September afternoon — potentially saves a life in January.
Day 25: Learn About Local Emergency Resources and CERT
Find out where your nearest emergency shelter is. Identify your local Red Cross chapter. Look up whether your community has a CERT (Community Emergency Response Team) program — most do, and the training is free. CERT courses are typically 20 hours spread over several weeks, covering fire safety, light search and rescue, basic medical triage, and disaster psychology. You don’t need any prior experience.
Even if you never pursue emergency management professionally, the skills and local connections you gain through CERT training are invaluable. You can find your nearest program at community.fema.gov.
Day 26: Set Up Power Redundancy
If you can afford it, consider a portable power station. Even a basic one like the Jackery Explorer 300 — around $250–$300 — can charge phones, run a CPAP machine, or power a small fan for several hours. If that’s outside your budget, a decent solar phone charger runs $20–$30. Even more budget-friendly: AA-battery power banks start around $10–$15 and can charge a phone from dead to full. Keep one in your go-bag.
Also worth knowing: during extended outages, many libraries and community centers serve as public charging stations. Find out in advance which facilities near you offer this — don’t wait until your phone is at 2% to start searching.
Day 27: Review and Update Your Plan
Pull out the communication plan and contact list from Week 1. Has anything changed? Did you realize during the last three weeks that you forgot something? Update it now. A plan that’s 90% right is still infinitely better than no plan at all.
Day 28: Do a Tabletop Exercise
Sit down with your family for 20 minutes. Pick your most likely disaster scenario (the one from Day 1). Talk through it step by step. Where are you when it happens? Who calls whom? Where do you meet? What do you grab? Where do you go? This isn’t a drill — it’s a conversation. But it’s the conversation that makes real drills effective. If you have kids, give them specific roles: one is in charge of grabbing the pet, another grabs the go-bags.
Day 29: Run a Full Drill
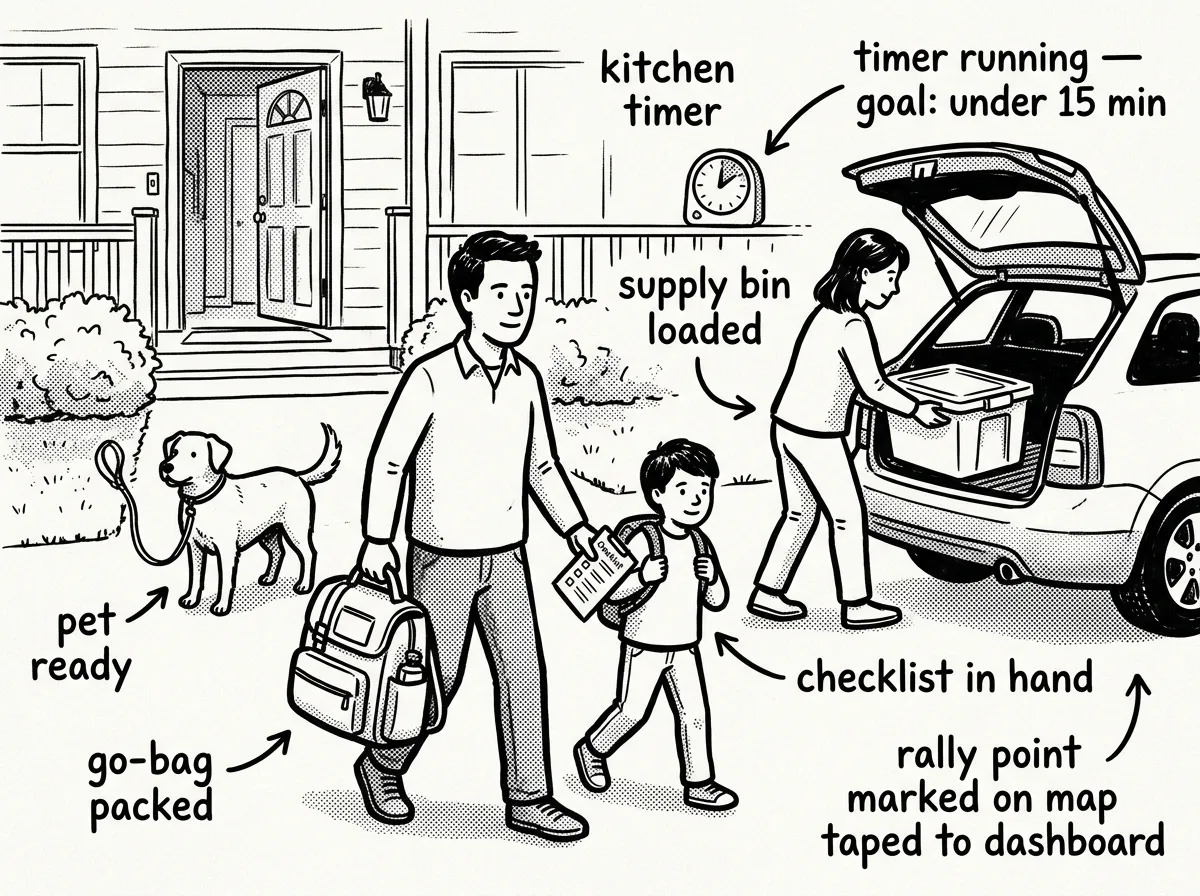 A family running a full evacuation drill before time runs out
Pick a Saturday morning. Simulate an emergency. Set a timer for 15 minutes and have everyone grab their go-bag, locate the emergency kit, and get to the car. Time it. Note what went wrong. Did someone forget their medications? Did the kids know where the rally point was? This is where the rubber meets the road. A common mistake during drills: moving the go-bag’s storage location without telling every household member. Communicate every change.
Day 30: Celebrate and Set Your Maintenance Schedule
You did it. You’ve gone from zero to genuinely prepared in 30 days. Now set your quarterly maintenance reminders:
- March: Rotate food and water supplies, replace expired medications, test batteries
- June: Update clothing sizes (especially for kids), review and update medications, check insurance coverage
- September: Full annual review during national emergency preparedness month, run another drill, refresh your plan
- December: Winter-specific checks — add cold-weather gear to kits, verify heating backup, check antifreeze and vehicle supplies
Here’s the truth nobody talks about — Day 30 isn’t really the finish line. Preparedness degrades. Batteries die, food expires, kids grow out of clothes you packed. But if you’ve followed this plan, you now have a system. And a system is infinitely easier to maintain than it is to build from scratch. You’ve already done the hard part.
National Preparedness Month Ideas for Workplaces and Communities
Everything above focuses on your household — but disaster preparedness doesn’t stop at your front door. If you want to extend the impact of September preparedness month beyond your family, here are concrete ideas that one motivated person can organize with minimal effort:
For Workplaces:
- Host a lunch-and-learn about go-bags. Bring yours in, show people what’s inside, and share a simple packing list. Twenty minutes over lunch can change how your coworkers think about readiness.
- Organize a workplace evacuation drill. Coordinate with your facilities manager. Time it. Debrief afterward. Most offices haven’t run a real drill since they moved in.
- Distribute emergency contact templates. Print FEMA’s free family communication plan template and put one on every desk. It takes five seconds per person and costs pennies.
- Coordinate a CERT training signup drive. Collect interested names and submit a group registration to your local program. People are more likely to sign up when colleagues are doing it with them.
For Communities:
- Create a neighborhood communication tree. Map out who lives where, exchange phone numbers, and identify households with special needs (elderly residents, people with mobility issues, families with infants).
- Partner with your local fire department for an open house. Many fire stations already host community events during September — volunteer to help organize or promote one.
- Build a shared community supply inventory. You don’t all need a generator. Document who has one, who has a chainsaw, who has medical training. A shared Google Sheet can turn isolated households into a resilient neighborhood.
- Start a community garden with an emergency preparedness focus. Growing food together builds relationships and food security simultaneously.
The reason community actions matter isn’t philosophical — it’s practical. In major disasters, the neighborhoods that recover fastest are consistently the ones where people had relationships before the event. You can’t build trust during a crisis. You build it during a calm September afternoon and cash it in when you need it.
Frequently Asked Questions
What is National Preparedness Month and when is it?
National Preparedness Month is an annual observance held every September, sponsored by FEMA and the Ready.gov campaign since 2004. It encourages Americans to prepare for disasters and emergencies in their homes, businesses, and communities. FEMA releases weekly themes and free resources throughout the month, culminating on September 30th with National Preparedness Day.
What are the four weekly themes of National Preparedness Month?
FEMA organizes National Preparedness Month around four weekly themes that align with their core framework. Most recently they were: Week 1 — Make a Plan, Week 2 — Build a Kit, Week 3 — Low-Cost, No-Cost Preparedness, and Week 4 — Teach Youth About Preparedness. These themes rotate slightly from year to year, but the underlying four-step framework (Make a Plan, Build a Kit, Know Your Risk, Get Involved) remains consistent.
How do I participate in National Preparedness Month at work?
Start small and practical. Host a 20-minute lunch-and-learn where you walk coworkers through a basic go-bag. Coordinate with your facilities team to run an evacuation drill. Print and distribute FEMA’s free family communication plan template. Organize a group signup for local CERT training. Even posting your county’s emergency alert signup link in your team chat makes a difference — most people don’t know their county has one.
What supplies does FEMA recommend for an emergency kit?
FEMA recommends gathering enough water (one gallon per person per day), non-perishable food, and medications to last at least three days. Your emergency kit checklist should also include a flashlight with extra batteries, a battery-powered or hand-crank radio, first aid supplies, copies of important documents, cash in small bills, a manual can opener, sanitation and hygiene supplies, a wrench for shutting off utilities, and local maps.
How do I make a family emergency plan?
Sit down with every household member and answer three critical questions: Where do we meet if we can’t get home? Who is our out-of-area emergency contact? How do we communicate if cell service goes down? Write the answers on one page, make copies for every family member, and store additional copies in your go-bags and emergency kits. Then practice — run at least one full drill per year so the plan is tested, not theoretical. Our step-by-step emergency preparedness plan walks you through the entire process.
What is the difference between National Preparedness Month and National Preparedness Day?
National Preparedness Month spans all of September — 30 full days of themed preparedness activities, resources, and community events. National Preparedness Day falls specifically on September 30th, the final day of the month. It serves as a culminating event designed to reinforce the actions people have taken throughout September and encourage ongoing commitment to disaster preparedness.
Your National Emergency Preparedness Month Commitment
Here’s what I want you to take away from all of this: preparedness isn’t about fear, and it’s definitely not about doomsday fantasies. It’s about giving yourself and your family the gift of readiness. Across wildfires, hurricanes, and ice storms, the same lesson holds — the families who fare best aren’t the ones with the most gear. They’re the ones who spent a little time thinking ahead.
Start Day 1 on September 1st. Set a daily phone reminder for 7 PM. Treat it like brushing your teeth — non-negotiable, and over in minutes.
National emergency preparedness month only comes once a year, but the readiness you build during this 30-day preparedness challenge protects you every single day after. Pick one task. Start today. And if you complete all 30 days, you’ll have something most people never achieve — a real, tested, organized emergency preparedness plan for when things go sideways.
Set those quarterly reminders. Run your drills. Know your neighbors’ names. And when the next September rolls around, you won’t be starting from scratch — you’ll be refining a system that already works. That’s not paranoia. That’s just being a responsible adult.
You’ve got this.
Product recommendations in this article are based on manufacturer specifications and published reviews, not personal testing. No compensation was received from any brand mentioned.
The Complete
Prepper's Reference.
149 articles synthesized into one comprehensive PDF — twelve chapters covering water, food, shelter, first aid, comms, and scenario-specific preparedness. Free with your email.
Unsubscribe anytime · We never share your email
You're in. Check your inbox.
Keep Reading
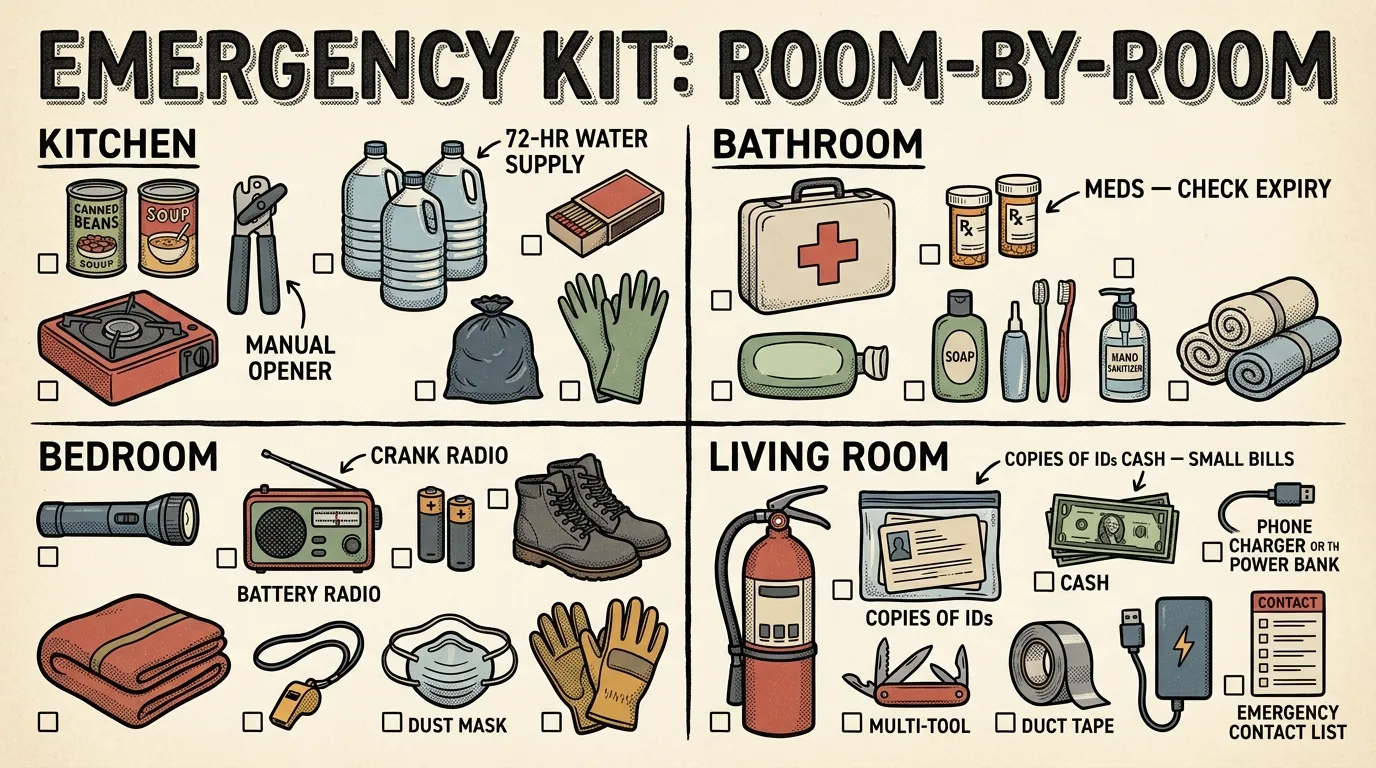
Emergency Preparedness Kit: Room-by-Room Home Guide
Build your emergency preparedness kit room by room for 14-day shelter-in-place readiness. Budget-friendly system. Start tonight.
Zombie Apocalypse Survival Preparedness: FEMA Pro's Guide
Zombie apocalypse survival preparedness teaches real disaster skills. Here's a breakdown of the exact steps. Start today.
Alien Invasion Preparedness: A Practical Survival Guide
Alien invasion preparedness uses proven survival skills that work for any disaster. Build your kit, plan your routes, and get ready for anything.