This article teaches you how to build and organize an emergency preparedness kit distributed across rooms in your home — kitchen, bathroom, bedroom, and garage — for shelter-in-place scenarios, with specific product recommendations, budget tips, and a maintenance schedule.
Key Takeaways
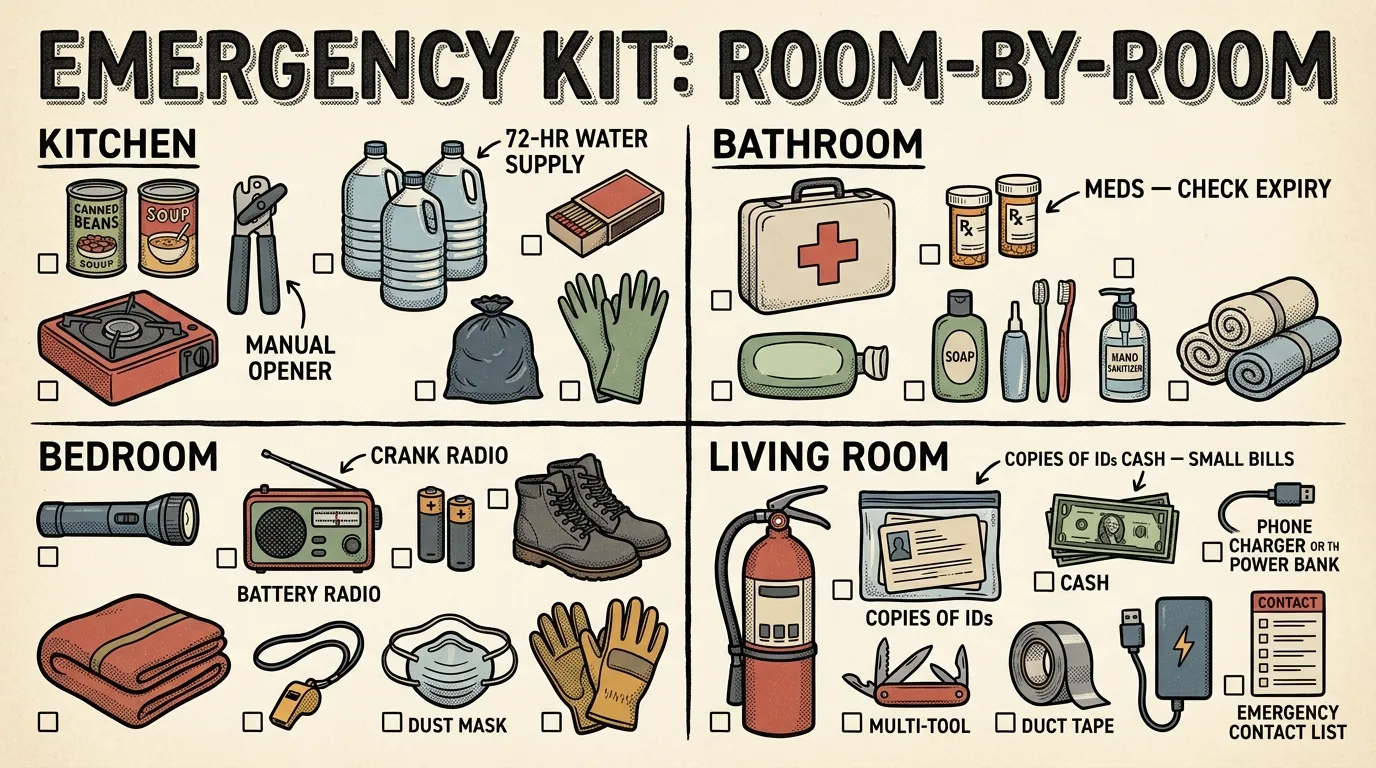
- Distribute your emergency preparedness kit across four rooms — kitchen, bedroom, bathroom, and garage — so supplies are always within reach during any scenario.
- Start with a 3-day supply of water and food, then build toward a 14-day shelter-in-place capability over four weeks for under $50.
- Stage a flashlight, hard-soled shoes, and a document bag within arm's reach of your bed — most emergencies catch you sleeping.
- Set two annual maintenance reminders (daylight saving time changes) to rotate water, food, medications, and batteries — it takes 30 minutes each time.
- Customize your kit by disaster type: add a gas shutoff wrench for earthquakes, extra fuel for power outages, or a safe-room kit for tornado zones.
- Cash is critical — ATMs and card readers fail without power. Keep $200-$300 in small bills in your bedroom kit.
I’ve responded to enough Pacific Northwest ice storms and multi-day power outages to know one thing: when a disaster hits, you don’t calmly walk to a single closet and grab everything you need. You’re in the dark. You’re in your bedroom. Maybe you’re in the kitchen when the shaking starts. Your emergency preparedness kit shouldn’t live in one neat backpack — it should live where you live.
Over 12 years, I’ve deployed to seven multi-day power outages, two wildfire evacuations, and the aftermath of the 2001 Nisqually earthquake — each one reinforced why staging matters more than stockpiling. Most guides hand you a checklist and call it done. That’s fine if you’re packing a bug-out bag. But for shelter-in-place scenarios — the ones that are statistically far more likely — you need supplies staged in the rooms where you’ll actually use them. After years of FEMA training, Wilderness First Responder certification, and more real-world blackouts than I’d like to count, this is the system I use in my own home.
Quick Summary
- Distribute, don’t centralize. Stage your emergency preparedness kit across your kitchen, bathroom, bedroom, and garage for faster access during any scenario.
- Kitchen is command central. Water, food, cooking fuel, and your main communication gear belong here.
- Bedroom gets your grab-and-go essentials. Flashlight, shoes, documents, and a 72-hour backup bag live within arm’s reach of your bed.
- Bathroom holds medical and sanitation supplies. First aid, hygiene, and prescription meds stay where you already store them.
- Garage or utility room is your infrastructure hub. Tools, fuel, tarps, bulk water storage, and pet supplies go here.
- Budget-friendly is the goal. You can set up the full system for well under $200 if you build it over a few weeks.
What Are 10 Items in an Emergency Kit?
Every home emergency preparedness kit starts with the same ten essentials — these are the items FEMA and the Red Cross both consider non-negotiable.
- Water (one gallon per person per day, 3-day minimum)
- Non-perishable food (3-day supply of calorie-dense, no-cook options)
- Flashlight (LED with a runtime of at least 10 hours)
- Batteries (extra sets in the sizes your flashlight and radio require)
- First aid kit (bandages, gauze, antibiotic ointment, pain relievers, medical tape)
- Battery-powered or hand-crank radio (with NOAA weather alert capability)
- Multi-tool (pliers, knife, screwdriver at minimum — see my multi-tool guide for picks)
- Prescription medications (14-day supply, plus common OTC meds)
- Copies of important documents (IDs, insurance policies, medical records in a waterproof bag)
- Cash in small bills ($200–$300 in fives, tens, and twenties)
This list is your starting point, not your finish line. The room-by-room system I’m about to walk through distributes these ten items — plus many more — into the locations where they’re most accessible when you actually need them. A flashlight does you no good in the kitchen junk drawer when you’re waking up at 2 AM to a shattered window.
Why a Single Emergency Kit Falls Short
Here’s the scenario nobody talks about. It’s 2 AM, a windstorm just dropped a tree on your power line, and glass just shattered somewhere in your house. Are you going to walk barefoot through the dark to the hall closet where your perfectly organized kit is sitting? No. You’re going to reach for whatever’s next to your bed.
That’s the core problem with the “one bag, one location” approach. It assumes you’ll have time, light, and a clear path. In my experience responding to emergencies with FEMA-trained teams, none of those assumptions hold up.
Here’s the data that drives this point home: according to FEMA’s National Household Survey, only about 48% of American households have emergency supplies set aside at all. Of those who do, the majority have a single kit in one location — and many haven’t checked expiration dates in over a year. That means roughly half the country has nothing, and a significant chunk of the other half has a kit that’s partially expired or inaccessible during the most common scenarios.
The Nisqually earthquake hit at 10:54 AM on a weekday — people were at work, at school, spread across multiple buildings. The 2021 PNW ice storm knocked power out at all hours, trapping people in whatever room they were in when branches started falling. Disasters don’t schedule themselves around your kit’s location.
Your emergency kit should be where you are, not where you wish you were.
The room-by-room approach solves this by putting the right supplies in the right context. Medical gear near your medicine cabinet. Cooking supplies near your stove. Tools near your workbench. It’s intuitive, faster, and — honestly — easier to maintain because everything stays in its natural home.
The Kitchen: Your Shelter-in-Place Command Center
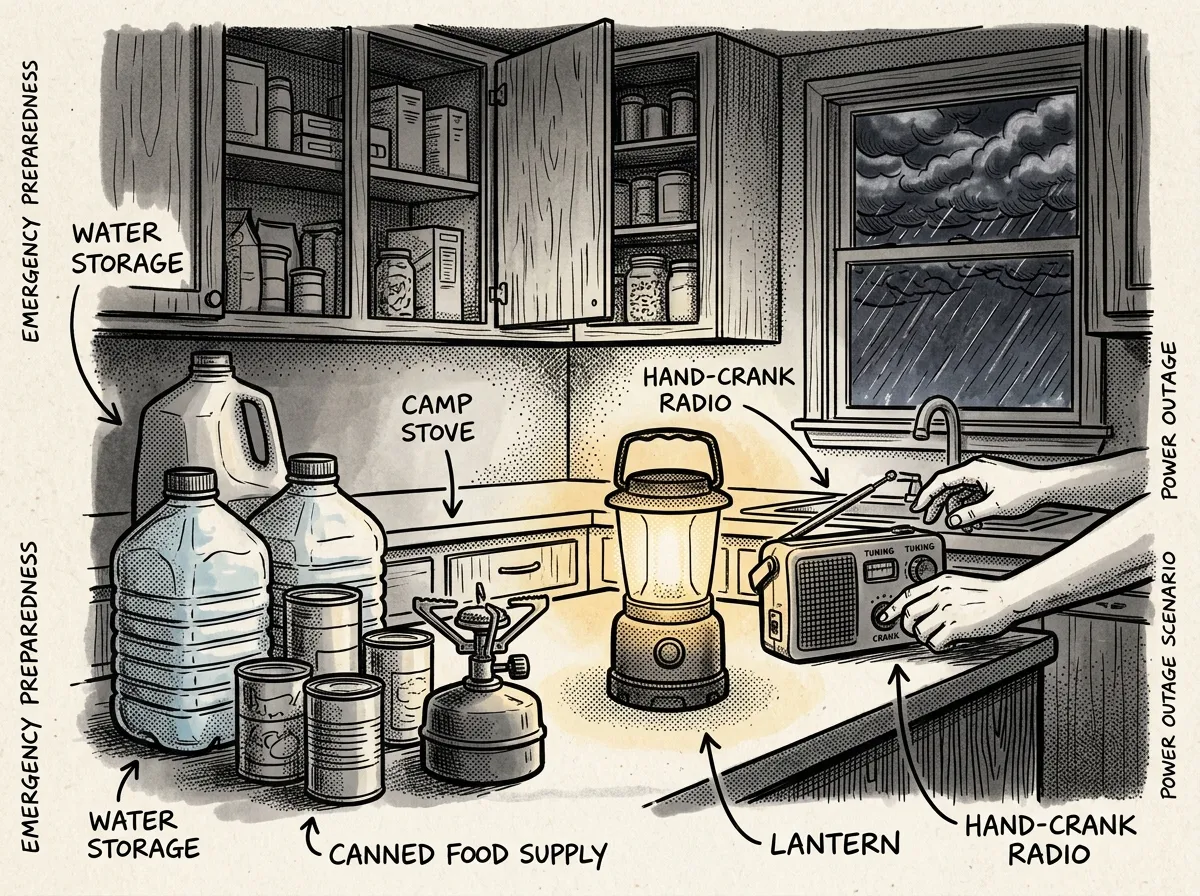 A well-staged kitchen ready for shelter-in-place
Your kitchen already stores food and water. It’s where you gather. It makes sense as the hub of your home emergency kit.
Water Storage
One gallon per person, per day. For a two-week shelter-in-place scenario, that’s 14 gallons per person. A family of four needs 56 gallons. That’s a lot.
Don’t let the math paralyze you. Start with a three-day supply and build up. I use 7-gallon Reliance Aqua-Tainer jugs — around $12–$15 each — stacked two deep beside my pantry. They’re sturdy, stackable, and have a spigot so you’re not wrestling with a five-gallon bucket. If you’re filling from the tap, add water preserver concentrate and rotate every five years. Regular tap water without preserver should be rotated every six months. For a deeper dive into water storage strategies, check out my complete water storage guide.
During my Wilderness First Responder recertification in 2024, our instructor reinforced that dehydration kills faster than hunger — which is why water storage comes before food in every protocol I follow.
Fill a few clean two-liter soda bottles with tap water right now. It’s free, takes five minutes, and gives you an immediate three-day cushion while you build up your supply.
Food Supply
Stock non-perishable, easy-to-prepare food. Think canned goods with pull-top lids, peanut butter, crackers, dried fruit, granola bars, and instant oatmeal. Aim for a 14-day supply, but even three days puts you ahead of most households.
One thing I see constantly: people buy a bucket of freeze-dried meals and call it done. Those work, but they require water you might not want to spare. A mix of ready-to-eat and just-add-water options gives you flexibility.
Keep a manual can opener in this kit. I’ve watched people stare at a pile of canned soup with no way to open it. Don’t be that person.
Cooking and Communication Gear
A single-burner butane stove — like the Iwatani 35FW, around $25–$30 — lets you heat water and cook simple meals when the power’s out. Store three to four extra butane canisters alongside it. Only use it with ventilation.
Your kitchen is also the right spot for your emergency radio. The Midland ER310 (around $35–$40) is what I keep on my counter. It’s got hand-crank, solar, and USB charging, plus NOAA weather alerts. Pair it with a set of rechargeable AA batteries and you’re covered.
- 14-day water supply (1 gal/person/day)
- 14-day non-perishable food supply
- Manual can opener
- Single-burner butane stove + 3-4 fuel canisters
- Emergency radio with NOAA alerts
- Rechargeable batteries + charger
- Heavy-duty trash bags
- Paper plates, cups, and utensils
- Waterproof matches or lighter
- Dishwashing soap (small bottle)
The Bedroom: Your Middle-of-the-Night Lifeline
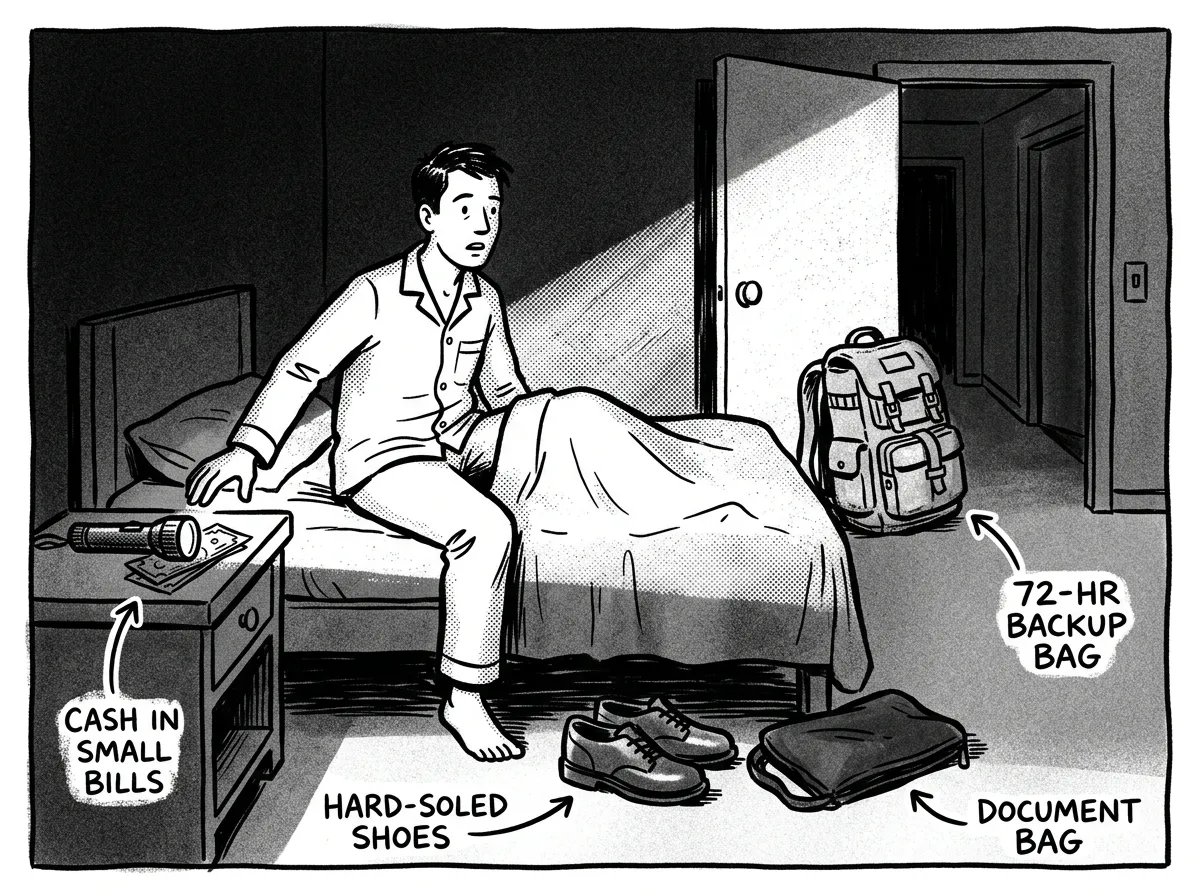 Bedside emergency essentials within arm’s reach
This room matters more than you think. Most earthquakes, severe storms, and home emergencies happen while you’re sleeping — or at least that’s when you’re least prepared for them.
Bedside Essentials
Keep a flashlight and hard-soled shoes under or beside your bed. Not across the room. Not in the closet. Right there. The first time I tried reaching for a headlamp during a 3 AM power failure in my own house, it had rolled off the nightstand and under the dresser. Now I use a small clip that attaches the headlamp to my bed frame. Problem solved.
A pair of work gloves goes next to the shoes. If there’s broken glass, debris, or you need to move anything heavy, your hands are your most important tool.
Documents and Cash
Your bedroom is where your critical documents should live — in a small fireproof bag or lockbox. For a full walkthrough on building a comprehensive document kit, see my emergency binder guide. Include copies (not originals, which should be in a safe deposit box or fireproof safe) of:
- IDs and passports
- Insurance policies
- Medical records and prescriptions
- Bank account information
- Emergency contact list (printed, not just on your phone)
Stash $200–$300 in small bills. ATMs don’t work without power. Credit card readers don’t either. Cash is king in the first 72 hours after a disaster.
The 72-Hour Backup Bag
So what about the classic “bug-out bag”? It lives in your bedroom too — in case shelter-in-place turns into evacuation. Keep it light: one change of clothes, a water bottle, three days of calorie-dense food bars, a first aid pouch, and copies of everything in your document bag.
I keep a small dry bag under my bed with a change of clothes, my WFR first aid pouch, and 2,400-calorie emergency ration bars. It’s not a full bug-out bag — it’s an “oh no, we have to leave right now” bag. In the Pacific Northwest, I’ve had to grab it twice in 12 years. Both times I was glad it was three feet from my pillow instead of in the garage.
Special Needs Considerations
If your household includes infants, elderly family members, or anyone with disabilities, the bedroom is where you customize. Keep a three-day supply of formula and diapers near the crib. Stage extra hearing aid batteries, mobility device chargers, or supplemental oxygen supplies in the bedroom of the person who needs them. FEMA’s guidance is clear on this: generic kits fail people with specific needs. Build for your family, not a hypothetical one.
- Flashlight or headlamp (clipped to bed frame)
- Hard-soled shoes + work gloves
- Fireproof document bag with copies of IDs, insurance, medical records
- $200-$300 cash in small bills
- 72-hour backup bag (clothes, food bars, water, first aid)
- Whistle (for signaling if trapped)
- Phone charging cable + portable power bank
- Infant/elderly/disability-specific supplies as needed
The Bathroom: Medical and Sanitation Hub
 Medical and sanitation supplies organized for quick access
Why fight your home’s layout? You already keep medications and first aid supplies in the bathroom. Lean into that.
First Aid Kit
A well-stocked first aid kit is non-negotiable. The Adventure Medical Kits Ultralight .7 — around $30–$40 — is a solid pre-built option, but I’d supplement it with extra gauze, an Israeli bandage, and a SAM splint if you’ve got any first aid training. As a certified Wilderness First Responder, I carry both of those in my personal kit — they’ve proven useful in three real field scenarios where EMS was delayed beyond 45 minutes. Even without training, having wound care basics on hand can make a real difference before professional help arrives.
Don’t forget a two-week supply of all prescription medications. Talk to your doctor or pharmacist about getting a 90-day supply so you always have a buffer. This is one of the most overlooked parts of any emergency preparedness kit, and it’s potentially the most critical.
Sanitation Supplies
If water service fails, your toilet stops working. That’s not a minor inconvenience — it’s a health hazard within 24 hours. Keep these in your bathroom or a nearby closet:
- Heavy-duty garbage bags (line the toilet bowl)
- Kitty litter or enzyme-based waste treatment powder
- Hand sanitizer and disinfecting wipes
- Feminine hygiene products
- Toilet paper (extra beyond your normal stock)
A water main breaks during a winter freeze and your city announces a boil-water advisory that could last three days or more. Your toilets won’t refill after flushing, your taps run dry, and stores are already picked clean of bottled water. Having sanitation supplies staged in your bathroom and water stored in your kitchen means you’re uncomfortable but functional — not desperate.
Hygiene Basics
It’s easy to overlook morale during an emergency. Being able to brush your teeth, wash your face, and feel somewhat clean makes a measurable difference in how well you cope. Keep travel-sized soap, toothpaste, a toothbrush, deodorant, and a pack of baby wipes in a small bin. These weigh almost nothing and cost almost nothing.
- Comprehensive first aid kit
- 14-day supply of prescription medications
- Over-the-counter pain relievers, antihistamines, anti-diarrheal
- Heavy-duty garbage bags for emergency toilet
- Kitty litter or waste treatment powder
- Hand sanitizer + disinfecting wipes
- Extra toilet paper
- Travel hygiene kit (soap, toothbrush, toothpaste, wipes)
- Feminine hygiene products
- Latex or nitrile gloves
The Garage or Utility Room: Your Infrastructure Hub
 Infrastructure supplies staged in the garage
This is where the heavy stuff lives. The gear that keeps your house functional when systems fail.
Tools and Structural Supplies
You need the basics: a pry bar, a claw hammer, duct tape, a utility knife, work gloves (a second pair), and a wrench that fits your gas meter shutoff valve. If you’re in earthquake country, that wrench matters. Tag it with a bright ribbon and hang it near the door. Keep a hand saw or bow saw for clearing downed tree limbs — in the Pacific Northwest, every major storm leaves debris that blocks driveways and doors.
A good tarp — at least one 10x12-foot heavy-duty poly tarp — can cover a broken window, patch a roof leak, or create a rain catchment. Keep 50 feet of paracord alongside it.
Backup Power
A portable power station or generator lives here. I’m not going to tell you to buy a $2,000 whole-house generator if that’s not in your budget. But a small solar-capable power station like the Jackery Explorer 300 — around $250–$300 — can charge phones, run a small fan, and power LED lights for days. Pair it with a 100-watt solar panel and you’ve got indefinite low-level power.
If you go with a gas generator, store fuel safely in approved containers and rotate it every three to six months. Never run a generator indoors or in an attached garage. Carbon monoxide kills fast and silently.
Don’t overlook your car as a backup resource. A full gas tank gives you a heated shelter, phone charging via USB, and radio access. I keep my vehicles above half a tank as a habit — it’s one of the easiest preparedness steps you can take.
The first time I tested a cheap gas generator during an extended outage, I stored the fuel for nine months without stabilizer. It gummed up the carburetor and the generator wouldn’t start when I actually needed it. Now I add Sta-Bil to every can and run the generator for 15 minutes every quarter. Expensive lesson learned for free by you.
Pet Emergency Supplies
If you have pets — and roughly 70% of U.S. households do — your garage or utility room is where their disaster supplies kit lives. FEMA and the Red Cross both emphasize pet preparedness, and I’ve seen families forced into agonizing decisions during evacuations because they didn’t plan ahead. Keep these staged and ready:
- 14-day supply of pet food and water
- Carrier or crate (sized so your pet can stand and turn around)
- Leash, collar with ID tags, and a recent photo of your pet
- Pet medications (14-day supply)
- Waste bags and a small litter pan for cats
- Copies of vaccination records
Bulk Water and Overflow Storage
If you’ve got the space, this is where extra water goes. A 55-gallon drum with a hand pump costs around $60–$80 and gives a two-person household nearly a month of drinking water. Treat it with water preserver concentrate, seal it, and forget it for five years.
A note on storage climate: Extreme heat in garages — common in the South and Southwest — can degrade plastic water containers and accelerate battery drain. If your garage regularly exceeds 100°F, store water and batteries in an interior closet instead, and keep only tools and structural supplies in the garage.
If you’re in a humid Gulf Coast climate, inspect your garage storage quarterly for mold on cardboard boxes and labels. Switch to plastic bins with snap-on lids — they last longer and keep moisture out.
Fire Safety
Keep a fire extinguisher rated ABC in the garage (and ideally one in the kitchen too). Check the pressure gauge every six months. A fire blanket is a cheap addition — under $15 — and can smother a small cooking fire before it becomes a catastrophe.
- Pry bar, hammer, utility knife, hand saw
- Duct tape + electrical tape
- Gas shutoff wrench (tagged and visible)
- Heavy-duty tarp (10x12 minimum) + 50 ft paracord
- Portable power station or generator
- Fuel (with stabilizer) or solar panel
- 55-gallon water drum with hand pump
- ABC fire extinguisher
- Work gloves (second pair)
- Jumper cables or portable jump starter
- Pet supplies (food, water, carrier, meds, records)
- Chainsaw or hand saw for debris clearing
Emergency Preparedness Kit by Disaster Type
Your baseline room-by-room kit handles most scenarios. But specific disaster types call for specific additions. Here’s how I’d customize based on the threats most likely to affect your area.
Earthquakes
If you’re in seismic country — Pacific Northwest, California, the New Madrid zone — these additions matter. The Nisqually earthquake taught me that unsecured furniture is as dangerous as the shaking itself.
- Gas shutoff wrench (already in your garage kit — confirm it works)
- Furniture straps for bookcases and water heaters
- Sturdy shoes and gloves in every bedroom (not just the primary)
- Crowbar or pry bar for jammed doors and debris
- Dust masks (N95) for concrete and plaster dust
Hurricanes
Prep starts days in advance, but your kit should already be staged.
- Plywood or pre-cut hurricane shutters for windows
- Extra tarps (three or more for roof damage)
- 7+ day fuel supply for your generator
- Battery-powered sump pump if you’re in a flood zone
- Extra water beyond 14 days — supply chains break for weeks in major hurricanes
Tornadoes
Your safe room — interior bathroom, basement, or closet — needs its own mini kit.
- Helmets or bicycle helmets for head protection from debris
- Heavy blanket or mattress to cover your family
- Shoes, flashlight, and whistle pre-staged in the safe room
- Battery-powered weather radio (separate from your kitchen unit)
- Small first aid kit specific to that room
Extended Power Outages
This is the disaster type I’ve dealt with most in the Pacific Northwest, and the one most families underestimate.
- Extra fuel and stabilizer (enough for 7–14 days of generator runtime)
- Cooler and ice packs to preserve refrigerated food for the first 48 hours
- Battery-powered or solar-powered fans for summer outages
- Extra warm layers, sleeping bags, and emergency blankets for winter outages
- Board games, books, and activities — morale matters more than you think when the screens go dark
Building Your Emergency Preparedness Kit on a Budget
Can you pull this off without spending a fortune? Yes. Here’s how I’d prioritize if I were starting from scratch with $50 this week.
- Week 1 ($15): Fill containers with tap water for a 3-day supply. Grab an extra case of canned food during your normal grocery run. Print document copies and put them in a zip-lock bag.
- Week 2 ($15): Buy a decent flashlight and set of batteries. Pick up a manual can opener. Stash $50 cash in your bedroom document bag.
- Week 3 ($10): Assemble a basic first aid kit from dollar-store supplies — bandages, gauze, antibiotic ointment, pain relievers. Add garbage bags and kitty litter for sanitation.
- Week 4 ($10): Get a tarp, a roll of duct tape, and a wrench for your gas meter. You now have the foundation of a four-room emergency preparedness kit for under $50.
From there, build up. Add the butane stove next month. The emergency radio the month after. A power station when budget allows. The point isn’t perfection on day one — it’s consistent forward progress.
How Much Does an Emergency Preparedness Kit Cost?
A basic 72-hour emergency kit list can be assembled for $30–$50 using grocery store and dollar store supplies. A comprehensive 14-day family emergency preparedness kit — covering all four rooms with cooking gear, a power station, and bulk water storage — runs $300–$500 when built gradually. Pre-assembled commercial kits for four people typically cost $150–$400 but often lack the depth and customization of a room-by-room system. Building your own over time is almost always cheaper and better tailored to your family’s actual needs.
What about the free stuff? Don’t overlook it. Repurpose old backpacks as your bedroom bag. Save sturdy containers for water storage. Keep expired (but not ancient) medication in your kit as a last-resort backup, and replace with current supplies as you can. Every little bit counts.
Maintaining Your Home Emergency Kit
Building it is half the battle. Keeping it functional is the other half, and it’s where most people fail.
I learned the hard way during the 2019 PNW ice storm that untested gear is unreliable gear — my backup radio had corroded batteries and my water filter’s O-ring had cracked from temperature cycling in the garage. Those failures happened because I’d skipped a single maintenance check. Never again.
Set a calendar reminder twice a year — I tie mine to daylight saving time changes, same as smoke detector batteries. During each check:
- Rotate water if using tap (or check seals on commercial bottles)
- Check food expiration dates and swap anything within three months of expiring into your regular pantry — eat what you store, store what you eat
- Test flashlights, radios, and power stations
- Update medications
- Verify cash is still there (sounds obvious, but…)
- Inspect fire extinguisher pressure gauges
- Replace any batteries showing corrosion
- Check pet food and medication expiration dates
Seasonal Adjustments
Your kit shouldn’t be static year-round. Before winter, swap in extra warm layers, wool socks, and hand warmers. Before summer, add sunscreen, electrolyte packets, and a battery-powered fan. If you’re in wildfire country, make sure your N95 masks are stocked and accessible before fire season.
Tracking Your Inventory
You don’t need anything fancy. A simple note on your phone with expiration dates organized by room works. If you prefer paper, the downloadable checklist below has a dedicated section for tracking dates. The point is having one place to look instead of opening every bin and checking every label twice a year.
This takes 30 minutes, twice a year. That’s one hour annually to keep your disaster supplies kit fully ready. There’s no excuse not to do it.
Free Printable Emergency Preparedness Kit Checklist
I’ve consolidated the room-by-room emergency kit checklist from this entire guide into a single printable PDF. It’s organized by room — kitchen, bedroom, bathroom, and garage — with checkboxes for every item, quantity fields so you can customize for your family size, and a six-month maintenance reminder section with space to record inspection dates.
The checklist includes:
- All four room-by-room checklists from this article
- Disaster-type add-ons (earthquake, hurricane, tornado, power outage)
- Special needs reminders (infants, elderly, pets, medications)
- Bi-annual maintenance tracker with fields for dates, items rotated, and items to replace
It’s free — no email required. Print it, stick it on your refrigerator or inside a cabinet door, and work through it at your own pace. If you want occasional updates on gear reviews and preparedness tips, you can optionally subscribe, but the checklist is yours either way.
Frequently Asked Questions
What are 10 items in an emergency kit?
The ten essentials are water (one gallon per person per day), non-perishable food, a flashlight, batteries, a first aid kit, a battery-powered or hand-crank radio, a multi-tool, medications, copies of important documents, and cash in small bills. These form the backbone of any home emergency preparedness kit, though you should expand well beyond this baseline using the room-by-room approach outlined above.
What food should be included in an emergency preparedness kit?
Focus on shelf-stable, calorie-dense food that requires minimal or no preparation. Canned goods with pull-top lids (soups, beans, tuna, fruit), peanut butter, crackers, granola bars, dried fruit, instant oatmeal, and emergency ration bars are all solid choices. Avoid foods that require a lot of water to prepare — during a water-scarce scenario, you don’t want to spend a quart of your supply rehydrating a freeze-dried meal. Aim for a mix of ready-to-eat and just-add-water options. Always keep a manual can opener with your food supply.
What are 10 items in an emergency kit for an earthquake?
Beyond the standard ten essentials, earthquake-specific items include: a gas shutoff wrench, sturdy shoes staged by every bed, N95 dust masks, a crowbar or pry bar, heavy work gloves, a whistle for signaling rescuers, furniture straps (preventive), a fire extinguisher, a portable radio with NOAA alerts, and a waterproof bag with document copies. In earthquake country, the most common injuries come from falling objects and broken glass — which is why shoes, gloves, and head protection are priorities over almost everything else.
How much does an emergency preparedness kit cost?
A basic 72-hour kit runs $30–$50 when built from grocery and dollar store supplies. A full 14-day home emergency preparedness kit with all four rooms covered costs $300–$500 when built gradually over several months. The biggest single expense is usually a portable power station ($250–$300), which is optional and can be added last. Starting with $50 spread over four weeks gets you a functional foundation — the budget build plan above proves it. Pre-assembled commercial kits exist, but they’re typically less comprehensive and more expensive per item than building your own.
Your Next Step
You don’t need a bunker. You don’t need $5,000 in gear. You need the right supplies in the right rooms, maintained on a simple schedule. That’s what a real home emergency preparedness kit looks like — not a fantasy, but a practical system you can build starting tonight with a few water bottles and a flashlight beside your bed.
Pick one room. Start there. In four weeks, you’ll have coverage across your whole house. In six months, you’ll have a 14-day shelter-in-place capability that puts you ahead of the vast majority of households in your neighborhood. And you’ll have done it without panic, without breaking the bank, and without a single piece of gear you don’t know how to use.
That’s preparedness. Quiet, steady, and real.
The Complete
Prepper's Reference.
149 articles synthesized into one comprehensive PDF — twelve chapters covering water, food, shelter, first aid, comms, and scenario-specific preparedness. Free with your email.
Unsubscribe anytime · We never share your email
You're in. Check your inbox.
Keep Reading
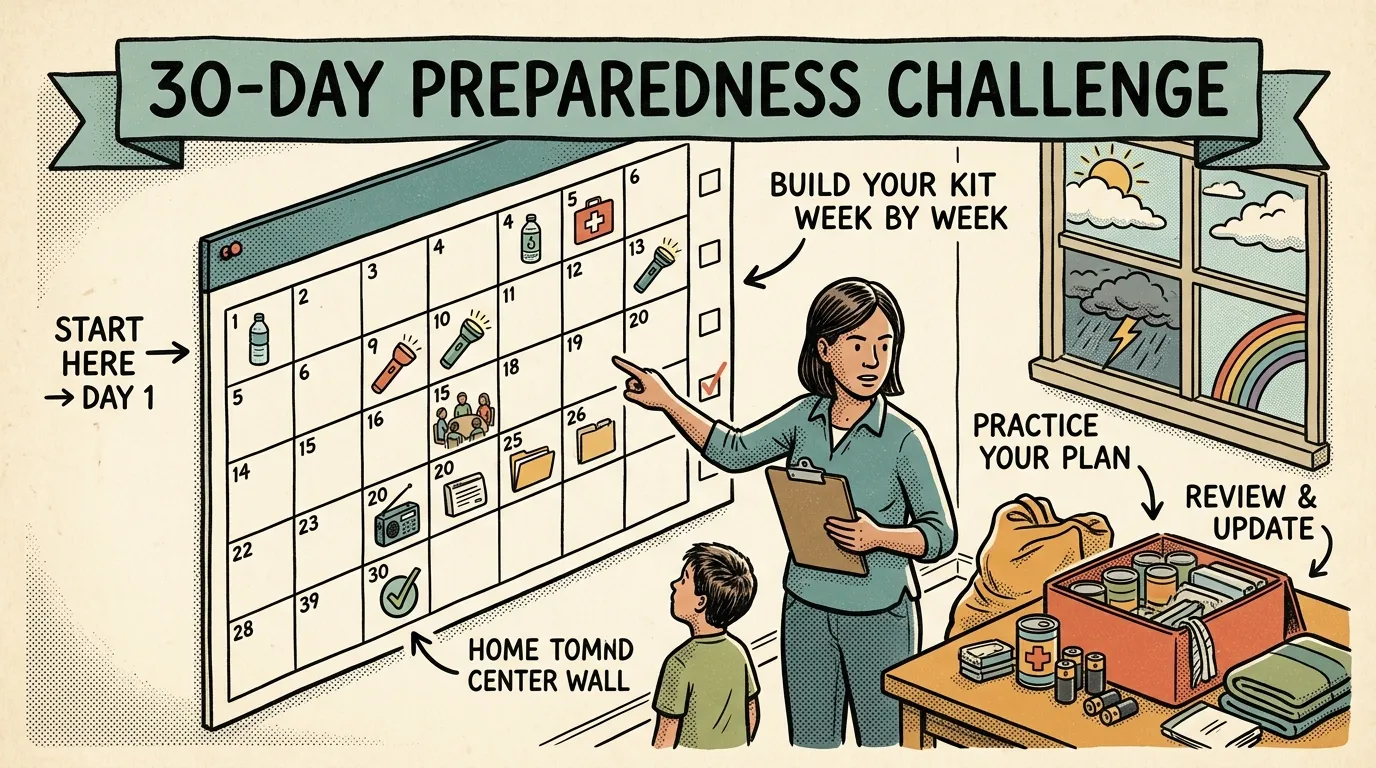
National Emergency Preparedness Month: 30-Day Plan
Use this 30-day National Emergency Preparedness Month challenge to go from unprepared to fully ready. One simple 15-minute task per day. Start now.
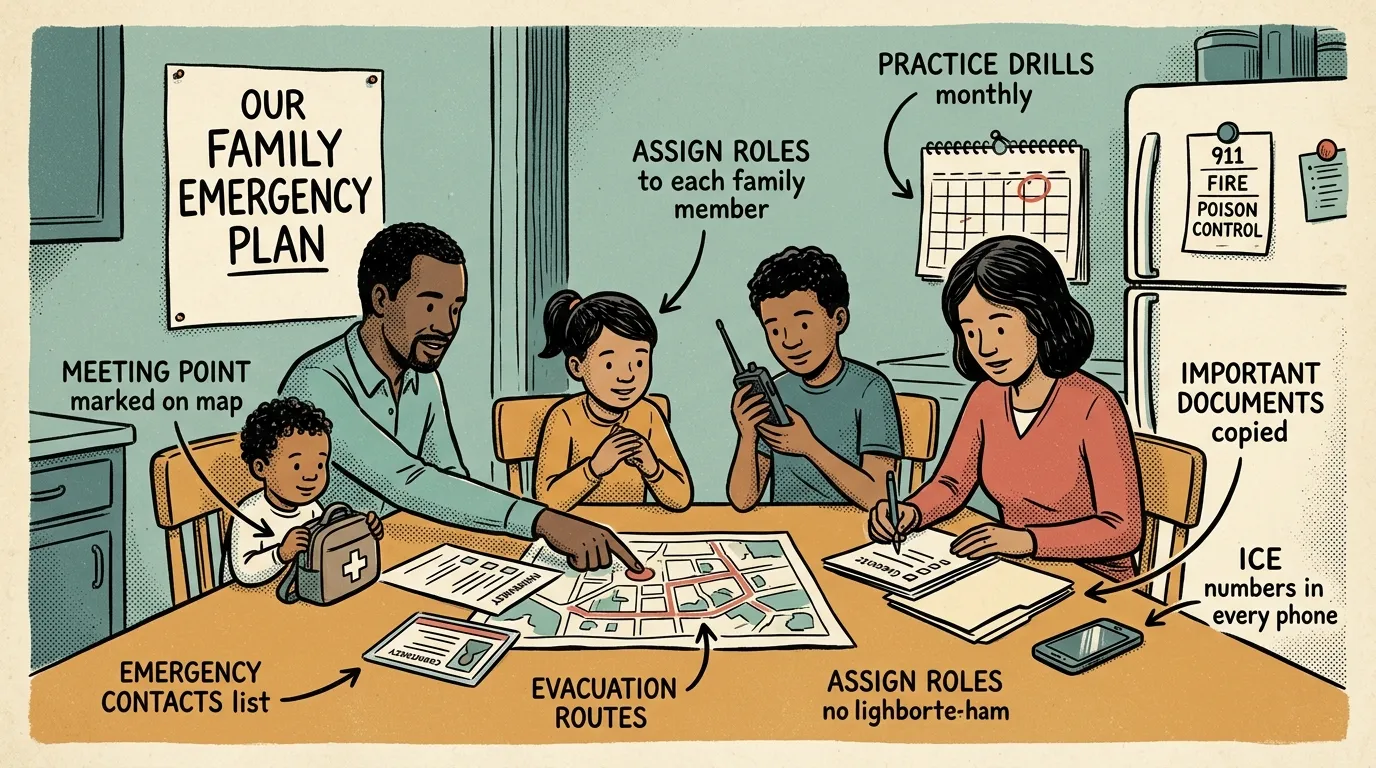
Family Emergency Plan: A Practical Step-by-Step Guide
Build a practical family emergency plan with step-by-step communication, supply kit, and drill guidance from a FEMA-trained responder. Start today.
Emergency Preparedness Merit Badge: A Parent's Guide
Use the Emergency Preparedness merit badge framework to teach your kids real survival skills at home. Step-by-step activities for each requirement.