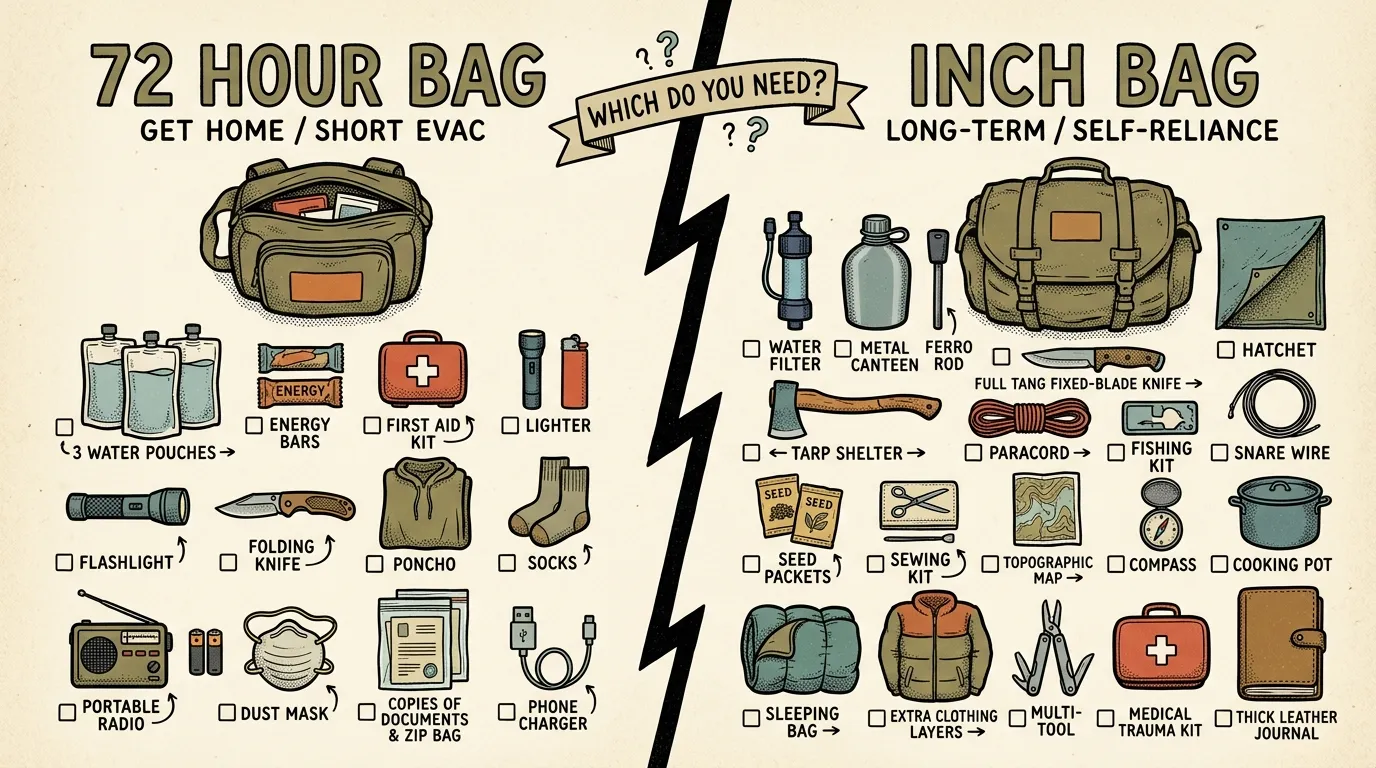
This article directly compares 72-hour evacuation bags with INCH (I'm Never Coming Home) bags, explaining the core differences in purpose, weight, gear selection, and threat scenarios. It helps readers determine which bag type matches their realistic needs rather than building both unnecessarily.
Key Takeaways
- Build a 72-hour bag first — it covers 95% of real-world emergencies you'll actually face
- An INCH bag only makes sense if your honest threat assessment includes permanent displacement scenarios
- Use a modular system: a grab-and-go 72-hour core plus bolt-on sustainment layers you add only when needed
- Test every bag with a loaded 5-mile hike — if you can't carry it comfortably, strip weight until you can
- Skills reduce pack weight more than any gear upgrade — invest in training before buying more stuff
- Don't forget the get home bag in your vehicle — it's the most likely bag you'll actually use first
The single most common mistake in go-bag planning is building the wrong bag for the wrong scenario. The 72 hour bag vs INCH bag debate generates endless forum arguments, but here’s what most of those threads miss: these aren’t competing options. They’re answers to fundamentally different questions. And if you pick the wrong one, you’re either carrying 50 pounds you don’t need or missing critical gear when everything falls apart.
This guide breaks down the difference the way it should have been explained from the start.
Quick Summary
- A 72-hour bag is a temporary evacuation kit designed to sustain you for 2–3 days until you return home or reach a shelter. It should weigh 15–25 pounds.
- An INCH bag (I’m Never Coming Home) is built for permanent displacement — you’re leaving and not planning to return. These run 40–60+ pounds.
- Most people only need a 72-hour bag. The vast majority of real-world emergencies — wildfires, floods, power grid failures — are temporary.
- Your threat assessment determines your bag, not internet hype. Be honest about where you live and what’s actually likely.
- A modular system with a core 72-hour bag plus bolt-on kits is smarter than building two separate bags from scratch.
- Skills reduce weight in both categories. The more you know, the less you carry.
72 Hour Bag vs INCH Bag: Side-by-Side Comparison Table
A 72-hour bag sustains you during temporary evacuations (2–3 days), while an INCH bag (I’m Never Coming Home) supports indefinite self-sufficiency after permanent displacement.
| Category | 72-Hour Bag | INCH Bag |
|---|---|---|
| Purpose | Bridge gap to safety/shelter | Rebuild life from scratch |
| Duration | 2–3 days | Indefinite |
| Target Weight | 15–25 lbs | 40–60 lbs |
| Size (Liters) | 30–40L | 60–80L |
| Key Gear | Water, food, first aid, documents | Procurement tools, shelter-building, redundancy |
| Cost Range | $150–$400 | $500–$1,500+ |
| Skill Level | Beginner-friendly | Requires tested wilderness skills |
| Best For | Wildfires, floods, evacuations | Societal collapse, permanent displacement |
What a 72 Hour Bag Actually Is (and Isn’t)
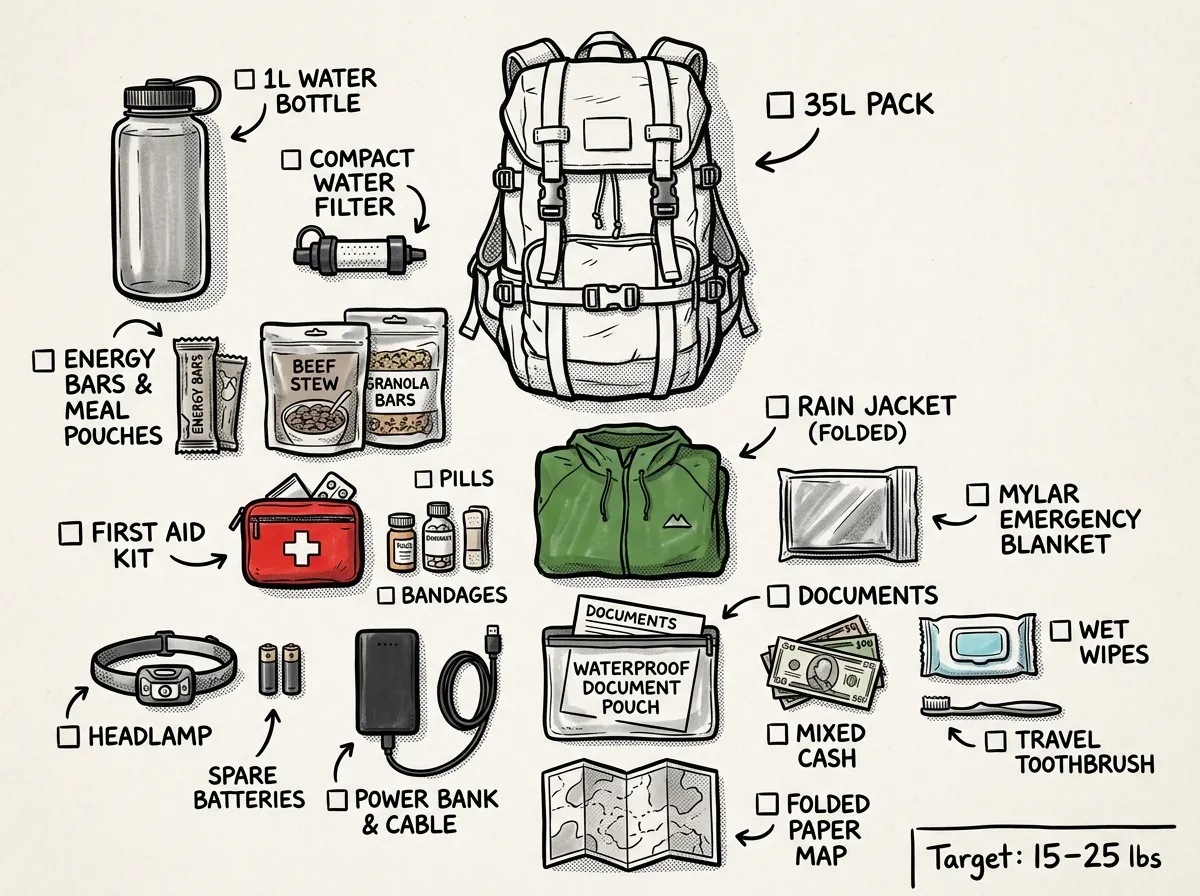 Everything inside a well-built 72-hour evacuation bag — nothing more, nothing less
A 72-hour emergency kit is straightforward. You’re anticipating coming home. That’s the defining characteristic that separates it from everything else. A wildfire forces an evacuation, a flood makes your neighborhood impassable for a few days, or a chemical spill puts your area under a shelter-elsewhere order. You grab your bag, you leave, and within a few days you’re back.
This isn’t about surviving in the wilderness. It’s about staying comfortable, safe, and mobile while you’re temporarily displaced. Most of the time, you’re heading to a hotel, a friend’s house, or an emergency shelter — not bushcrafting your way through the backcountry. FEMA’s Ready.gov guidelines specifically recommend 72-hour kits as the baseline for every American household, and that recommendation is grounded in data showing most evacuations resolve within that window.
Here’s what belongs in a solid 72-hour bug out bag list:
- Water (1L minimum) plus filtration method
- 2,000+ calories of shelf-stable food per day
- First aid kit with personal medications (7-day supply)
- Weather-appropriate clothing layer
- Emergency shelter (space blanket or bivy)
- Headlamp with extra batteries
- Phone charger and backup battery bank
- Copies of critical documents in waterproof bag
- Cash in small bills ($200–$300)
- Hygiene basics — toothbrush, wipes, hand sanitizer
- Physical map of your region and evacuation routes
Notice what’s not on that list? Fishing kits. Snare wire. Hatchets. Seed packets. That stuff creeps into 72-hour bags constantly because people conflate “bug out bag” with “wilderness survival kit.” Don’t make that mistake.
How Many Liters Should a Bug Out Bag Be?
For a 72-hour bag, you’re looking at 30–40 liters of pack capacity. That’s enough to fit all your essentials without tempting you to overpack. A 35L pack is a common choice for a core kit, fitting everything with room to spare. Anything larger and you’ll fill it with weight you don’t need. Anything smaller and you’re playing Tetris with your first aid kit.
What an INCH Bag Means — and Why It’s Extreme
INCH stands for “I’m Never Coming Home.” Let that sink in for a second. You’re packing this bag under the assumption that your home, your community, and possibly your entire region’s infrastructure is permanently gone or permanently unsafe. You won’t be returning.
This isn’t a Tuesday afternoon power outage. An INCH bag addresses scenarios like total societal collapse, prolonged military conflict in your area, or a catastrophic event that renders your region permanently uninhabitable. The Cascadia Subduction Zone mega-quake in the Pacific Northwest is one of the few scenarios where an INCH bag could become relevant — potential infrastructure collapse lasting months across multiple states. But even then, for most residents, evacuation to functional areas is the realistic plan, not permanent wilderness survival.
An INCH bag is heavy. Necessarily so. You’re carrying tools for self-sufficiency, and breaking down the weight by category, the math gets real fast:
- Shelter system (tarp, cordage, stakes): 5–8 lbs
- Water purification (filter, chemical backup, metal bottle): 2–3 lbs
- Food procurement tools (fishing kit, snare wire, reference guide): 3–4 lbs
- Carried food (2 weeks of calorie-dense bars and freeze-dried): 8–12 lbs
- Tools (fixed-blade knife, folding saw, multi-tool, repair kit): 4–6 lbs
- Medical (extended trauma kit, medications, dental emergency kit): 3–5 lbs
- Clothing, navigation, and miscellaneous: 5–8 lbs
That’s 30–46 pounds of gear alone, before you add water weight. The sweet spot for a functional INCH bag is generally around 45 pounds for someone in good physical condition.
A 72-hour bag gets you through a bad week. An INCH bag is betting your life has permanently changed.
Three INCH-specific items stand out based on published specifications: the Mora Garberg full-tang fixed-blade knife (rated for heavy use and edge retention), a 10x10 silnylon tarp (versatile enough for dozens of shelter configurations at under 2 lbs), and a single-wall titanium water bottle for boiling — the Vargo BOT weighs 4.6 oz, doing the job without the weight penalty of steel.
The problem? Many INCH bags built online are fantasy kits. They’re packed based on apocalyptic scenarios that have essentially zero probability for someone living in suburban Ohio. Those scenarios aren’t impossible, but bag-building decisions should be driven by likelihood, not anxiety.
INCH Bag Checklist: Essential Gear Categories
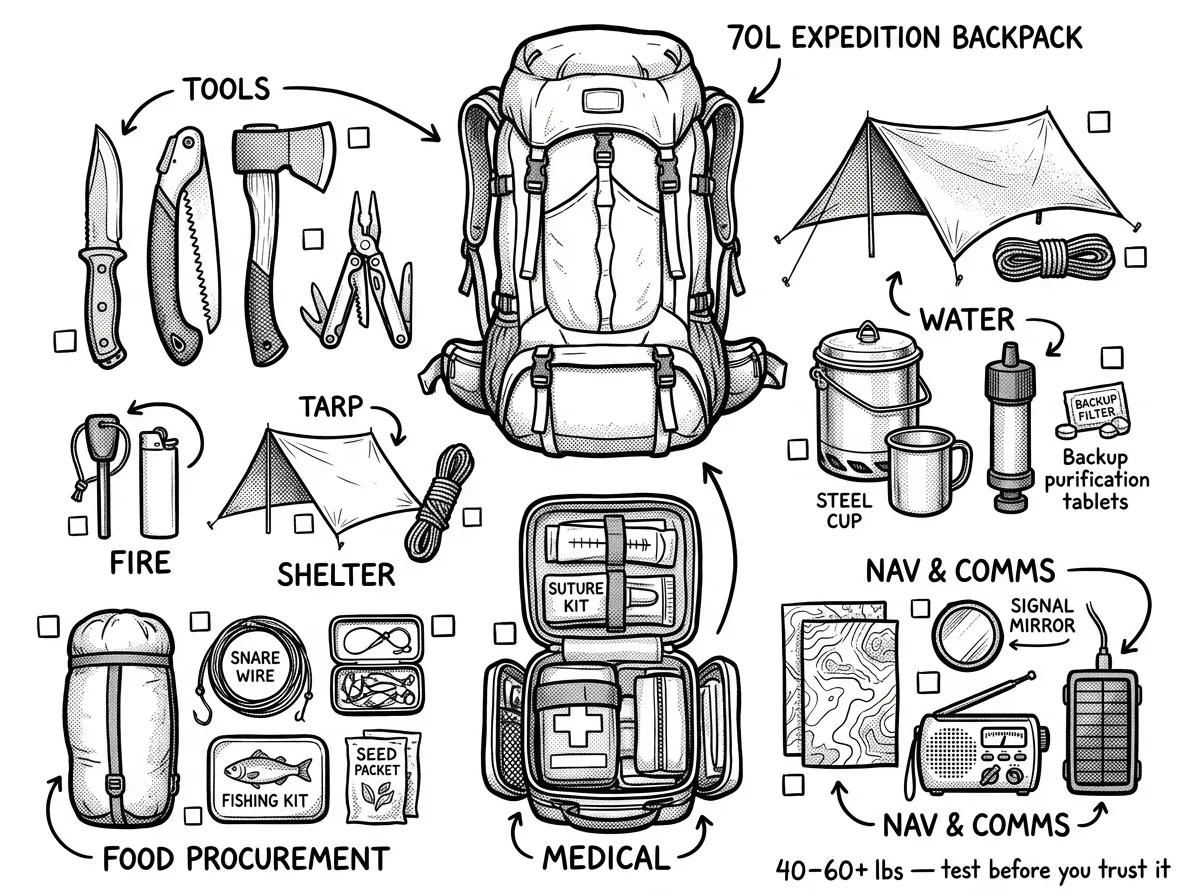 The full INCH bag loadout — built for indefinite self-sufficiency when you’re never coming home
One of the biggest gaps in the preparedness community is people who understand the INCH concept but have no structured packing framework. Here’s a categorized checklist:
- Portable water filter (Sawyer Squeeze or Katadyn BeFree)
- Chemical treatment backup (Aquamira drops)
- Metal single-wall bottle for boiling (titanium or steel)
- Collapsible water bladder (2L minimum)
- Silnylon or Dyneema tarp (minimum 8x10)
- 550 paracord (100 ft minimum)
- Full-tang fixed-blade knife
- Folding saw (Silky Gomboy or similar)
- Emergency bivy as backup
- Ferro rod with striker
- BIC lighters (2 minimum)
- Waterproof tinder (cotton balls with petroleum jelly)
- Fatwood sticks (3–4 pieces)
- Compact fishing kit with hooks, line, and sinkers
- Snare wire (brass or steel, 25 ft)
- Regional wild edibles reference card or booklet
- Gill net (compact, for base camp use)
- Carried calories for 10–14 days minimum
- Baseplate compass (Suunto A-10 or similar)
- Topographic maps of your region and bug-out route
- GPS device with spare batteries (backup only)
- Permanent marker for route marking
- Extended trauma kit (CAT tourniquet, hemostatic gauze, chest seals)
- 7–30 day supply of prescription medications
- Broad-spectrum antibiotics if available (consult your doctor)
- Dental emergency kit (temporary filling, oil of cloves)
- SAM splint and ACE bandages
- Suture kit or wound closure strips
- Quality multi-tool (Leatherman Signal or Wave+)
- Gear repair kit (duct tape, tenacious tape, needle and thread)
- Solar charger panel (lightweight, 10W minimum)
- Headlamp with spare batteries
- Copies of critical documents in waterproof container
- Local and regional maps
- Ham radio or FRS radio for communication
Total estimated weight across all categories: 40–55 lbs loaded, depending on carried food volume.
72 Hour Bag vs INCH Bag: The Core Differences
Let me lay out the direct comparison in detail, because this is where the bug out bag vs INCH bag distinction gets concrete.
Purpose and Mindset
With a 72-hour bag, your mindset is return. You’re bridging a gap. Infrastructure still exists somewhere nearby — you just need to reach it. With an INCH bag, your mindset is rebuild. You’re carrying the foundation of a new life, however temporary that foundation might be.
This mindset difference changes every single packing decision you make.
Weight and Mobility
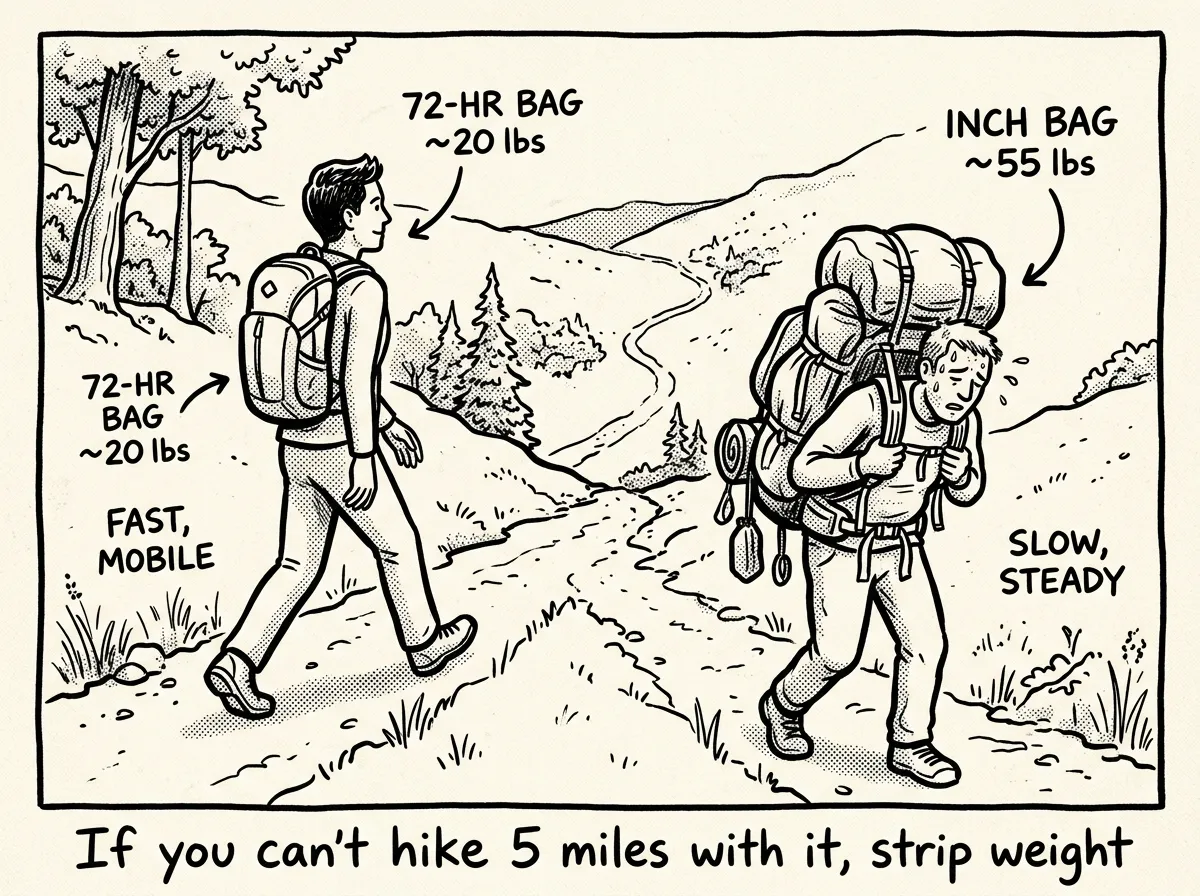 Same trail, different loads — a 20-pound bag keeps you moving while a 55-pound pack slows you down
A 72-hour bag that weighs more than 25 pounds is almost certainly overpacked. Most people can build an excellent 72-hour kit at 18–20 pounds. Speed matters here — you might need to grab this bag and be in your car in under two minutes.
An INCH bag realistically lands between 40 and 60 pounds. Some go higher, but that carries real risk: the difference between 45 and 55 pounds over ten miles is not marginal. It’s the difference between arriving functional and arriving wrecked.
Here’s a brutal honesty test: load your pack to its intended weight and walk 5 miles on a trail. If you can’t do it comfortably, the bag is too heavy — period. No amount of gear matters if you can’t actually carry it to where you need to go.
Water Strategy
For a 72-hour bag, you carry water and a compact filter. The Sawyer Squeeze — around $30 — is a commonly recommended option. It filters up to 100,000 gallons, weighs 3 ounces, and threads directly onto standard water bottles. For more detail on filtration options, see the portable water filter guide.
For an INCH bag, you need the Squeeze plus chemical treatment backup (Aquamira drops or iodine tablets), plus the knowledge and a metal container to boil water. Redundancy isn’t optional when there’s no end date to your scenario.
Shelter Approach
A 72-hour bag carries emergency shelter — a SOL Emergency Bivvy ($15–20) or a compact tarp. You’re sleeping in it for maybe two nights, and probably inside a building.
An INCH bag carries real shelter: a quality tarp system, paracord, possibly a lightweight tent or hammock setup, and critically, the tools to build and repair semi-permanent shelters. A full-tang fixed-blade knife and a folding saw aren’t overkill here — they’re essential.
Food Philosophy
Seventy-two hours of food is easy. Calorie-dense bars, freeze-dried meals, a few packets of electrolyte mix. Done. You don’t even need a stove, though a pocket-sized one like the BRS-3000T ($20) is nice to have.
An INCH bag shifts from “carry food” to “procure food.” That means fishing gear, snare wire, knowledge of wild edibles in your region, and enough carried calories to sustain you while your procurement skills ramp up. This is where the I’m Never Coming Home bag concept gets genuinely difficult — most people dramatically overestimate their ability to feed themselves from the land.
Even with decent skills, wild food procurement is unreliable, time-consuming, and calorie-expensive. If an INCH plan depends on “living off the land,” that plan needs to be tested before life depends on it — it is entirely possible to burn more calories setting snares than you recover from whatever you catch. Skills matter more than gear here, and those skills take years to develop.
Priority Bag System: Why Cascading Layers Beat Rigid Categories
Some folks in the preparedness community — including some well-respected voices — argue that the entire 72-hour bag vs INCH bag framework is outdated. They advocate for a cascading priority system instead, where you organize gear by urgency rather than time-based categories. That’s half right.
Here’s what that means. The priority-based approach says: don’t think in terms of “72 hours” or “forever.” Think in terms of immediate safety, then mobility, then sustainment. Your most critical gear (water, first aid, shelter) goes in first regardless of what you call the bag. Less urgent items layer on top.
That’s genuinely good thinking. But the 72-hour vs INCH framework still has real value — especially for beginners. When someone new to emergency preparedness asks “what bag should I build?” telling them to implement a cascading priority system is like telling a new cook to “just develop flavor profiles.” It’s technically correct but practically useless.
The familiar categories give people a mental model for understanding the spectrum of preparedness. You start by understanding that a 72-hour bag and an INCH bag serve fundamentally different purposes. Then, once that concept clicks, you implement the priority system to actually build your kit.
A hybrid approach looks like this:
- Understand the spectrum: 72-hour (temporary) to INCH (permanent) — this tells you how deep your kit needs to go
- Priority 1 — Immediate Safety: Water, first aid, emergency shelter, medications (every bag starts here)
- Priority 2 — Mobility: Navigation, communication, documents, cash, appropriate footwear (essential for any displacement)
- Priority 3 — Sustainment: Extended food, procurement tools, shelter-building gear, repair kits (only INCH-level kits go deep here)
- Build your 72-hour core around Priorities 1 and 2, then add Priority 3 modules only if your threat assessment demands it
This bridges both philosophies. You get the clarity of understanding why different bags exist, plus the practical efficiency of building by priority rather than arbitrary time limits.
Which Bag Matches Your Real Threat Profile?
This is where you need to be brutally honest with yourself. Forget the YouTube fantasies for a minute and think about what’s actually likely where you live.
It’s 2 AM. Your phone blares with an emergency alert — a chemical plant 8 miles upwind has had a catastrophic failure. You have 30 minutes to leave. Where are you going? A hotel two counties over. How long will you be gone? Three to five days while hazmat teams work. This is a 72-hour bag scenario, and it’s the one that actually happens to real people every single year.
You Probably Need a 72-Hour Bag If…
You live in a populated area with access to infrastructure within a day’s drive. You face weather-related threats: hurricanes, wildfires, ice storms, flooding, tornadoes. You have family you’d be evacuating with. Your realistic worst case is “displaced for a week.”
That covers roughly 95% of you reading this. And that’s not a knock — it’s just statistical reality.
For residents of the Pacific Northwest, primary threats include earthquakes, wildfires, and the Cascadia Subduction Zone event. Even the Cascadia scenario — the big one — is a 72-hour bag problem for most people. Getting to safety is the goal, not disappearing into the Olympic Range forever.
You Might Need an INCH Bag If…
Your threat model genuinely includes scenarios where returning home is impossible. You live in an extremely remote area where evacuation support won’t come. You’re in a geopolitically unstable region where conflict-driven displacement is plausible. You have a specific, pre-planned relocation destination and the INCH bag is designed to get you there.
Notice the word “might.” Even in these scenarios, an INCH bag is only useful if you have the physical fitness to carry it and the wilderness skills to use what’s inside.
The 5-Question Threat Assessment
Answer these honestly to determine where you fall on the spectrum:
- Is your area prone to natural disasters requiring evacuation? (Wildfires, floods, hurricanes, earthquakes)
- Do you live within 50 miles of a major population center? (Access to infrastructure, shelters, and aid)
- Do you have a pre-identified bug-out location with supplies cached? (Not a vague “head for the hills” plan — an actual place)
- Can you carry 45+ pounds for 10 miles over uneven terrain? (Be honest. Test it.)
- Have you practiced wilderness survival skills for 48+ continuous hours? (Not a weekend car-camping trip — actual skills under real conditions)
If you answered yes to only 1–2, build the 72-hour bag. That’s your priority. If you answered yes to 3–5, you’re a candidate for the INCH layer — built on top of your 72-hour core. If you answered yes to zero, start with our beginner prepper guide and work your way up.
The Smarter Approach: A Modular Bug Out Bag System
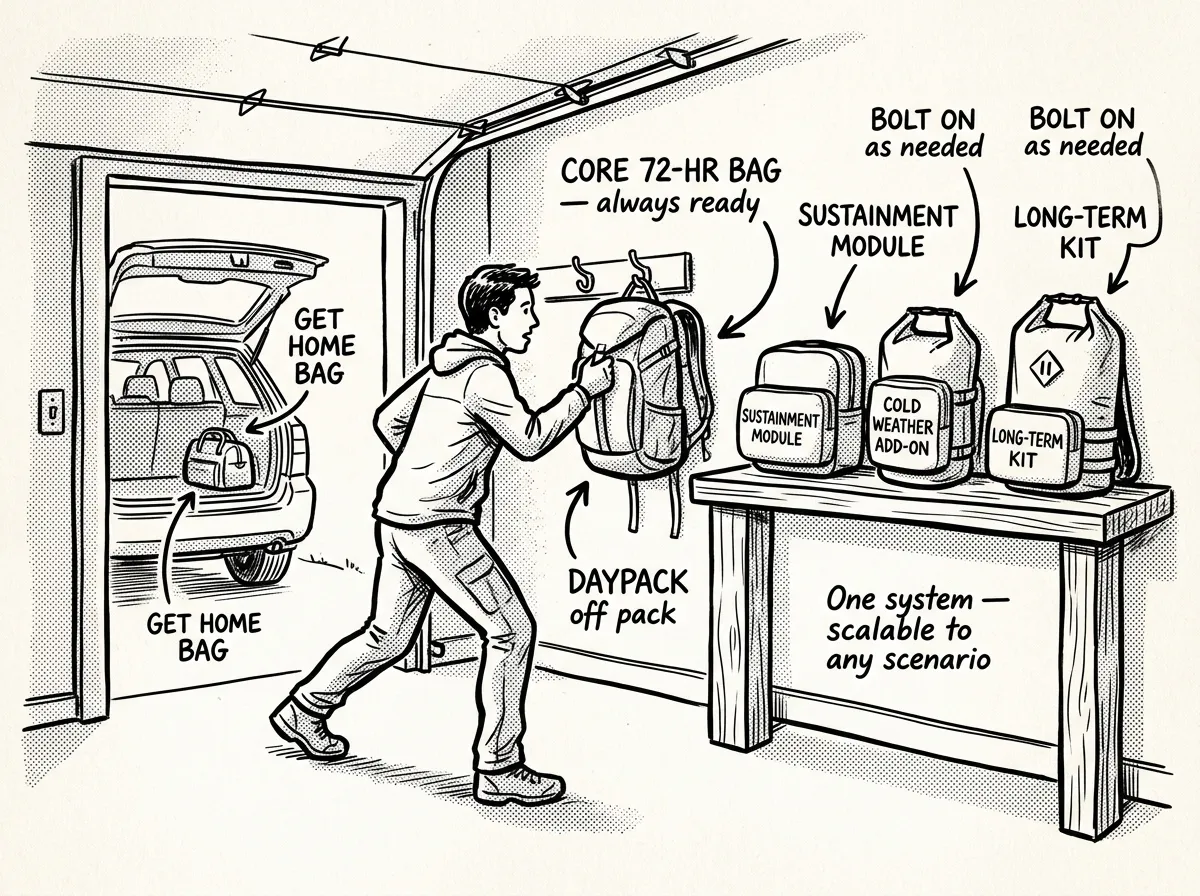 A modular system in action — grab the core bag fast, bolt on layers only when the situation demands it
The recommended approach: don’t build two completely separate bags. Build a modular system.
- Start with a solid 72-hour bag as your core — this is your always-ready, grab-and-go kit at 15–20 pounds in a 30–40L pack ($150–$250 budget)
- Create a “sustainment module” in a separate stuff sack or small bag — this adds food procurement tools, extra medical supplies, and shelter upgrades ($100–$200)
- Build an “INCH layer” if your threat assessment warrants it — long-term tools, navigation materials, and extended self-sufficiency gear ($250–$500+)
- Store the modules together but separate — your 72-hour core should be grabbable in seconds without touching the other layers
- Test each configuration separately: hike with just the core, then core + sustainment, then the full loadout
This approach solves the biggest problem in the space: people building an INCH bag as their primary go-bag and then never grabbing it during an actual evacuation because it’s 55 pounds and buried in the closet. Speed kills hesitation. A light, accessible bag gets grabbed. A heavy, intimidating one gets left behind while you throw random stuff into a trash bag.
Estimated total cost for a complete modular system: $500–$950 depending on gear quality. Compare that to building two separate bags from scratch, which typically runs $800–$1,800 and leaves you with redundant gear and a slower response time.
Common Mistakes in Both Categories
72-Hour Bag Mistakes
Overpacking survival gear. You don’t need a ferro rod, three methods of fire-starting, and a full knife kit for a three-day hotel stay. Pack for the scenario, not for bushcraft fantasy.
Forgetting documents and cash. It’s common to see meticulous bags built with MREs and water filters but zero copies of insurance policies, IDs, or medical records. When your house floods, you need your emergency binder more than your paracord.
Ignoring personal medications. This one’s critical. A 7-day supply of any daily medication should be in your bag, rotated every 6 months. Period.
Buying the wrong size pack. A 60L pack for a 72-hour kit is a mistake. You’ll fill it. Get a 30–40L bag and force yourself to prioritize.
INCH Bag Mistakes
All gear, no skills. That fishing kit is dead weight if you’ve never fished. The snare wire is decorative if you’ve never set a snare. Don’t pack what you can’t use.
Ignoring physical fitness. A 50-pound bag on an untrained body is a medical emergency waiting to happen. Overconfidence in load-carrying ability is one of the most common and serious mistakes people make.
No destination. An INCH bag without a destination plan is just a heavy backpack. Where are you going? How are you getting there? What’s the route? What are the alternates? The bag is a tool to execute a plan — it’s not the plan itself.
No cost discipline. INCH builds exceeding $2,000 are common among people who haven’t mastered the basics. A $1,500 INCH bag doesn’t compensate for not having a $200 72-hour kit ready to go.
Online INCH bag builds are often treated like video game loadouts — the perfect knife, the titanium cookset, the folding solar panel — without ever going through a shakedown hike. Taking a bag into the field for a weekend typically strips out a third of the total weight by the end: folding shovels, camp chairs, and duplicate knives are common casualties once the pack has to actually be carried.
The Get Home Bag: The One Everyone Forgets
While the 72 hour bag vs INCH bag debate dominates forums, there’s a third category that’s arguably more immediately useful for most people: the get home bag.
This is a small kit that lives in your vehicle or at your office. Its only job is getting you from wherever you are back to your home (where your 72-hour bag is waiting). Think 8–12 pounds in a 20L daypack — something that looks like a regular commuter bag, not a tactical loadout that invites theft from your car.
Here’s the key calculation: figure out your maximum commute distance and pack enough water and food to walk it. If you’re 15 miles from home, that’s roughly 5–6 hours of walking. Pack accordingly.
- Comfortable walking shoes (if you commute in dress shoes)
- Water — 2L minimum, more in hot/arid climates
- 2,000 calories of compact bars or trail mix
- Headlamp with fresh batteries
- Basic first aid kit (bandages, pain relief, blister care)
- Cash in small bills ($100–$150)
- Physical map of your area with route marked
- Lightweight rain layer or poncho
- Phone charger (battery bank, not solar)
- Seasonal swap items: sun protection in summer, hand warmers and wool hat in winter
Seasonal rotation matters. Swapping a get home bag to a winter configuration each fall — adding a wool base layer, hand warmers, and extra calories — and back to a summer configuration each spring, with sunscreen and extra water capacity, keeps the kit relevant year-round. A calendar reminder helps; the swap takes about ten minutes twice a year.
Keep your get home bag inconspicuous. A plain gray daypack in your trunk draws zero attention. A MOLLE-covered tactical bag with patches on it is a billboard that says “break into this car.” Tactical-looking gear is more likely to draw the kind of attention that leads to vehicle break-ins.
Stop Defining Your Bags by Time
Here’s a perspective shift worth adopting: stop thinking about your bags in terms of hours or permanence. Think about them in terms of function.
What does this bag need to do? Get me to safety. Keep me alive for 72 hours. Sustain me indefinitely.
When you define the function clearly, the packing list writes itself. You stop agonizing over whether a hatchet belongs in your kit because you know exactly what the kit is for. You stop adding “just in case” items that turn a 20-pound bag into a 35-pound anchor.
A cascading priority system works better than rigid categories. Your first priority is always immediate safety: water, shelter, first aid. Your second priority is mobility: navigation, communication, documents. Your third is sustainment: food, tools, extended supplies. Every bag you build should nail priorities one and two. Only an INCH-level kit needs to go deep on priority three.
Frequently Asked Questions
What is the difference between a bug out bag and an INCH bag?
A bug out bag — typically a 72-hour bag — is designed for temporary evacuation. You’re planning to return home or reach a shelter within a few days. An INCH bag (I’m Never Coming Home) is built for permanent displacement where you don’t expect to return. The INCH bag is heavier (40–60 lbs vs 15–25 lbs), more expensive ($500–$1,500 vs $150–$400), and includes self-sufficiency tools like food procurement gear and shelter-building equipment that a standard bug out bag doesn’t need.
How much should a 72 hour bug out bag weigh?
A well-packed 72-hour bag should weigh between 15 and 25 pounds. Most people can build an excellent kit at 18–20 pounds. The general rule from FEMA’s CERT guidelines is that your pack shouldn’t exceed 25% of your body weight for sustained carrying. If you’re at 30+ pounds for a three-day evacuation kit, you’ve overpacked and need to strip items.
What should I put in a 72 hour emergency kit?
Focus on the essentials: 1 liter of water plus a filtration method, 2,000+ calories of shelf-stable food per day, a first aid kit with a 7-day supply of personal medications, weather-appropriate clothing, emergency shelter (space blanket or bivy), a headlamp, phone charger and battery bank, copies of critical documents in a waterproof bag, $200–$300 cash in small bills, and basic hygiene items. Leave the bushcraft gear at home — you’re evacuating to safety, not surviving in the wilderness.
What does INCH bag stand for?
INCH stands for “I’m Never Coming Home.” It’s a bag designed for worst-case scenarios where you’re permanently leaving your home and need to sustain yourself indefinitely while relocating to a long-term safe location. It’s significantly heavier and more comprehensive than a standard 72-hour kit, typically weighing 40–60+ pounds and filling a 60–80L pack.
Do I need a bug out bag or a get home bag?
You need both, but a get home bag is arguably more immediately useful. It lives in your vehicle or office and gets you home during a disruption — that’s where your 72-hour bag is waiting. Most people will use their get home bag before they ever touch their bug out bag. Start with both: a 20L get home bag for your car and a 30–40L evacuation kit at home.
How many liters should a bug out bag be?
For a 72-hour bag, 30–40 liters is the sweet spot. It fits all essentials without tempting you to overpack. For an INCH bag, you’re looking at 60–80 liters to accommodate the additional tools, food, and shelter gear required for indefinite self-sufficiency. Don’t go bigger than you need — a larger pack just means more weight you didn’t plan for.
Making Your Decision
Here’s how to make the 72 hour bag vs INCH bag call right now. Sit down and write out your three most likely emergency scenarios. Not the most dramatic — the most likely. For most of you, that list includes things like severe weather, power outages lasting days, evacuation orders, or infrastructure disruption.
Now ask yourself: in any of those scenarios, am I never coming home?
If the answer is no — and for the vast majority of people it will be — build the best 72-hour bag you can. Make it light, make it accessible, and practice grabbing it fast. That bag, paired with a simple get home bag in your car, covers your realistic bases.
If your honest threat assessment includes permanent displacement scenarios, then invest in the INCH layer. But build it on top of a functional 72-hour core, not instead of one. And for the love of common sense, test it in the field before you trust your life to it.
The 72 hour bag vs INCH bag question isn’t really about choosing between two products. It’s about knowing yourself — your skills, your fitness, your region, and your actual risks. The person who can grab a simple, well-built 20-pound bag in 90 seconds will always outperform the person still debating whether to add another knife to their 55-pound fantasy kit. Get that right, and the bag practically packs itself. Start building today — not tomorrow, not next weekend. Today.
The Complete
Prepper's Reference.
149 articles synthesized into one comprehensive PDF — twelve chapters covering water, food, shelter, first aid, comms, and scenario-specific preparedness. Free with your email.
Unsubscribe anytime · We never share your email
You're in. Check your inbox.
Keep Reading
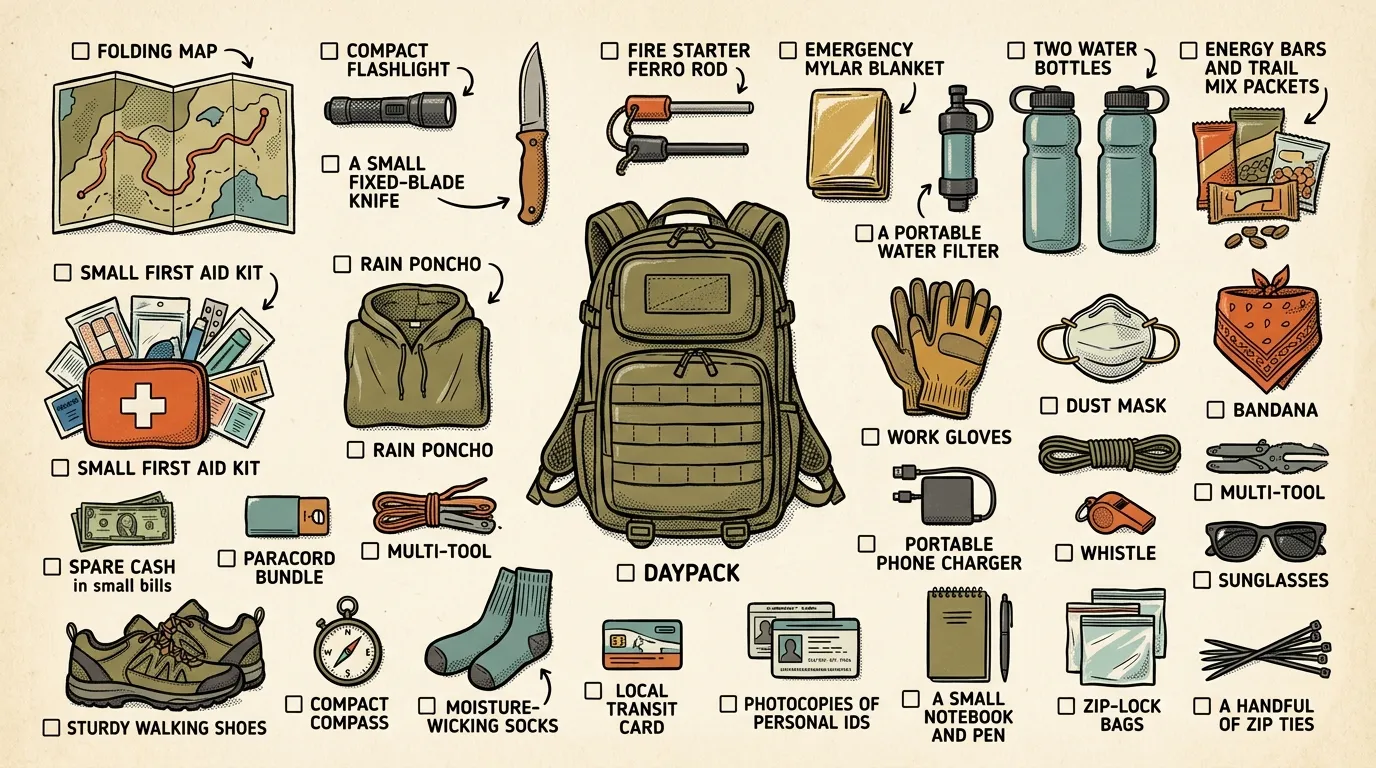
Get Home Bag Essentials: The Complete Checklist
Build your get home bag essentials list with this practical checklist. Gear that gets you from work to home in any emergency.
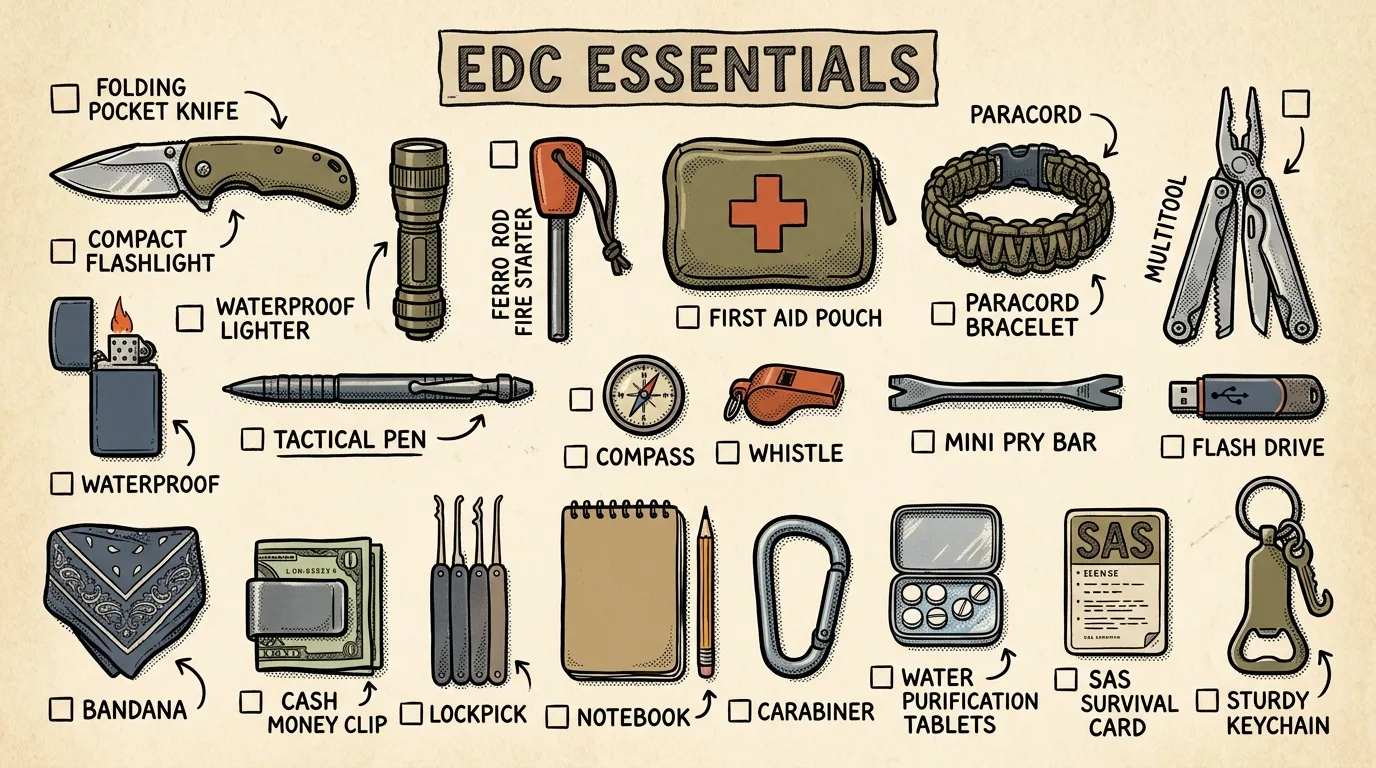
Everyday Carry Kit for Prepping: EDC Essentials
Build a practical everyday carry kit for prepping with this expert EDC checklist. Covers core gear, layering, budgets, and personalization tips.
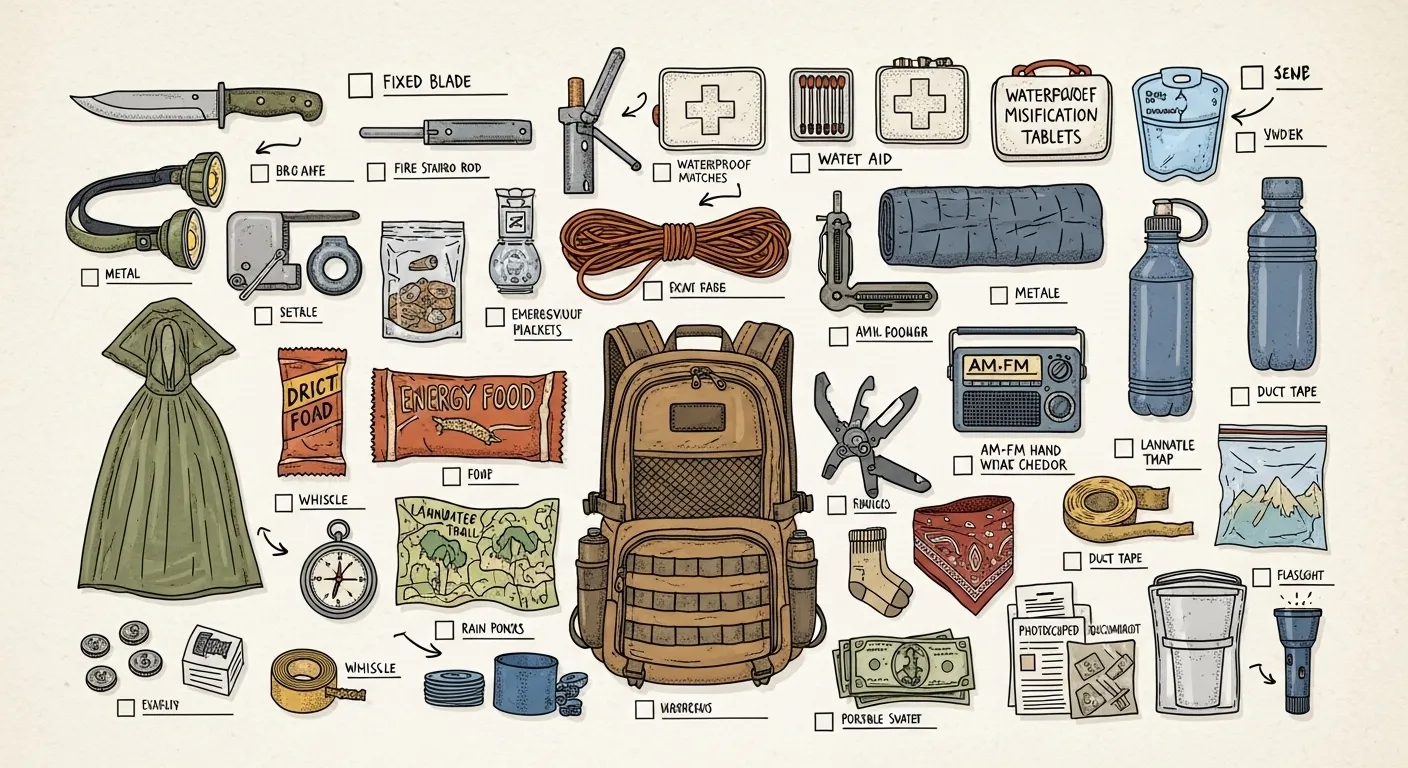
Building Your First Bug-Out Bag: A Preppers' Shopping List
New to prepping? Learn what to pack in a beginner bug-out bag, avoid common mistakes, and shop smart with practical gear suggestions.